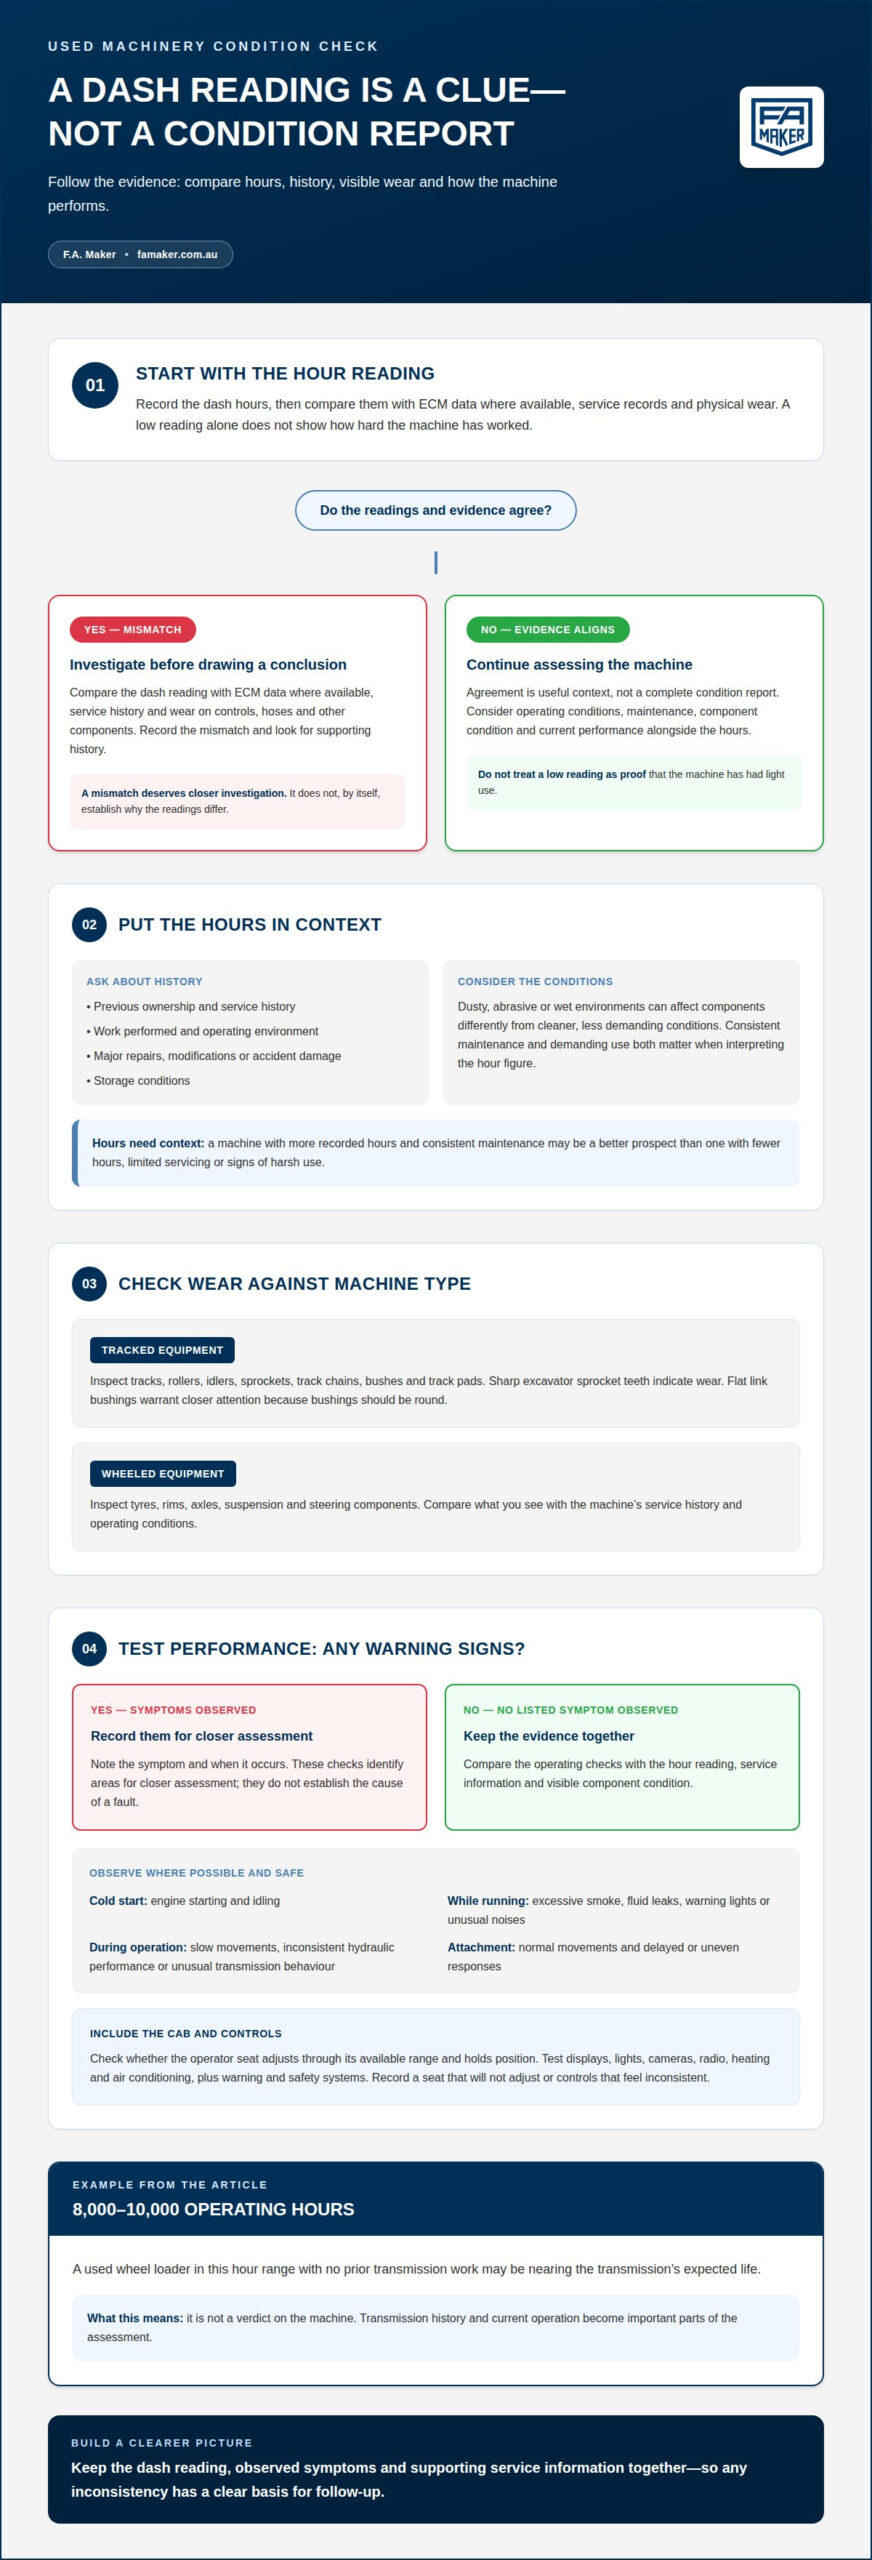
Industrial Plant Dismantling and Relocation for Facility Teams

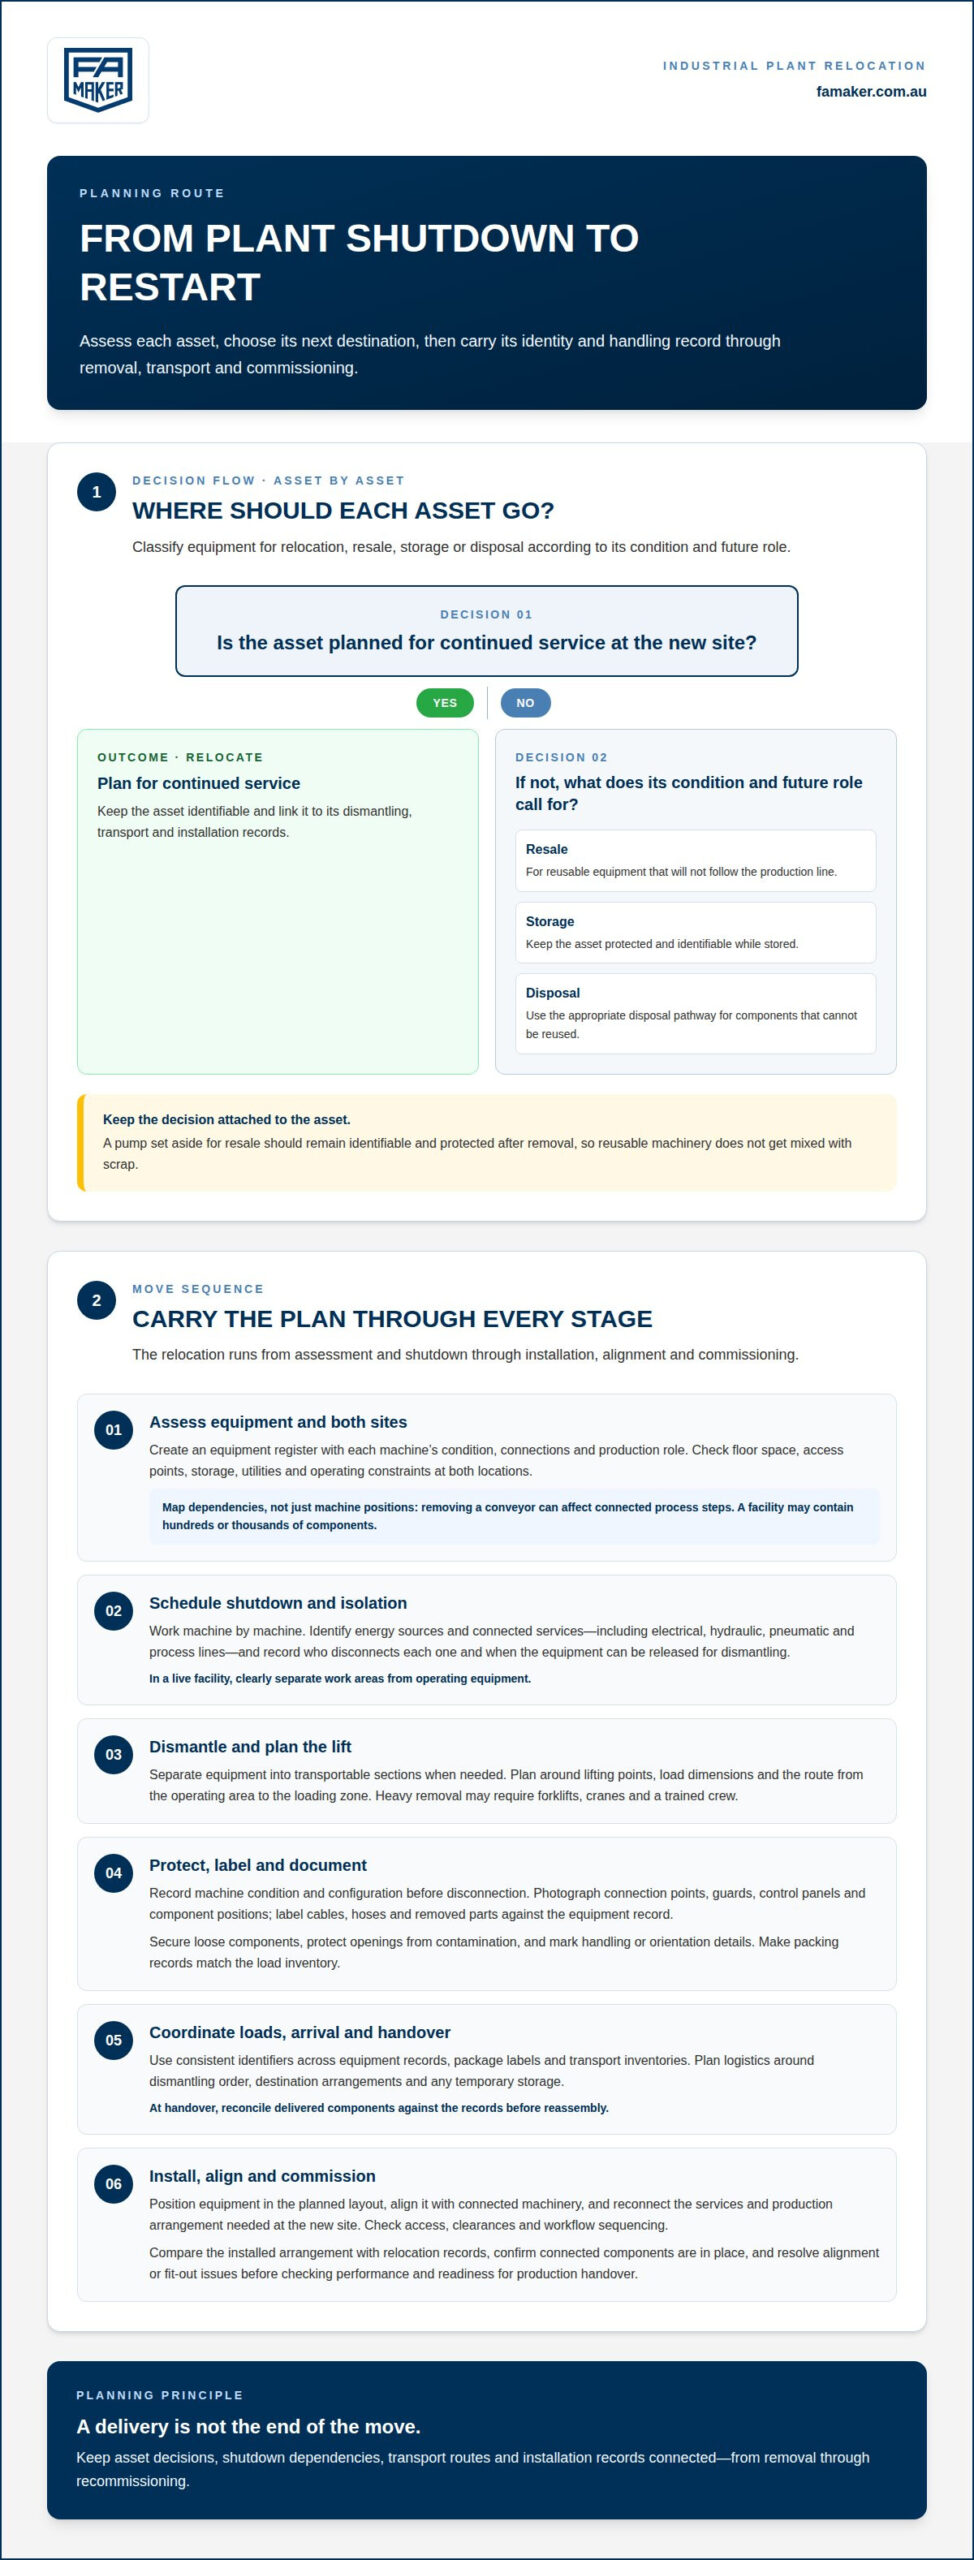
A plant move is more than lifting machinery onto trucks. Industrial plant dismantling and relocation means planning the shutdown, isolating and dismantling equipment, protecting and documenting components, then transporting and recommissioning them at the new site.

That sequence matters because equipment, utilities, floor space, transport access and operating constraints all shape how a move is organised. A relocation plan should cover every stage, from removal to installation, alignment and commissioning, so teams can manage dependencies and reduce avoidable disruption.

This guide explains industrial decommissioning, equipment handling and safety planning, and how approvals and contractor coordination fit into the work. It also highlights common planning gaps, such as overlooked storage needs, transport routes and workflow sequencing, to help facility teams prepare a practical move plan for an Australian operation.

Key Takeaways

  • Map equipment, utilities, space and operational constraints before setting the relocation sequence.
  • Plan isolation, dismantling, protective packing and documentation as connected stages of equipment handling.
  • Build hazard assessment, site safety controls, inspections and required approvals into the move plan.
  • Coordinate contractors around clear responsibilities, milestones, transport routes and storage needs.
  • Sequence shutdown and restart activities around operational priorities to help manage downtime.

What Does It Mean to Decommission an Industrial Plant for Relocation?

Decommissioning for relocation means preparing a facility for shutdown, removing and transporting equipment, then installing and commissioning it at another site. In Australia, industrial relocation contractors specialise in coordinating these stages, from equipment removal and transport through to recommissioning.

Equipment and Site Constraint Assessment

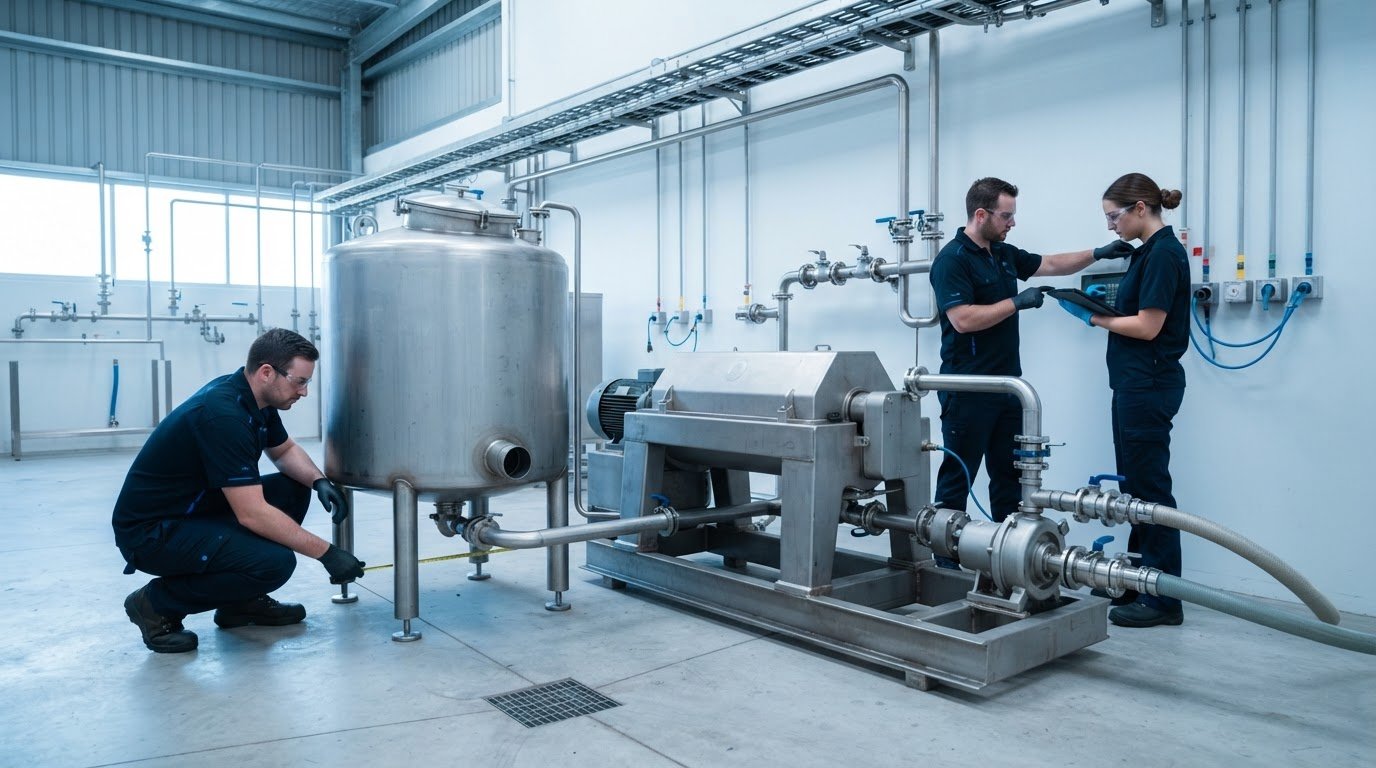
Start with an equipment register recording each machine, its condition, connections and role in production. Then assess floor space, access points, storage, utilities and operating constraints at both sites. This information shows which equipment can move intact, which needs dismantling, and where installation might conflict with existing services or production workflows.

Plan the sequence around dependencies, not just machine locations. A conveyor, for example, may connect several process steps, so removing it can affect equipment beyond its immediate footprint. Account for the whole facility and its components, which may number in the hundreds or thousands.

Dismantling, Rigging, and Transport

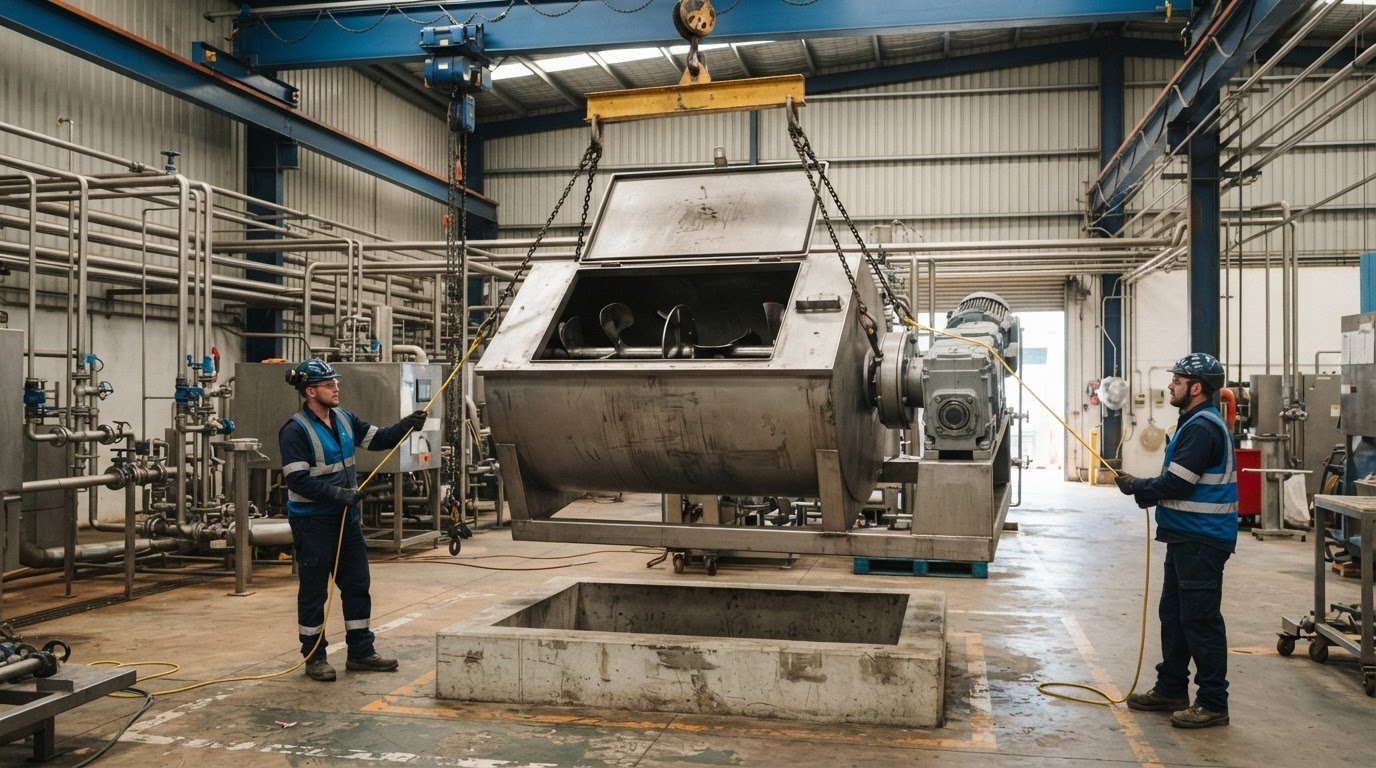
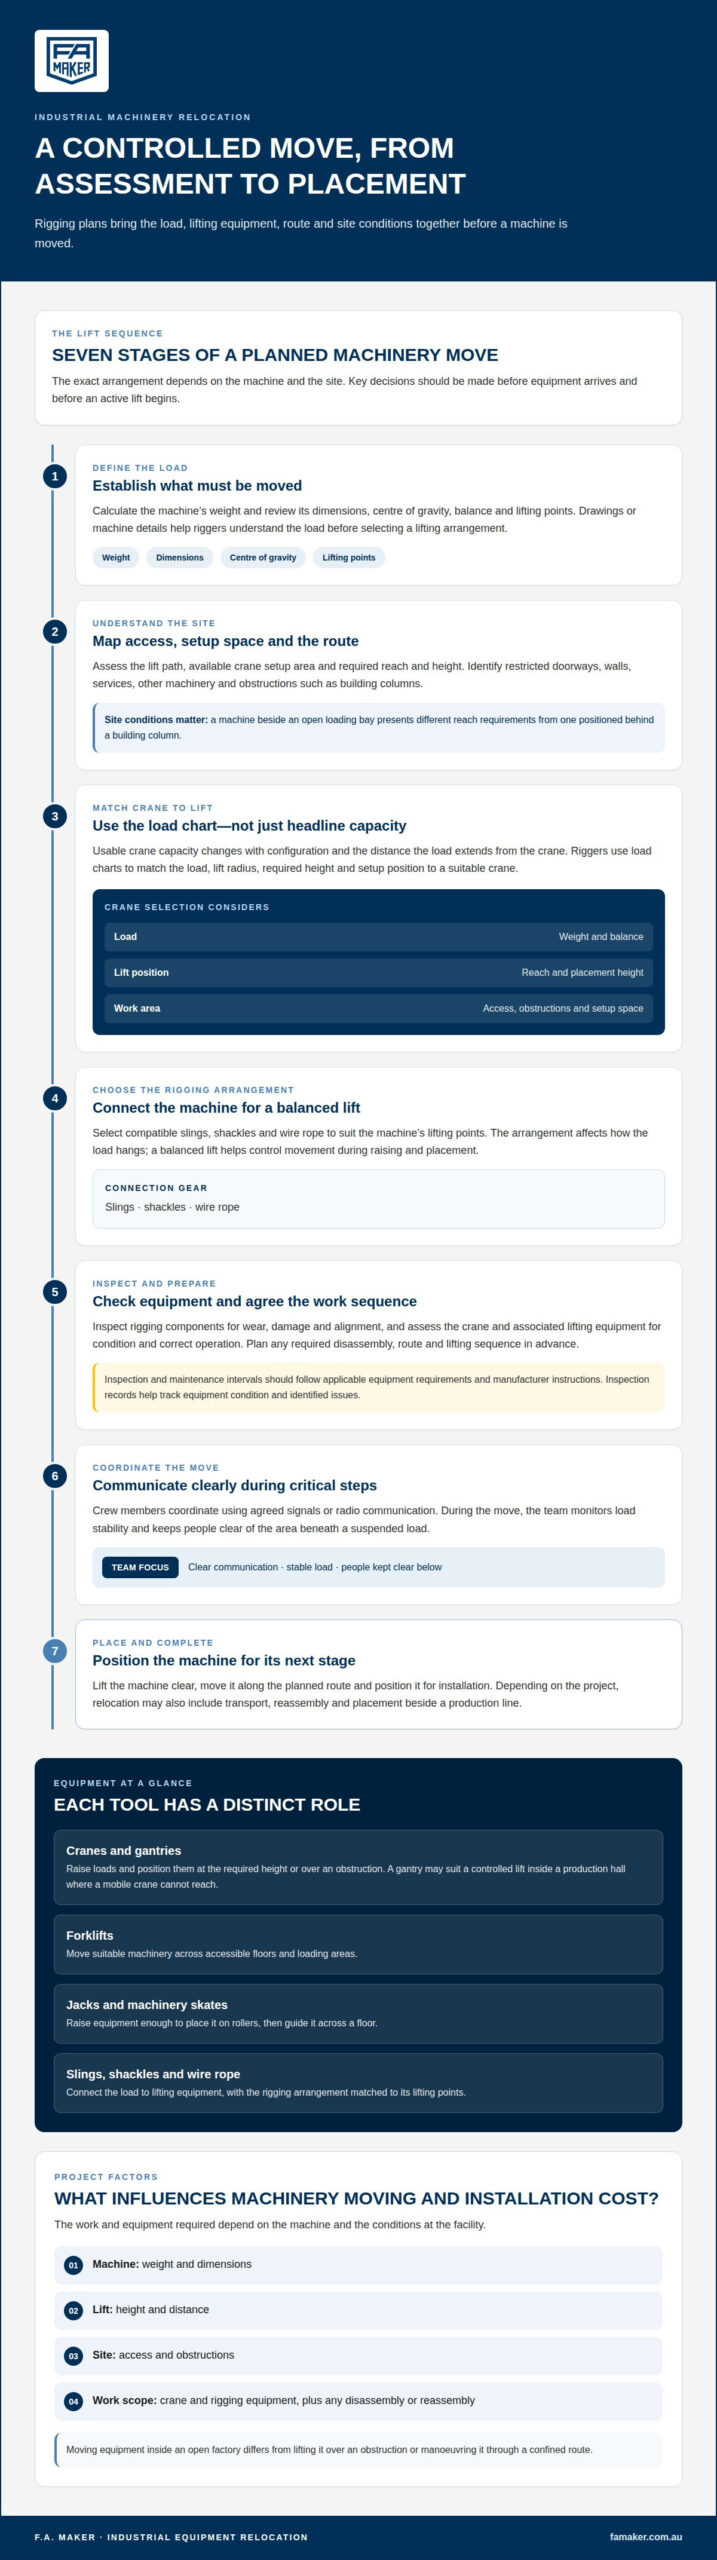
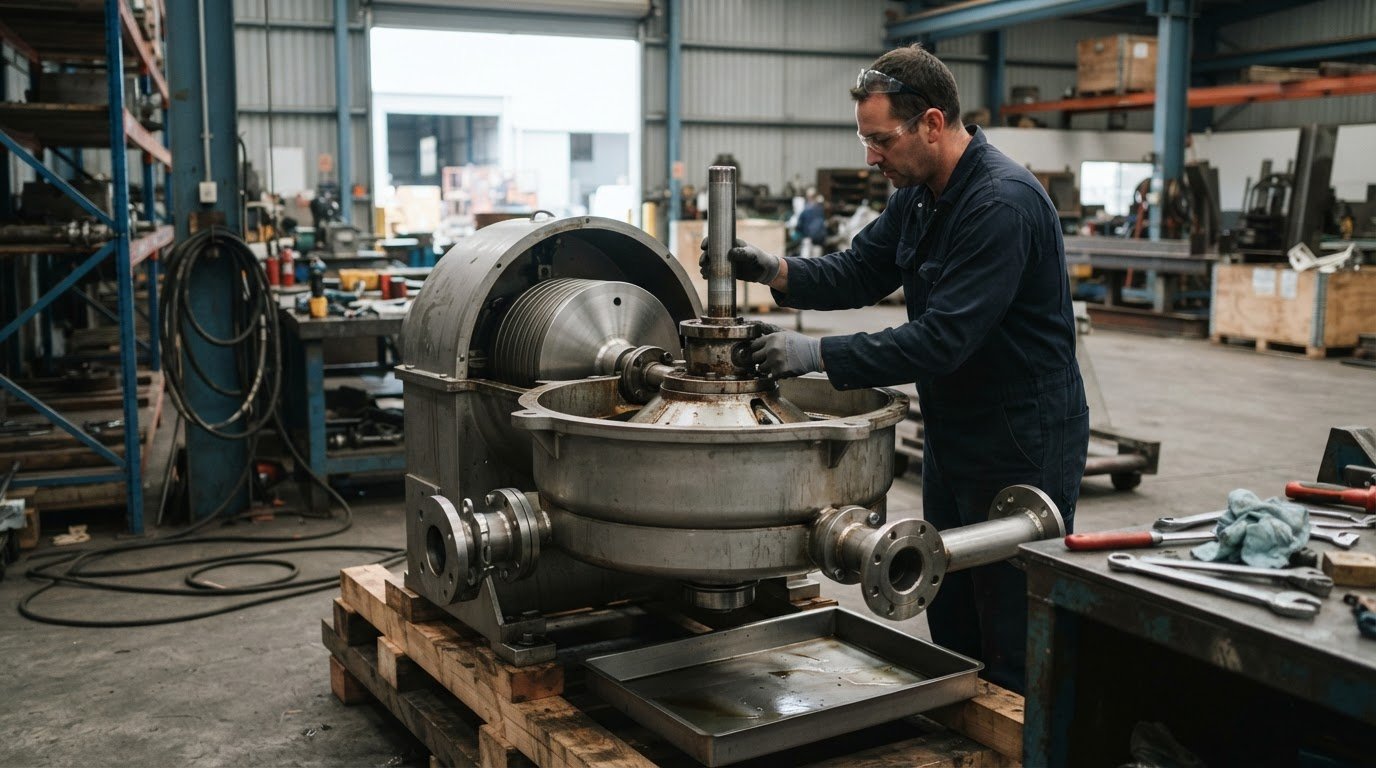
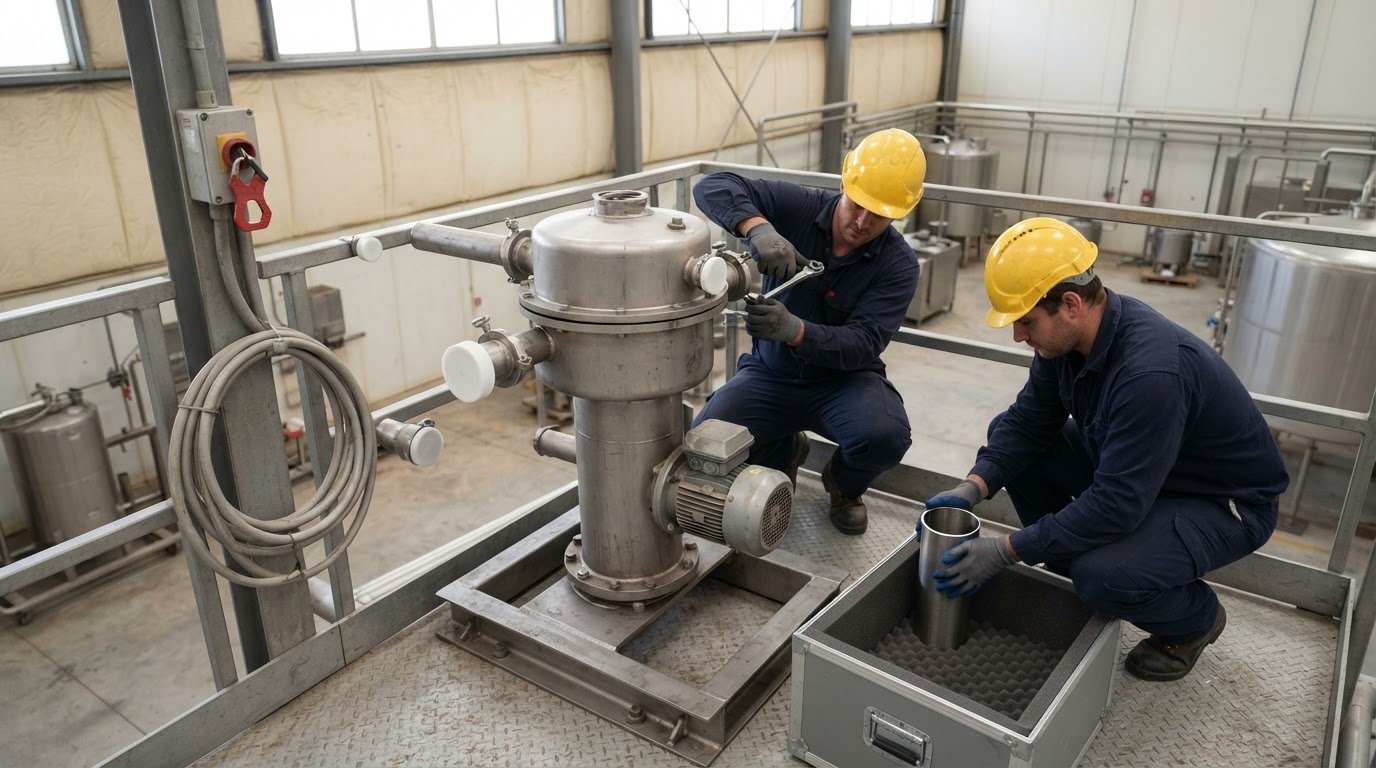
Once shutdown arrangements are set, machinery is isolated and prepared for removal. Dismantling separates equipment into transportable sections where needed. Rigging plans then account for lifting points, load dimensions and the route from the operating area to the loading zone. Heavy equipment removal may require forklifts, cranes and a trained crew.

Documentation should link each component to its original machine and destination. Marking connections, recording the dismantling sequence and protecting exposed surfaces help crews handle equipment consistently during packing and transport. Distinguish reusable items from material requiring disposal so components are not misplaced or mistakenly treated as scrap.

Relocation and Resale of Reusable Equipment

Not every asset needs to follow the production line to its new site. During assessment, classify equipment for relocation, resale, storage or disposal based on its condition and future role. Reusable equipment can be relocated for continued service or resold, while components that cannot be reused should follow the appropriate disposal pathway.

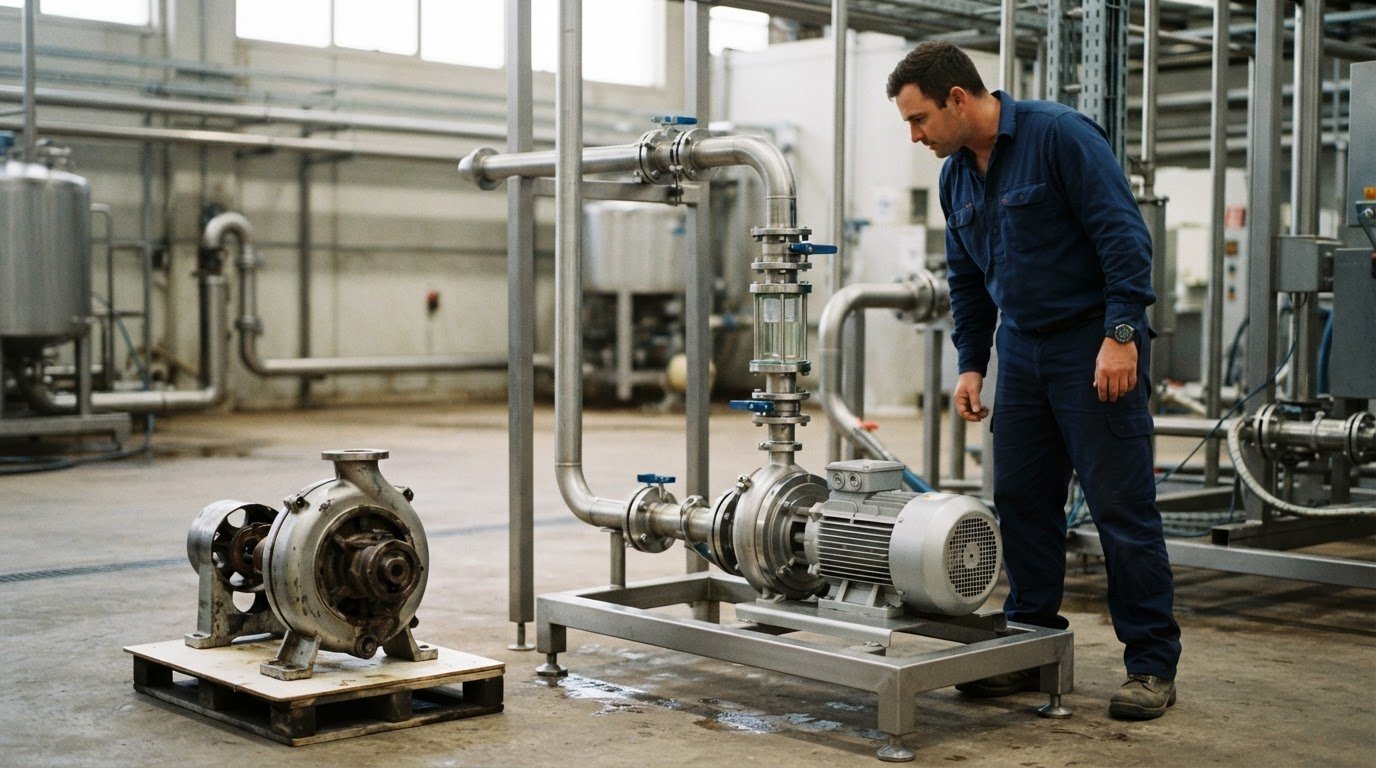
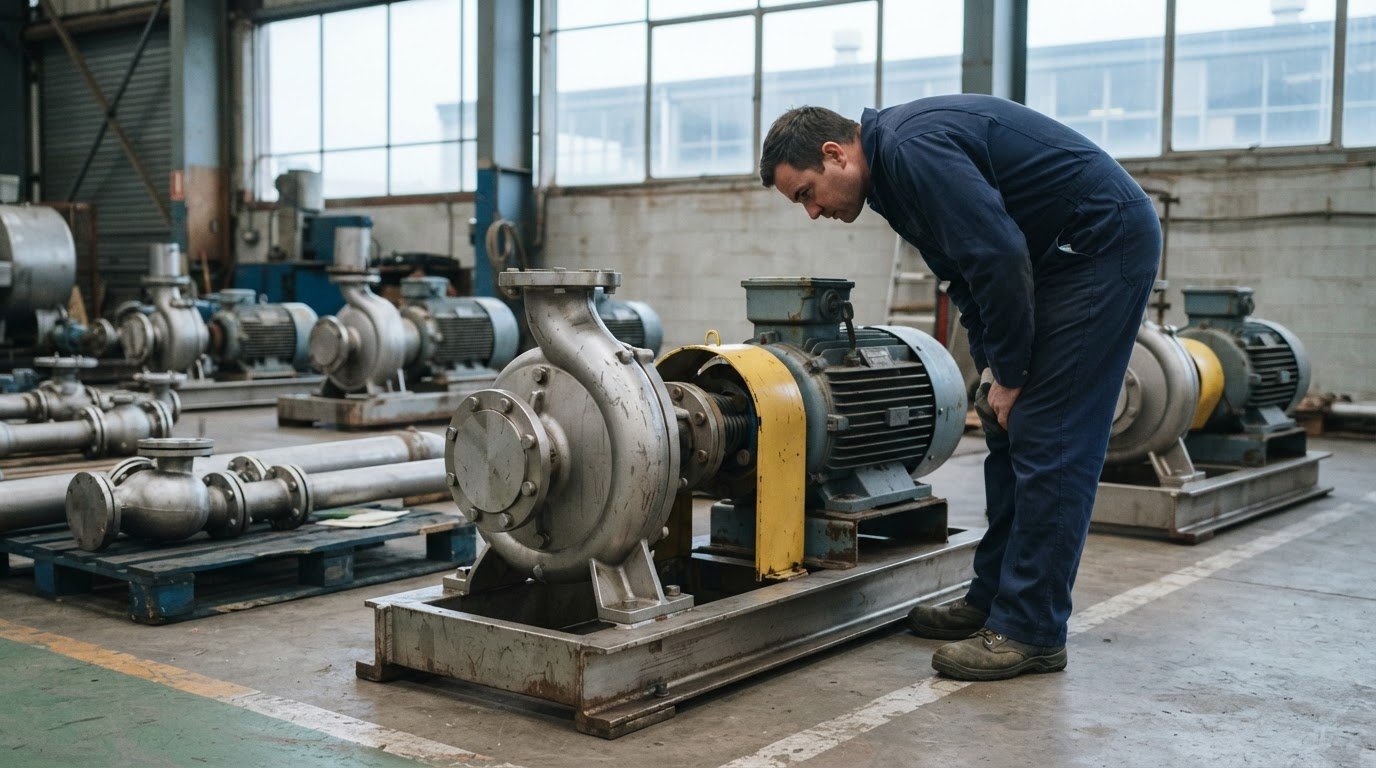
Keep each asset decision connected to its dismantling record. A pump set aside for resale, for example, should remain identifiable and protected after removal. This prevents reusable machinery from getting mixed with scrap and keeps the inventory clear through transport, storage and handover.

Alignment, Fit-Out, and Commissioning

At the destination, installation means positioning equipment in the planned layout and aligning it with connected machinery. Fit-out reconnects equipment to the services and production arrangement needed at the new premises. Access, clearances and workflow sequencing all affect where machines can sit and how the line will operate.

Commissioning checks equipment performance and readiness before operations restart. Compare the installed arrangement with the relocation documentation, confirm connected components are in place, and resolve alignment or fit-out issues before production handover. Delivery to the new site is not the end of the move.

Machinery isolation, dismantling, packing and documentation

Machinery preparation connects shutdown decisions with transport and the return to production. A controlled sequence keeps equipment identity, isolation status and handling instructions clear throughout the move.

Machinery Isolation, Packing, and Documentation

Begin with a machine-by-machine isolation schedule. Identify each asset, its energy sources and connected services, including electrical, hydraulic, pneumatic and process lines. Record who is responsible for each disconnection and when equipment can be released for dismantling. In a live facility, clearly separate work areas from operating equipment.

Before disconnection, record each machine’s condition and configuration. Photograph connection points, guards, control panels and component positions. Label cables, hoses and removed parts against the equipment record. Keeping a pump’s coupling components together, for example, reduces uncertainty during reassembly.

Match protective packing to the equipment and its exposed surfaces. Secure loose components, protect openings from contamination, and mark handling or orientation details on the package. Ensure packing records match the load inventory so every item can be identified during loading, transport and arrival.

Production Line Decommissioning and Disassembly

Machine relocation concerns an individual asset and its direct interfaces. Plant relocation has a wider scope: production lines, utilities and linked equipment must be decommissioned in a workable sequence. A filler connected to conveyors, for instance, cannot be treated as an isolated item if the line’s sequence affects removal or installation.

Production line decommissioning starts by mapping dependencies between machines. Identify which equipment must stop or be removed first, and document how each connection will be separated. This execution plan helps coordinate production shutdown, disassembly, loading and site access without mixing up machine parts.

During industrial plant and machinery disassembly, divide equipment into sections only when the transport plan requires it. Record the removal order and link each section to its original machine. This is especially important when separate loads arrive at different times or components need temporary storage before installation.

Connect logistics planning with the dismantling sequence, load preparation and destination arrangements. Use consistent identifiers across equipment records, package labels and transport inventories. At handover, reconcile delivered components against the records before reassembly. Clear documentation gives installation teams a practical reference for restoring the production arrangement and tracing missing or misplaced parts.

Safety compliance, inspections and approvals

Plan risk controls, inspections and approvals alongside equipment removal and transport. Unassessed hazards, unclear site controls, hazardous materials, or late approvals and transport arrangements can lead to equipment damage or delays.

Workplace Health and Safety Precautions

Before dismantling begins, coordinate shutdown so machinery can be isolated, services managed and work areas made safe. Set clear access boundaries between the relocation crew and nearby personnel. Workers handling machinery should use personal protective equipment suited to the tasks and site conditions.

Give hazardous materials particular attention during removal and storage. Older transformers, capacitors and oil used in motors and hydraulic systems may contain PCBs, according to the U.S. Environmental Protection Agency. Identifying this risk early helps teams plan safe handling and keep potentially hazardous materials separate from ordinary equipment or waste.

Risk Assessments and Worksite Safety

A relocation risk assessment identifies hazards before work begins and assigns controls to each stage. Consider lifting and rigging, machine access, stored energy, vehicle movements, work at height and interaction with ongoing production. For example, a crane lift near an operating line requires a defined work zone and coordinated timing.

Tailor site controls to the equipment, layout and work sequence. The plan should cover access to restricted areas, load routes through the site and separation of storage from active work. Reassess controls when conditions change, such as a revised lift path or unexpected equipment configuration.

Safety Procedures and Quality Checks

Use documented procedures for isolation, disassembly, lifting, packing and loading. A supervisor can record key hold points, such as confirming isolation before disconnection or checking that a load is secured before transport. These checks support safe work, protect equipment and help prevent components from being misplaced.

Include the destination and assembly stages in inspections. Confirm the receiving area is ready for equipment placement, then inspect items on arrival and before installation. A condition record can identify transport damage promptly and distinguish it from pre-existing wear, supporting accurate handover and follow-up.

Worker Safety Requirements

Assign tasks according to each worker’s role, skills and familiarity with the machinery. The site plan should identify who controls isolation, directs lifting operations and coordinates transport movements. Clear responsibilities help prevent conflicting instructions when several crews work around connected equipment.

Relocation planning should account for applicable safety and industry requirements. Businesses should obtain necessary permits and regulatory approvals before relocating a plant. Record inspection outcomes and approval status in the project documentation to track requirements through removal, transport and installation.
Industrial Plant Dismantling and Relocation for Facility Teams

Common planning and contractor coordination mistakes

Relocation projects can lose time when scope, responsibilities or site constraints emerge only after work begins. Early project management connects the facility assessment, schedule, specialist equipment and contractor handovers.

Pre-Decommissioning Planning and Site Assessment

A common mistake is planning around machinery alone. Assess the existing facility and destination together, including access, utilities, operating constraints and available storage. Record which assets will move, remain, be resold or be disposed of. This gives contractors a shared scope and helps identify dependencies before decommissioning.

Give site access specific attention. A machine may fit the new production area but still be difficult to move through a doorway or loading zone. Map removal routes, staging areas and destination access, then include them in the work plan. An overlooked route constraint can disrupt dismantling and transport sequencing.

Feasibility Studies and Relocation Planning

Feasibility work tests whether the proposed move supports the intended operation. Compare the destination’s space, utility connections, workflow and storage capacity with the equipment being relocated. A production line, for example, may need a different arrangement if service points differ from those at the original site.

Do not assume every asset is suitable for relocation. Record each machine’s condition, operational role and destination requirements. This gives the project team a basis for sequencing, storage and transport decisions, and helps distinguish equipment for reuse from assets better suited to resale or disposal.

Project Timelines and Relocation Planning

Complex industrial plant moves should begin early. The Kaizen Institute recommends planning 1 to 3 years ahead for complex moves. For a mid-to-large facility, allow at least 6 to 12 months of pre-work before relocation. These planning periods help organise scope, milestones, personnel and specialised equipment.

A schedule is unreliable if it lists dates without showing dependencies. Link shutdown, contractor access, equipment removal, transport and destination readiness as sequential milestones. Assign an owner to each handover and record what must be complete before the next task starts. A delayed destination fit-out, for example, can affect arrival and installation sequencing.

Dismantling Logistics

Connect workflow sequencing with packing methods, storage needs and transport routes. Specify where dismantled components will be staged, how loads will be identified and when each area must be cleared. If storage is overlooked, equipment can obstruct later removal or become separated from its destination sequence.

Contractor coordination can also falter when responsibilities overlap or leave gaps. Establish who controls site access, loading areas, equipment handovers and schedule updates. Share one project schedule with relevant personnel and record changes against affected milestones to keep each contractor aligned with the facility plan.

Use a change process throughout the project. When an asset, route or destination constraint changes, assess the effect on dismantling, transport, storage and installation before revising the schedule. Document the decision and notify affected contractors. A traceable plan helps prevent conflicting instructions at either site.

Minimising operational downtime

Downtime depends on shutdown timing, equipment dependencies and destination readiness. Coordinating these factors helps manufacturing teams plan production around the relocation sequence.

Shutdown Coordination and Production Downtime

Start by identifying which production areas can stop independently and which rely on shared machinery or services. Sequence shutdown tasks around those dependencies so removing one machine does not unexpectedly halt another line. Moving a bottle filler, for example, may also require planning for connected conveyors and upstream process equipment.

Coordinate the shutdown window with dismantling, transport and destination installation milestones. Assign responsibility for each handover, including when equipment is released, loaded and ready for assembly. A schedule covering these stages gives operations personnel a clearer view of when production can restart.

If unaffected areas can keep operating, separate them from relocation work. Define access routes and work boundaries, and keep operations teams informed about changes to equipment availability. This helps the facility manage partial production rather than treating the entire site as one shutdown area.

Relocation Budgeting and Downtime

Build the project budget around the actual scope, not transport alone. Relevant cost factors include dismantling complexity, specialised lifting and handling, protective packing, storage, transport logistics, destination fit-out and commissioning. The schedule matters too: delays at one stage can extend the period before manufacturing resumes.

Connect budget assumptions to project milestones. If destination services are not ready when machinery arrives, for example, additional storage and handling may be needed. Changes to equipment scope can also affect dismantling, packing and transport plans. Recording these dependencies clarifies how revisions may affect expenditure and downtime.

Comparing Contractors and Quotes

Compare quotes by matching their scope, not just their totals. Check whether each proposal covers the same assets, dismantling, rigging, packing, transport, storage, installation and commissioning. Ask how the sequence and handovers are represented, and whether site coordination responsibilities are clear.

Then compare schedule assumptions and exclusions. A quote omitting destination fit-out or commissioning may leave those activities outside its stated scope. Assess how each plan handles dependencies, changes and operational downtime. To compare amounts fairly, align scope, responsibilities, milestones and exclusions first.

For a planned move involving industrial machinery, discuss machinery relocation requirements as part of coordinating shutdown and restart planning.

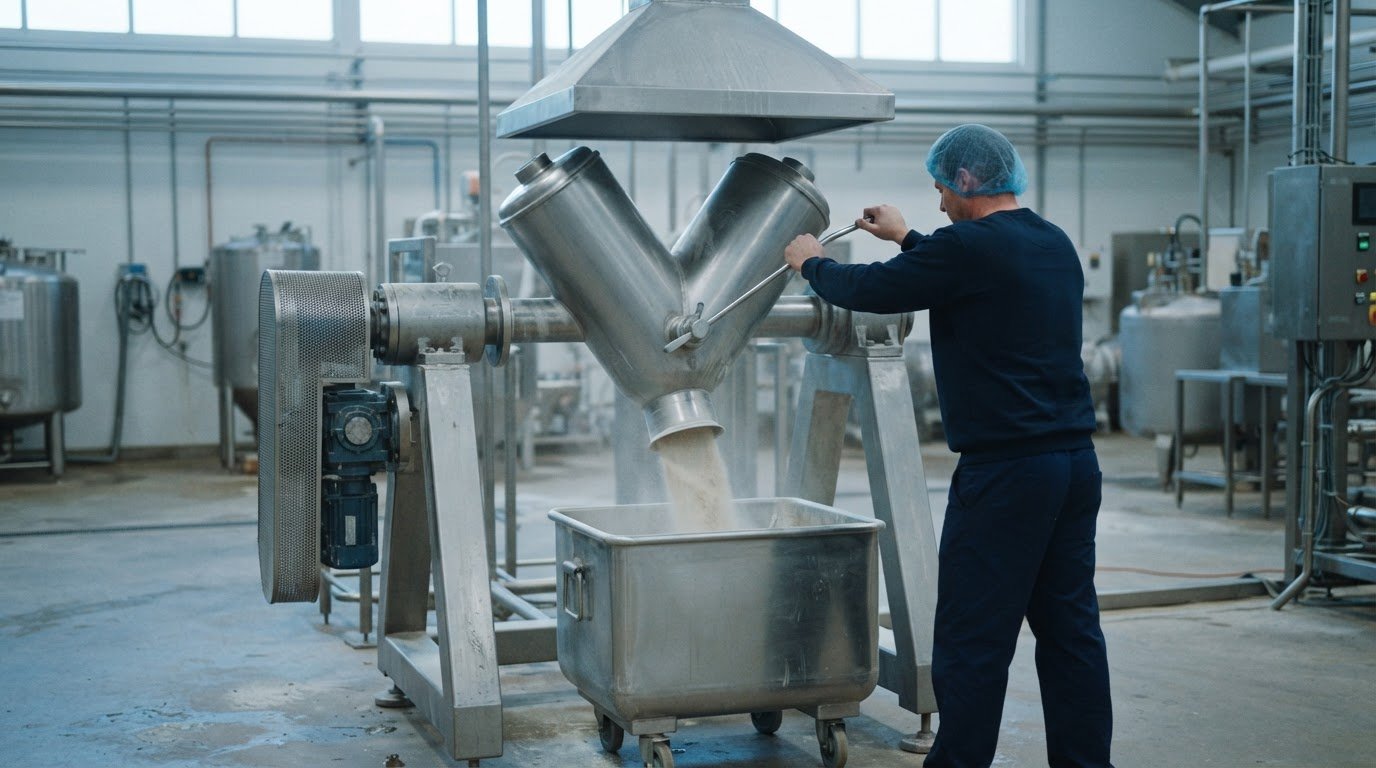
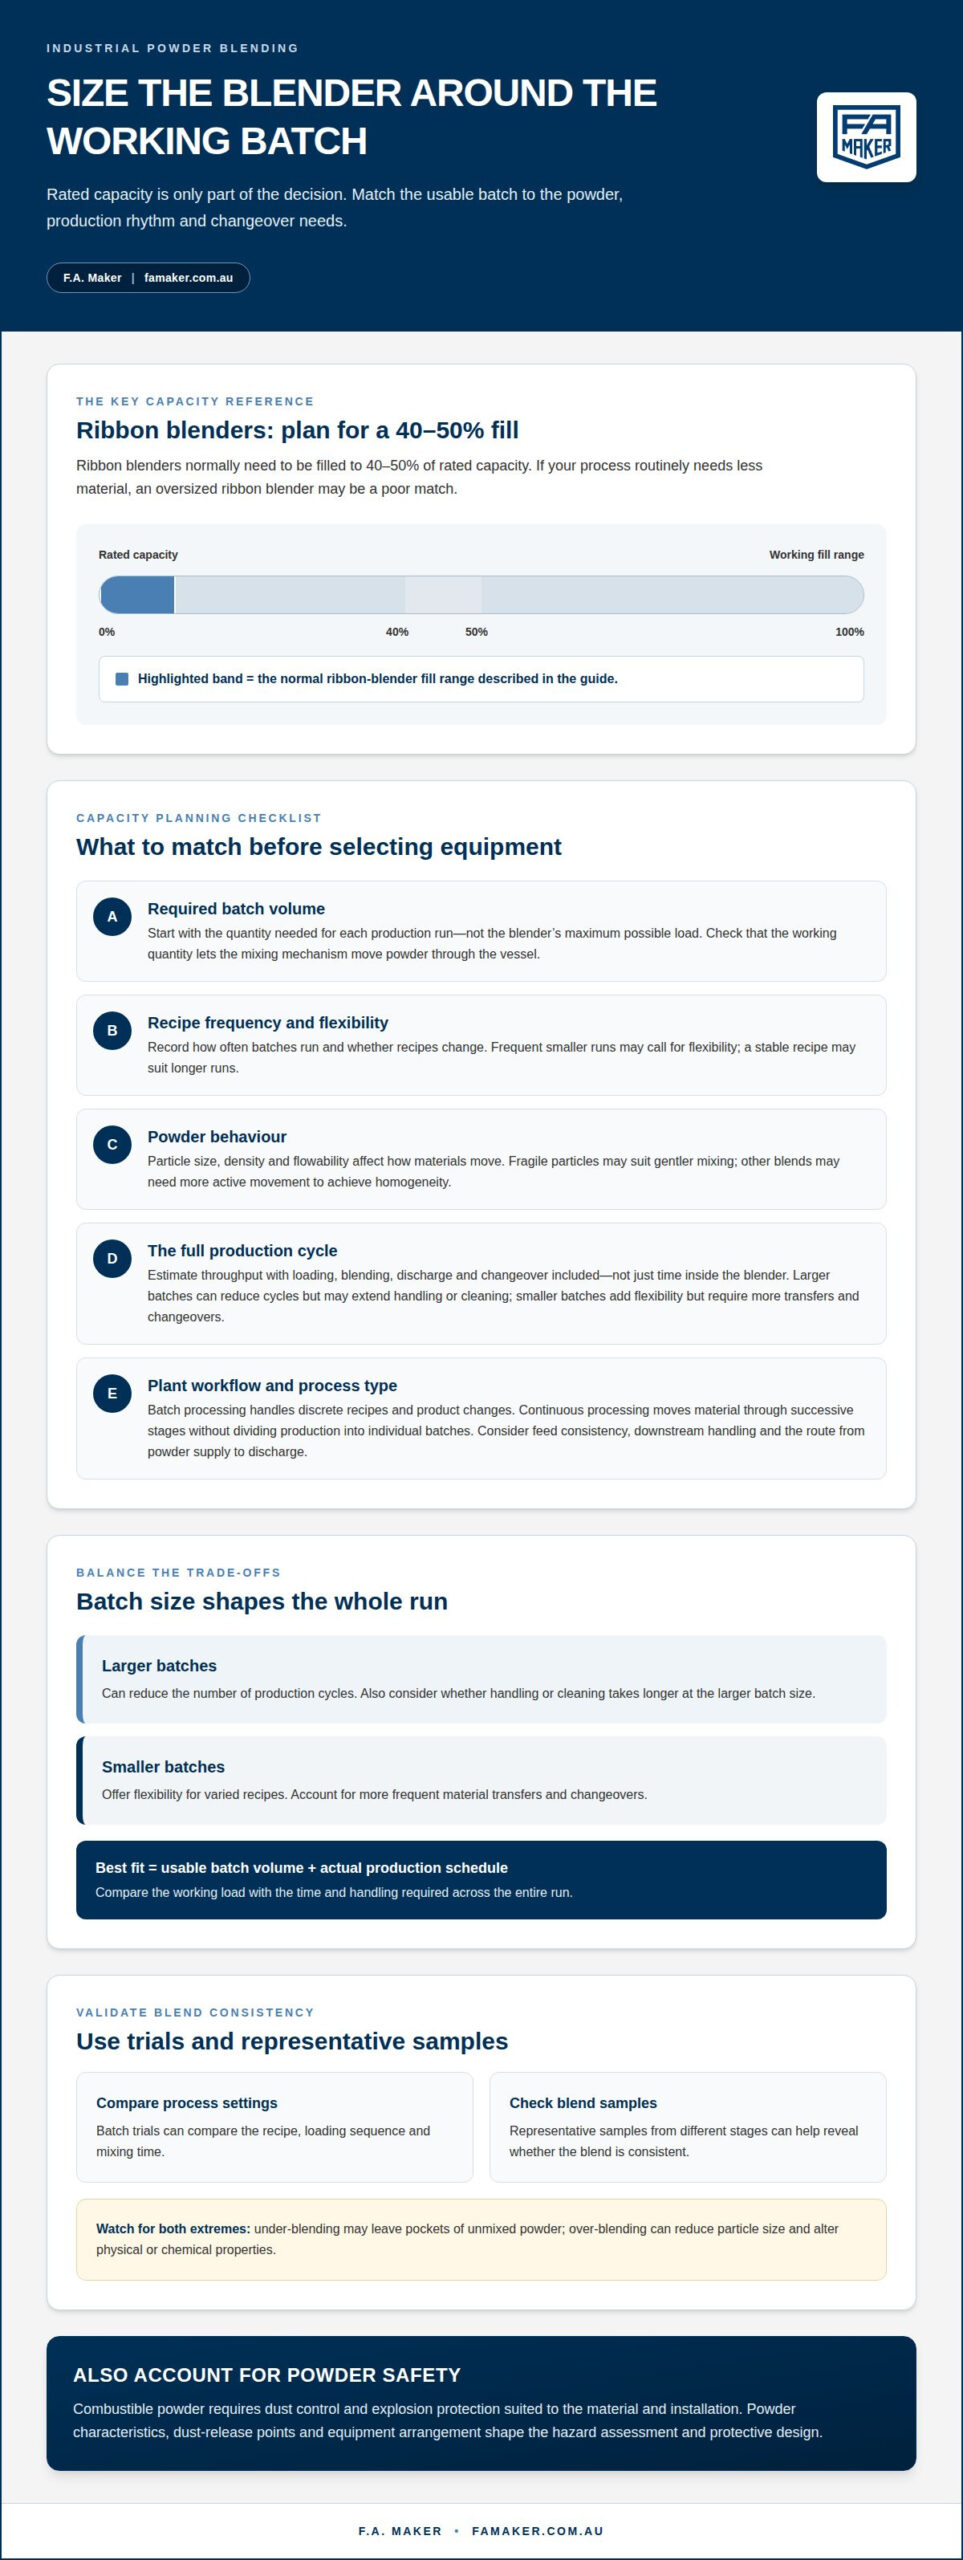
F.A. Maker: Industrial Mixers and Blenders

F.A. Maker supports facility teams planning machinery changes with machinery relocation services and a range of processing equipment, including industrial mixers and blenders. These offerings suit production moves involving process equipment or machinery decisions for a new site. Related equipment categories include used stainless steel tanks and centrifuges and separators.

Aligning equipment decisions with the relocation plan helps teams assess how machinery will fit the intended production layout. The right choices depend on the facility’s process requirements and which assets are moving, staying or being replaced.

For help with your equipment or relocation requirements, contact F.A. Maker.

Set the Next Move in Motion

Use the relocation plan to make deliberate decisions about the facility’s next operating phase. Before scheduling work, define what the future production arrangement needs to achieve and which equipment decisions support it. A clear project brief gives operational and technical teams a shared basis for resolving changes as the move progresses.

Industrial plant dismantling and relocation is also an opportunity to reassess how the equipment portfolio serves the business. Consider whether each asset remains suited to production needs at the destination, and carry those decisions into the relocation scope. This keeps the project connected to operating priorities, rather than treating physical movement as the only measure of completion.

With the next steps defined, facility teams can move from planning into a focused discussion about their machinery requirements. Contact F.A. Maker to discuss your relocation and the equipment that may support your operation. A considered start can help your team approach the move with a clear purpose.

Frequently Asked Questions

Why hire a specialist for installation and removal?

A specialist coordinates machinery handling with the production layout, site access and transport sequence. This is useful when equipment is heavy, connected to other machines or needs careful alignment at the destination. Removing one machine from a connected line, for example, may affect access to neighbouring equipment. Coordinated planning manages these interfaces and gives installation teams clear equipment records.

What does industrial plant dismantling and relocation involve?

Industrial plant dismantling and relocation involves preparing machinery for removal, moving it to another site and returning it to operation. A machine-only move focuses on one asset and its interfaces; a plant move may also involve connected production equipment and facility-wide dependencies. The scope depends on which assets are moving, what remains in operation and how the destination will use the equipment.

What are the steps for dismantling, transporting and reinstalling industrial equipment?

The work typically progresses from scope and condition records to shutdown coordination, machinery isolation, disassembly, packing and transport. At the destination, crews receive and inspect equipment, install it in the planned position, align connected machinery, complete fit-out and commission the system. For a connected line, preserve the relationships between components so installation follows the production arrangement, not simply the order in which loads arrive.

How much does industrial plant dismantling and relocation cost in Australia?

Cost depends on project scope and is provided after a quote request. Key factors include the number and condition of assets, dismantling complexity, lifting and packing needs, transport route, storage, destination fit-out and commissioning. Compare quotes only when they cover equivalent tasks and responsibilities. A proposal excluding destination installation, for example, is not equivalent to one covering the complete relocation scope.

What permits and approvals are required for industrial plant dismantling in Australia?

Required permits and approvals depend on the project, site and applicable local or industry requirements. Businesses should identify and obtain necessary approvals before relocating a plant, including those relevant to planned transport and worksite activities. Include this task in project planning rather than leaving it until loading is scheduled. Record the approval pathway according to the actual scope, location and equipment movement.

What WHS requirements apply to dismantling and relocating industrial machinery in Australia?

Plan for hazards, machinery isolation, safe work areas and suitable personal protective equipment before work begins. The relevant workplace health and safety framework depends on the Australian jurisdiction and worksite. Relocation planning should account for WorkSafe NSW and SafeWork Australia standards, alongside applicable local and industry requirements. Record risk controls and inspections so crews can follow agreed procedures during removal, transport and installation.

How long does an industrial plant dismantling and relocation project take?

Project duration depends on facility size, equipment complexity, site readiness, transport logistics and the sequence needed to resume production. For complex plant moves, the Kaizen Institute recommends beginning planning 1 to 3 years ahead. For a mid-to-large facility, allow at least 6 to 12 months of pre-work before relocation. These are planning periods, not a fixed duration for dismantling or transport itself.

How should machinery be inspected, packed and recommissioned after relocation?

Record equipment condition on receipt and compare it with the pre-transport record, noting visible changes before installation. Keep labels and component records with the corresponding machine, then inspect for loose or damaged items as packing is removed. After installation, check alignment and connected components, complete the required fit-out, and commission the equipment to assess performance and readiness before production restarts.
Industrial Process Machinery Liquidation for Stronger Sale Value

A strong sale outcome starts before machinery reaches the market. In Australia, industrial process machinery liquidation has no set time limit: the process continues until the required liquidation tasks are complete. Preparation, equipment condition and removal logistics all affect how a sale proceeds.

It is reasonable to focus on what equipment may sell for, but the sale method and available time matter too. This article explains how to assess machinery, document its condition, compare direct sale, consignment and auction options, and consider removal costs when evaluating offers.

You’ll also learn what to consider when selecting a liquidation partner, from processing equipment experience to the coordination of marketing and removal. These factors provide a practical framework for planning a sale and assessing potential net recovery.

Key Takeaways

  • Build a clear equipment record with identification, condition and service information so buyers can assess each asset with confidence.
  • Assess potential recovery by looking beyond age to serviceability, maintenance history, included accessories and removal complexity.
  • Match the sale method to the equipment and available timeline; direct sale, consignment and auction can also be combined across a facility.
  • Separate premium machinery from support equipment and obsolete material to shape a sale strategy around each asset group.
  • Evaluate a liquidation partner’s ability to coordinate asset marketing, sale logistics and removal planning.

Equipment preparation and condition disclosure

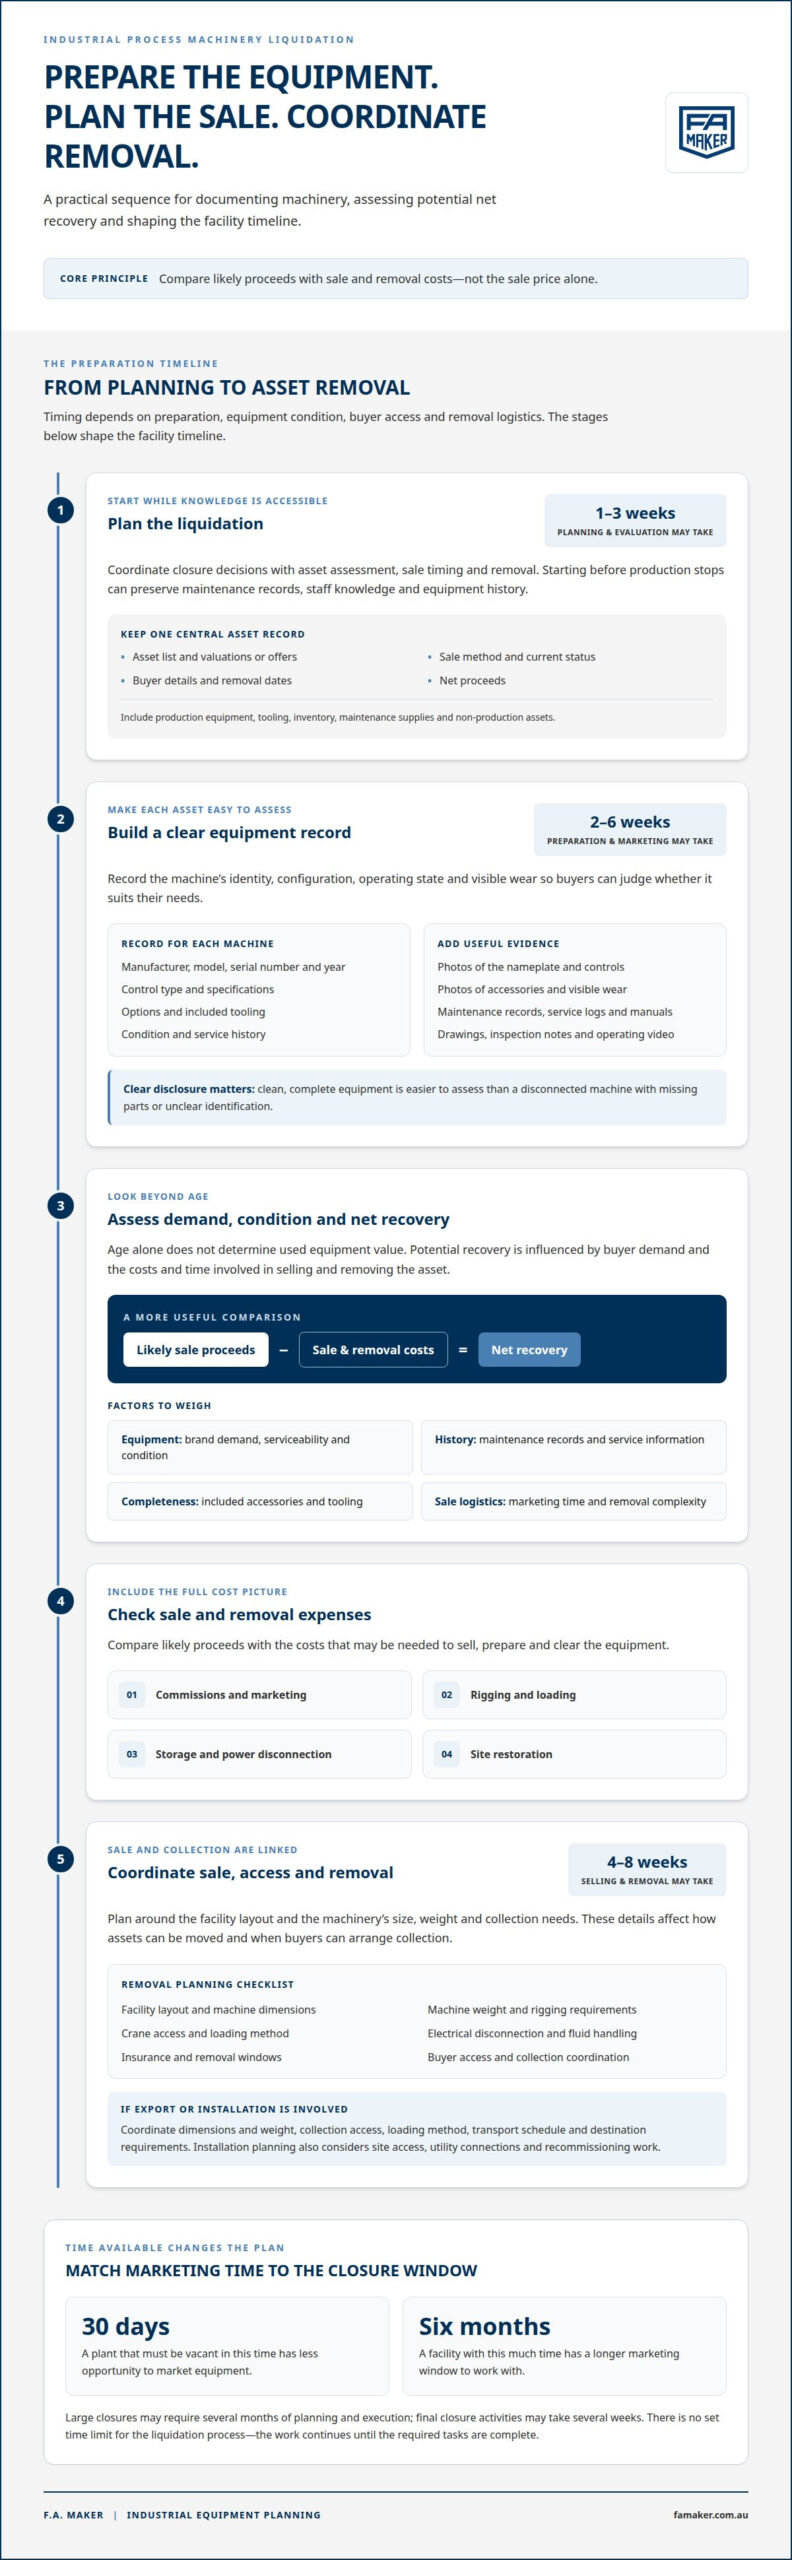
A well-planned industrial process machinery liquidation starts with clear asset records and realistic removal planning. Preparation and marketing may take 2 to 6 weeks, while selling assets and coordinating their removal may take 4 to 8 weeks. Both stages shape the facility timeline.

Equipment Condition Disclosure

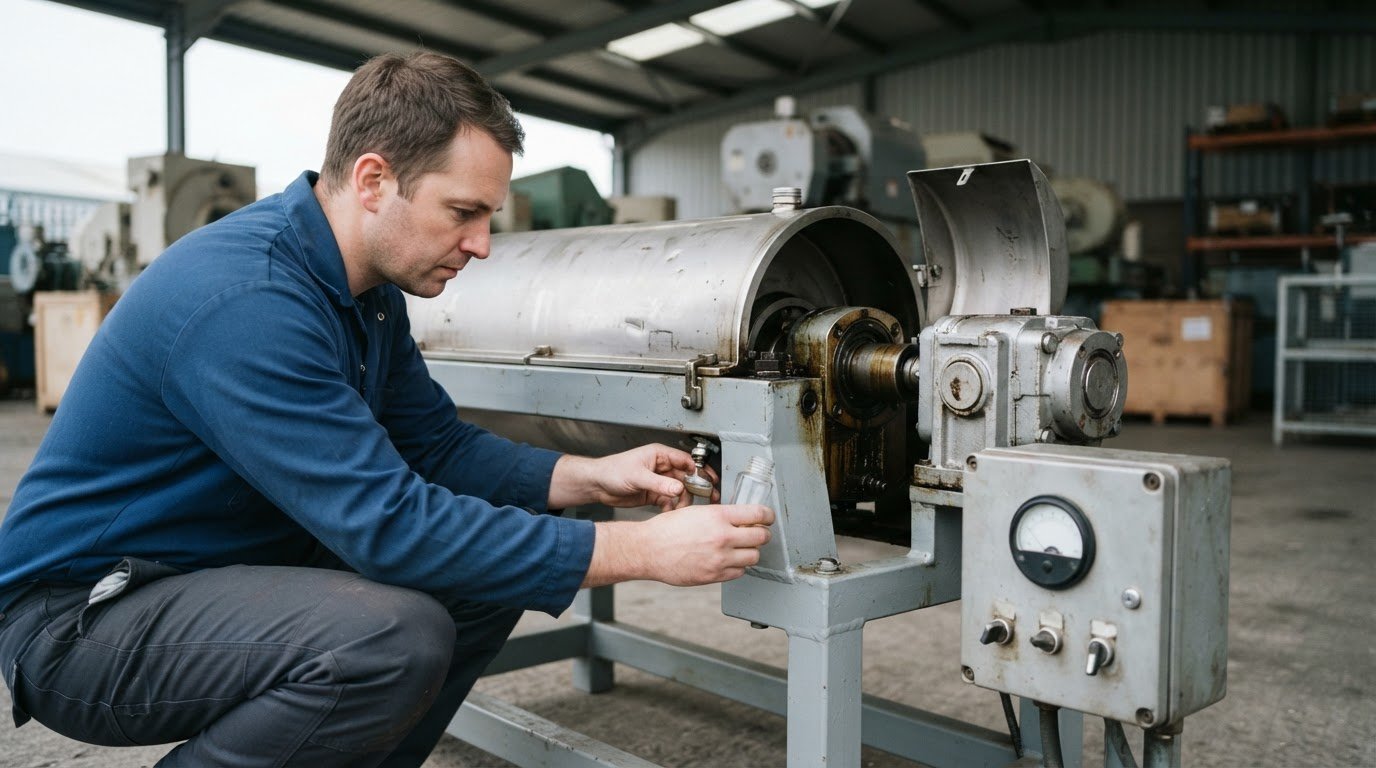
Condition records should identify a machine’s configuration, operating state and visible wear. Buyers need this information to assess whether the equipment suits their needs. Record the manufacturer, model, serial number, year, control type, specifications, options, tooling, condition and service history. Photographs of the nameplate, controls, accessories and visible wear make the record more useful.

Maintenance records, service logs, manuals, drawings and inspection notes add useful detail. A video showing the machinery operating under power can help buyers understand its function. Clean, complete equipment is easier to assess than a disconnected machine with missing parts or unclear identification.

Machinery Value Assessment

Value assessment considers likely buyer demand and the net amount recovered after sale and removal costs. Age alone does not determine used equipment value. Brand demand, serviceability, condition, maintenance history, included accessories, marketing time and removal complexity all influence potential recovery.

Compare likely proceeds with commissions, marketing, rigging, loading, storage, power disconnection and site restoration costs. A machine with service records and standard controls may attract more interest than a similar asset with unknown maintenance or missing tooling. Net recovery is a more useful basis for comparing offers.

Buyer Inspections and Purchase Risks

Before bidding, inspect the machine, nameplate, controls, accessories and visible wear, then compare your findings with the listing and available service records. Where possible, assess its operation under power and identify the included tooling. These checks help establish whether the machinery suits your intended production use.

Liquidation purchases can involve undisclosed wear, missing accessories, uncertain operating condition or difficult removal. Buyers should account for loading, transport and recommissioning, rather than treating the winning bid as the full acquisition cost.

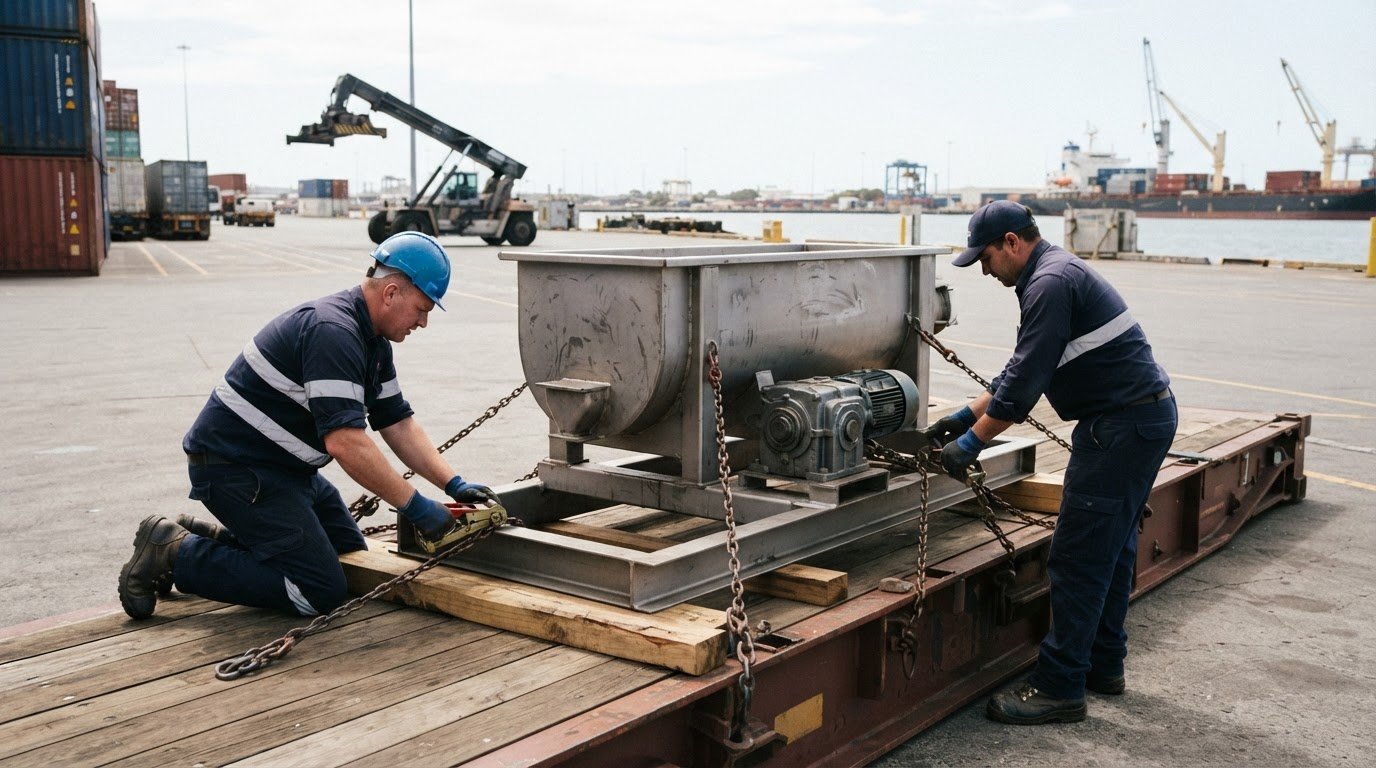
For export, freight and installation, coordinate the machine’s dimensions and weight, collection access, loading method, transport schedule and destination requirements. Installation planning should also consider site access, utility connections and the work required to recommission the equipment.

Removal planning should account for facility layout, machine dimensions and weight, rigging, crane access, electrical disconnection, fluid handling, insurance and removal windows. These details affect how assets can be moved and when buyers can arrange collection.

In an industrial process machinery liquidation, available marketing time affects buyer access and sale planning. A plant that must be vacant in 30 days has less time to market equipment than a facility with six months. Large closures may require several months of planning and execution, while final closure activities may take several weeks.

What drives value in a manufacturing plant liquidation?

Demand, asset condition and available marketing time influence potential recovery. Start planning when closure is being considered, while the operation, equipment knowledge and records remain accessible.

Liquidation Planning

Liquidation planning coordinates the company’s closure decisions with asset assessment, sale timing and removal. A manufacturing liquidation planning and evaluation phase may take 1 to 3 weeks. Starting before production stops can preserve maintenance, staff knowledge and records, helping buyers understand machinery and its operating history.

Keep a central record of assets, valuations or offers, sale method, status, buyer details, removal dates and net proceeds. Include production equipment, tooling, inventory, maintenance supplies and non-production assets. A working plant may also be able to continue trading if a liquidator considers that to be in creditors’ best interests.

The Australian winding-up route affects who controls the company and its assets. Creditors’ voluntary liquidation is initiated by directors concerned that the company cannot pay its debts. Court liquidation begins with a court order, usually after a creditor’s application. Members’ voluntary liquidation allows a solvent company to close.

Liquidation Company Selection

Choose the right professional for each responsibility. Company liquidation must be administered by an ASIC-registered liquidator, while machinery marketing and removal require suitable asset-sale coordination. Clarifying responsibilities helps align legal administration, buyer communication and site logistics.

Compare each proposed sale channel against asset demand, condition and removal constraints. A partner’s plan should account for buyer access, equipment ownership records, lender interests, landlord rights and sale proceeds. These details can affect the timing and execution of a manufacturing closure.

Company history can also affect the available process. Simplified liquidation is available only for a creditors’ voluntary winding up where the event triggering the winding up occurs on or after 1 January 2021. The company must be unable to pay its debts in full within 12 months, and must not have undergone restructuring or simplified liquidation during the preceding seven years.

Before adopting simplified liquidation, a liquidator must give members and creditors written notice at least 10 business days before adopting the process. Directors must provide a business affairs report and eligibility declaration within five business days after the day of the meeting at which the voluntary winding-up resolution was passed. These conditions make company records and history material to choosing the process.

Asset-sale planning should also distinguish machinery by buyer demand and operating use. For example, a production line with working mixers and bottle fillers may attract buyers seeking a coordinated operation, while a disconnected asset may suit a different channel. Reviewing industrial mixers and blenders can help readers assess how equipment categories fit their production requirements.

Direct sale, consignment and auction options

Sale channels determine how buyers are approached, how offers are made and how a closure timeline is managed. Direct sale, consignment and auction can each suit different assets within one facility.

Equipment Sale Channels

A sale channel is the method used to market equipment and receive offers. Direct sale targets a buyer for a particular asset, while consignment assigns marketing and sale coordination to an intermediary. Auctions invite competing bids through a defined sale process. The best fit depends on equipment demand, condition, removal requirements and available time.

Combining channels can make sense for a facility with multiple assets. A specialised process machine may be marketed individually, while support equipment can be grouped. An auction can bring several assets to market together, while a negotiated sale can focus on machinery with a clearly identifiable buyer. Each route needs clear sale terms and removal planning.

Direct Equipment Sales

A direct equipment sale is a negotiated transaction between a seller and an identified buyer. It can suit machinery with a specific application, such as a bottle filler sought by a packaging operation. The parties can discuss the machine’s condition, included components, collection arrangements and sale terms directly, keeping the transaction focused.

Direct selling depends on reaching suitable buyers and agreeing on terms. Consider offers alongside the asset’s condition, demand and net recovery after removal expenses. Keep a written record of offers, buyer details, agreed terms and collection dates. This makes each transaction easier to track during a wider closure.

Timeline affects the available options. A facility with six months to market specialised equipment has more selling choices than a plant that must be vacant in 30 days. A short deadline can narrow buyer access and constrain removal scheduling. In a mixed sale, use the longer marketing window for specialist assets where possible, while planning other lots around the facility’s access and closure dates.

Company circumstances also affect who can direct asset sales. In Australia, a company is insolvent if it cannot pay debts as they fall due, even if it holds assets that cannot be sold quickly. Directors who breach their duty not to incur debts while insolvent may be personally liable to compensate the company for those unpaid debts. The company’s financial position matters alongside machinery value.

Bankruptcy applies to individuals, not companies; company liquidation is a separate process. During liquidation, control of company assets and financial affairs passes to the liquidator, and directors cease to have authority over them. Asset sales must therefore follow the applicable control and approval arrangements. Identify who has authority before agreeing to a direct sale to help prevent conflicting instructions or delays.

For example, a plant with a sought-after process line and assorted support items could use a blended approach: negotiate for the specialist asset, group suitable equipment, and auction other lots. Match each channel to buyer demand, collection logistics and the closure schedule, then track offers and removal dates in the same asset record.

Industrial Process Machinery Liquidation for Stronger Sale Value

Auction and negotiated sale strategies

A sale strategy matches each machine to a transaction method, buyer group and removal plan. For a five-axis machining centre, individual marketing may suit its specialist demand better than bundling it with general inventory.

Auction Prices and Private Sales

Auction and private-sale outcomes depend on buyer demand, asset condition, sale terms and competition. There is no fixed price relationship between an Australian liquidation auction, a private sale and a machinery dealer’s offer. An auction establishes a result through competing bids; a negotiated transaction depends on an agreed offer and its conditions.

Compare expected net recovery, not just the headline amount. Account for buyer premiums where applicable, commission, marketing, loading and removal. A dealer offer may simplify a transaction, while an auction may expose an asset to multiple bidders. Compare the proceeds after considering each channel’s costs and timing.

Buying Rules for Liquidation Machinery

Buying rules are the sale conditions governing bids, payment, collection and transfer of an asset. In an Australian liquidation, the liquidator controls company assets and financial affairs after appointment, so machinery transactions must follow the authorised sale process.

Before bidding, read the lot conditions and confirm what the asset includes, how payment is handled and when collection must occur. Also assess equipment condition, access and removal requirements. These checks matter because a winning bid does not itself resolve rigging, transport or installation arrangements.

Sale terms should also identify the seller’s authority and the asset being transferred. For example, a production line may include several machines, guards and controls, while a single lot may exclude associated tooling. Clear lot descriptions and written transaction records reduce confusion about what the buyer has purchased.

Auction Fees and Removal Costs

A buyer’s total outlay includes the bid and any applicable buyer’s premium, GST treatment, freight, rigging and removal charges. The sale terms should explain the premium and how GST is treated. Compare those terms before bidding, since the winning bid alone does not show the full acquisition cost.

Transport planning starts with the machine’s dimensions, weight, collection access and required lifting equipment. A large vessel, for example, may need a different loading plan from a bottle filler. Buyers should align collection windows with freight and removal crews, and include power disconnection, fluid handling and site access in the plan.

Auction marketing can use a detailed catalogue, buyer inspections, digital channels, industry directories, trade events and direct outreach. These methods help buyers assess relevant assets before bidding. A catalogue should distinguish individual machines from grouped lots and describe visible condition, included components and collection arrangements.

Negotiated sales suit assets with a clear buyer or specialised application. The offer can address the machine, included tooling, payment, collection and removal responsibilities in one agreement. Record those terms alongside buyer details and the removal date, then compare the net result with other sale options.

A blended strategy can allocate premium machines to individual sale, group support systems and send obsolete material to scrap or salvage. For operations liquidating tooling or seeking to recover value from hardmetal components, specialized industrial scrap suppliers like Carbide Kings provide avenues for handling tungsten and carbide materials. One channel may not suit every asset. The decision should reflect buyer demand, production requirements, transaction terms and the facility’s removal schedule.

Choosing an industrial machinery liquidation partner

A suitable partner understands both the machinery and the responsibilities involved in a plant liquidation. The choice affects how assets are valued, marketed, sold and removed, so assess the proposed process as well as the expected sale outcome.

Australian liquidations are administered by specialist accountants who are registered liquidators with ASIC. A machinery sale partner may support asset valuation, buyer access, auction marketing and removal coordination, but these activities are distinct from administering the company’s liquidation. Establishing who controls each decision helps prevent conflicting instructions during a closure.

Ask how the proposed valuation will account for demand, serviceability, condition, maintenance history, accessories and removal complexity. A stainless steel tank with clear specifications presents different buyer considerations from an industrial mixer or bottle filler. The valuation approach should also explain whether assets will be offered individually, grouped, negotiated privately or placed in an auction.

Inspection and marketing plans should suit the equipment. A useful inspection process gives prospective buyers access to the relevant machine and its available records. For an operating asset, a demonstration may help buyers assess its function. Marketing can include a detailed catalogue, buyer inspections, digital channels, industry directories, trade events and direct outreach.

Industrial process machinery commonly sold in Australian liquidations includes stainless steel tanks, centrifuges, separators, mixers, blenders, pumps, valves, conveyors and processing equipment. The mix depends on the facility’s operation and the assets being sold. A specialist should explain how distinct equipment groups will be presented to relevant buyers.

Australian auction houses that handle industrial plant and machinery use specialist sale channels, including online auctions, sealed bids and negotiated transactions. The right fit depends on the asset mix, timeline and removal plan. Rather than treating an auction catalogue as the whole service, assess how inspection access, buyer communication, sale records and collection schedules will be coordinated.

For a company in liquidation, ownership and authority require particular attention. Resolve lender interests, landlord rights and any financing, leasing or lien issues before assets are marketed. Plant liquidation transactions can also require coordination of lien releases and shipment schedules. The partner’s process should make responsibilities and transaction records clear to the liquidator and relevant creditors.

Removal capability matters as much as sale capability. A large machine may need planned rigging, loading, electrical disconnection and suitable site access. Confirm that the proposed schedule accounts for equipment dimensions, removal windows and the facility layout. Gaps between sale dates and collection plans can complicate site closure.

Use the proposed plan to compare partners on valuation method, buyer reach, sale-channel choices, transaction tracking and removal coordination. For machinery that also needs relocation planning, discuss machinery relocation requirements alongside the sale and collection schedule.

F.A. Maker: Industrial Mixers and Blenders

F.A. Maker can help when a liquidation leaves a production operation needing suitable processing equipment. Its range includes Industrial Mixers and Blenders, Used Stainless Steel Tanks, Centrifuges and Separators, and Pumps and Valves.

For buyers replacing a machine or planning a new process line, matching equipment to the required application is a practical next step after assessing sale and removal options. F.A. Maker’s used industrial process equipment categories can help identify relevant machinery for that decision.

Contact F.A. Maker to discuss your industrial equipment requirements.

Put the Next Equipment Decision in Motion

The next step is to turn your plant’s changing needs into a clear equipment plan. Whether you are preparing for closure, replacing a process line or sourcing machinery for continued production, a considered industrial process machinery liquidation can help determine what to sell and what equipment may suit another operation. For facilities modernizing operations beyond traditional machinery, companies such as EdNex Automation highlight how modern robotic systems and industrial automation can reshape production environments.

F.A. Maker offers Industrial Mixers and Blenders, Used Stainless Steel Tanks, and Centrifuges and Separators. These categories can be relevant when assessing processing equipment for a new or continuing operation. Matching machinery to the intended application remains central to making a sound purchasing decision.

To discuss your equipment requirements and liquidation needs, contact F.A. Maker. A practical conversation can help you identify a suitable next step for your machinery plans.

Frequently Asked Questions

Liquidation: What is the process?

In Australia, company liquidation converts company assets into cash to repay as much debt as possible. The liquidator takes control of company assets and financial affairs, investigates the company’s position, realises assets and considers creditor claims. Section 556 of the Corporations Act sets the order of priorities for dividends, including liquidation costs, employee entitlements and unsecured creditors. There’s no set time limit; the process continues until required tasks are complete.

What investigations are undertaken by the liquidator?

A liquidator investigates the company’s financial affairs, assets, liabilities and relevant transactions to understand its position and creditor outcomes. In a creditors’ voluntary winding up, directors provide a Report as to Affairs detailing assets and liabilities at the appointment date. In voluntary administration, the administrator issues an investigation report under section 75-225 of the Insolvency Practice Rules (Corporations) 2016. Ownership records and lender interests can also affect which assets are available for realisation.

How do industrial machinery liquidation auctions work in Australia?

Australian industrial machinery auctions may run online or by sealed bid, while negotiated sales can suit particular assets. The authorised seller sets the sale terms, and a catalogue identifies the available lots. Buyer inspections help bidders assess machinery before bidding. Successful bidders then follow the stated payment and collection conditions and arrange rigging, freight and removal. Review lot boundaries and included components, as production-line equipment may be divided into separate lots.

Industrial Equipment Shipping Costs and What Shapes the Price

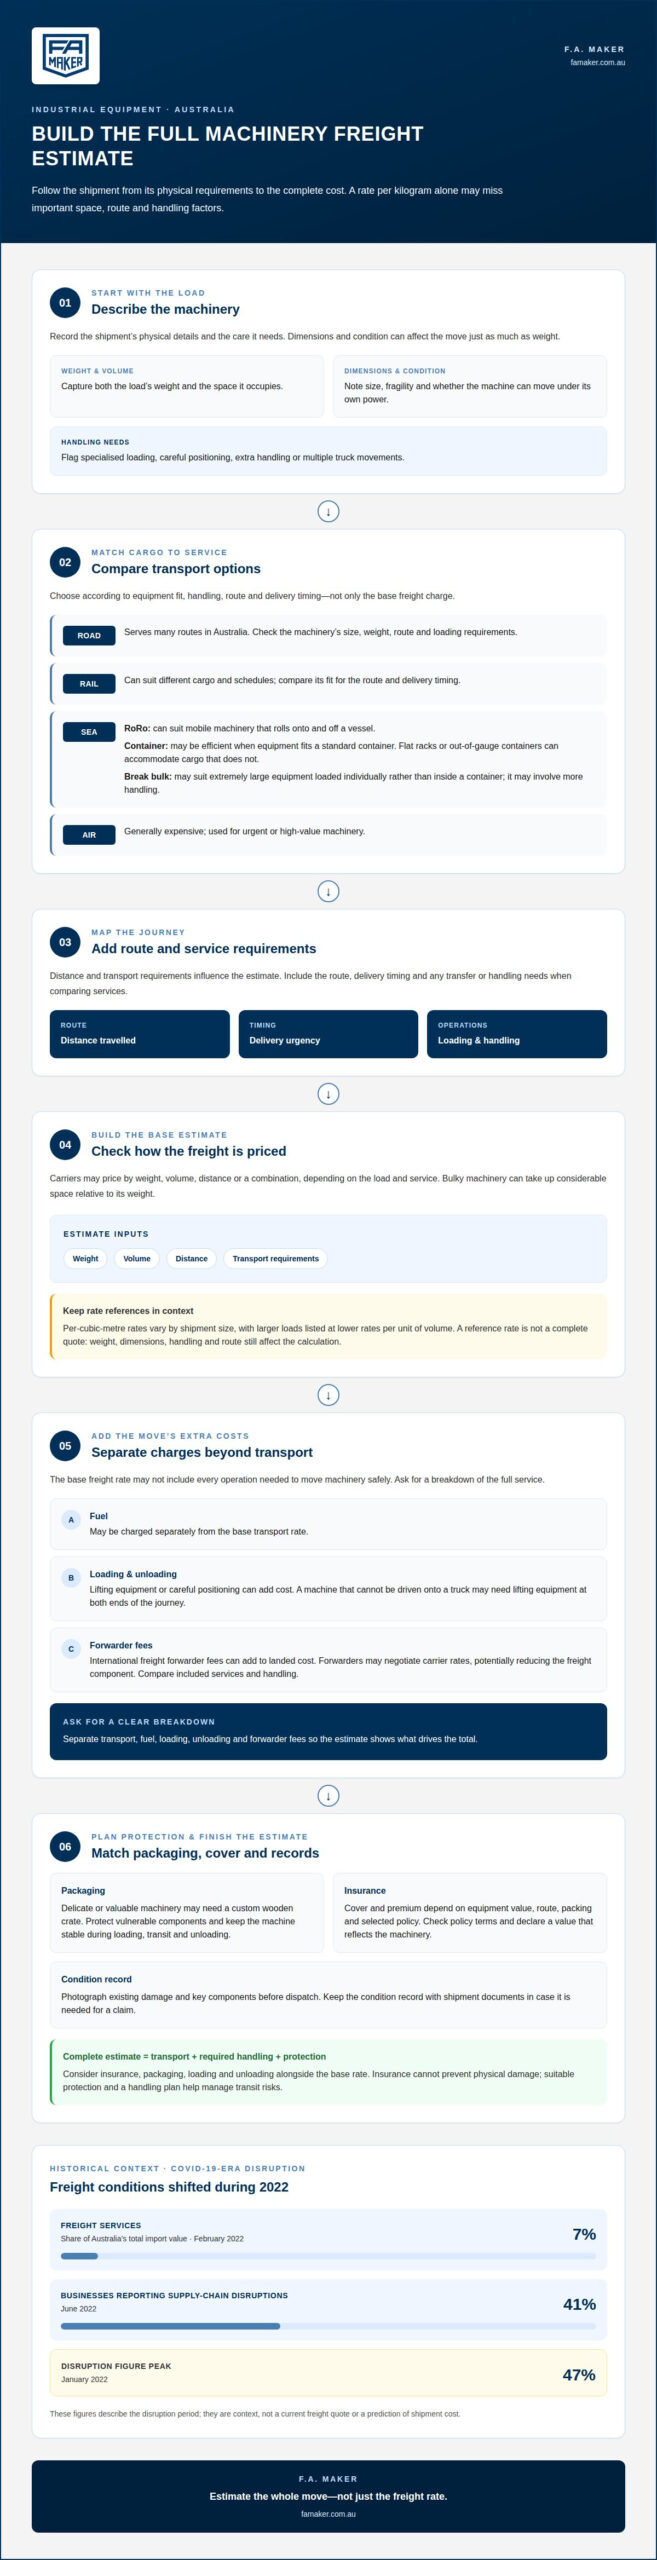
The heaviest machine isn’t always the most expensive to move. Industrial equipment shipping costs in Australia depend on a load’s dimensions and weight, as well as the route, transport method and handling required. A compact but awkward machine may need specialised loading or transport, while equipment that is straightforward to move can cost less.

Freight charges typically reflect shipment weight or volume, distance and transport requirements. Fuel, insurance, loading, unloading and extra handling can add to the total. A useful estimate therefore considers the complete move, not just a rate per kilogram.

This guide explains how freight is priced and what affects the final amount. It covers equipment dimensions and condition, road, rail, sea and air options, and the impact of fuel, insurance and loading. Understanding these cost components helps you assess which transport method suits the machinery and journey before arranging a shipment.

Key Takeaways

  • Build a freight estimate around the shipment’s weight, volume, route and handling needs, rather than relying on one rate alone.
  • Understand how pandemic-era disruption affected freight: freight services reached 7% of Australia’s total import value in February 2022, while 41% of Australian businesses reported supply-chain disruptions in June 2022.
  • Match the transport mode to the equipment’s size, weight, distance and delivery timing; oversized or mobile machinery can have different handling requirements.
  • Account for loading, unloading, fuel and insurance alongside the base transport charge, and assess the equipment’s dimensions and fragility before planning the move.
  • See when F.A. Maker’s industrial mixers and blenders, used stainless steel tanks, centrifuges and separators, or pumps and valves may suit your equipment needs.

How Do You Calculate Freight Cost?

Freight estimates combine shipment weight, volume, distance and transport requirements. For an import into Australia, the equipment’s dimensions and handling needs can affect the charge as much as its weight.

Freight Cost Calculation Factors

Freight calculations take account of the space a shipment occupies, its weight and the distance it travels. Depending on the load and service, carriers may price by weight, volume, distance or a combination.

The example shows why reviewing the calculation’s separate components helps explain the total.

Freight Rates by Shipment Size

Per-cubic-metre rates vary by shipment size, with larger loads listed at lower rates per unit of volume.

These ranges are reference points, not a complete quote. Weight, dimensions, handling and route still affect the calculation. Volume can be especially important when bulky equipment takes up considerable space relative to its weight.

Shipping Methods for Freight

The transport method depends on equipment size and weight, distance and delivery timing. Roll-on roll-off (RoRo) can suit mobile machinery that rolls onto and off a vessel. Container shipping may be efficient when equipment fits in a standard container; flat racks or out-of-gauge containers can accommodate cargo that does not.

Air freight is generally used for urgent or high-value machinery because it is expensive. Break bulk, where cargo is loaded individually rather than inside a container, can suit extremely large equipment but may involve more handling. Compare transport modes by fit, handling and timing, not just the base freight charge.

Disruption, Forwarder Fees, and Negotiation

COVID-19-era supply-chain disruption coincided with higher freight costs for Australian imports. Freight services reached 7% of Australia’s total import value in February 2022, and 41% of Australian businesses faced supply-chain disruptions in June 2022. The disruption figure peaked at 47% in January 2022, illustrating how conditions shifted during that period.

International freight forwarder fees can add to the landed cost of a machinery shipment. Forwarders may also negotiate carrier rates, potentially reducing the freight component. Compare the full service and included handling rather than judging a quoted rate alone. A clear breakdown separates transport charges from forwarder fees and shows what drives the estimate.

Additional charges such as fuel, insurance and loading

A base freight rate may not cover every operation required to move machinery safely. Fuel, loading, packaging and insurance can add charges to delivery.

For machinery shipments in Australia, cargo insurance can cover equipment in transit, and additional insurance may be required for some shipments. There is no single price: insurance costs depend on equipment value, route, packing and selected cover, and are provided after a quote request.

Fuel, Loading, and Other Charges

Additional charges cover services beyond transporting machinery between pickup and delivery. They matter because heavy machinery may need specialised loading equipment, extra handling or several truck movements.

Fuel may be charged separately from the base transport rate. Loading and unloading can also cost extra when lifting equipment or careful positioning is required. For example, a machine that cannot be driven onto a truck may need lifting equipment at both ends of the journey.

Request a breakdown that separates transport, fuel, loading and unloading. This makes it easier to see what contributes to the total and whether the planned handling suits the equipment.

Machinery Packaging and Insurance

Packaging protects machinery during handling and transit, while insurance addresses financial exposure if damage or loss occurs. Both matter because packaging affects how a machine can be secured and moved.

Delicate or valuable industrial equipment may need a custom wooden crate. Packaging should protect vulnerable components and keep the machine stable during loading, transport and unloading. A crate can also make handling more predictable when equipment moves between vehicles or freight modes. Similarly, for sensitive electronic or production equipment, purpose-built solutions such as TruckPaX™ Truck Pack Cases help optimize vehicle dimensions while shielding components against transit shock.

Shipping insurance and cargo insurance refer to cover for goods in transit, but policy terms determine which events and losses are covered. The insured value, route, equipment type and packaging can affect the premium. Declare a value that reflects the machinery being shipped, and read the policy alongside the transport arrangements.

Documenting the machine’s condition before dispatch creates a useful record. Photographs of existing damage and key components can help distinguish pre-existing marks from damage noticed after delivery. Keep the condition record with the shipment documents in case it is needed for a claim.

Consider packaging and cover together. A fragile machine moved without suitable protection may face greater exposure during loading, while insurance cannot prevent physical damage. Matching the crate, restraints and handling plan to the equipment helps manage transit risks and clarify costs.

Road, rail, sea and air transport options

Transport method affects shipping costs through route, handling, equipment fit and delivery timing. In Australia, road freight serves many routes, while sea, rail and air suit different cargo and schedules.

The total depends on machinery dimensions, weight, distance and handling requirements.

Typical rail, sea and air costs depend on route, cargo size, weight and urgency. Air freight is generally expensive and used for urgent or high-value machinery. Oversized-load permit and escort charges vary by jurisdiction, cargo details and route.

Transport Modes and Their Costs

Transport modes are the road, rail, sea or air services used to move equipment between locations. Choosing a method matters because each has different route, handling and timing requirements.

In Australia, combining rail and truck transport can reduce costs for long-distance heavy machinery shipments, though rail delivery is less common for oversized machinery. Sea freight suits international movements, while air freight prioritises speed over cost. Cargo dimensions, weight, distance and required delivery time guide the choice.

For international shipments, sea freight from nearby Asia-Pacific countries such as New Zealand, Singapore or Indonesia usually takes 1 to 4 weeks. From Europe, North America or Africa, it typically takes 6 to 10 weeks. Air freight to Australia takes between 3 and 7 days from almost anywhere in the world.

Road Vehicle and Pallet Transport

Road transport uses trucks to move machinery or palletised cargo between pickup and delivery points. For interstate logistics, distance, remote locations and specialised equipment can all affect the rate.

These examples apply to pallets, not necessarily complete machinery shipments.

Heavy machinery may require flatbed, step-deck or lowboy trailers. Oversized cargo may need permits if it exceeds state road authority size or weight limits; some movements may also require escort vehicles. Requirements vary between states and territories. Permit applications may require cargo dimensions and weight, vehicle type and planned route, so route details affect planning and charges.

International transport adds customs clearance and documentation to the logistics plan. Invoices and declarations support customs processing, while shipments to or from Australia also undergo quarantine inspection. Some machinery may require import or export permits. A shipment plan may include customs clearance, warehousing and onward transport, making the full route and each service part of the overall cost.

Industrial Equipment Shipping Costs and What Shapes the Price

Assessing equipment dimensions, weight and fragility

Assess equipment dimensions and weight before selecting a vehicle or freight method. Accurate measurements help determine whether machinery fits standard transport, needs special handling or requires a different route to its destination.

Record the machine’s length, width and height in its transport configuration, including projections such as guards, handles or attached components. Note its total weight and how that weight is distributed. These details help match the load to a truck, container or air freight option. A machine may fit by length but exceed a vehicle’s width or height limits.

For oversized equipment, dimensions affect route planning as well as vehicle selection. In Australia, permit requirements vary between states and territories, so consider every jurisdiction along the planned route. Permit applications may require cargo dimensions and weight, vehicle type and route. These details can also help identify obstacles such as low bridges or narrow roads before the carrier plans the movement.

Scale can change the transport plan substantially. One batching plant shipment described in the available examples comprised over 4,000 m³ of cargo. Each pontoon measured approximately 22.6 metres long, 9.05 metres wide and 2.15 metres high, and weighed 52 tonnes. Such dimensions illustrate why overall cargo size, not weight alone, determines suitable handling and transport arrangements.

Fragility affects how machinery should be packaged, secured and handled. Identify delicate assemblies, exposed controls and components that could shift or be damaged in transit. Custom wooden crates are suggested for delicate or valuable equipment. Restraints and tie-downs should secure cargo to the vehicle or container and limit movement as trucks travel over changing road conditions.

Document the equipment’s condition before dispatch. Take clear photographs of existing damage and record the machine’s condition alongside its dimensions and weight. This creates a practical reference if it arrives with marks that were not present before transport. Include attached parts and accessories so the carrier can account for their space and securement.

Use the measurements to compare transport configurations. If machinery can be dismantled, assess whether the reduced dimensions lower freight and handling costs enough to justify the labour. Some equipment may need disassembly before international shipment. Keep components together and document their arrangement to maintain a clear packing plan for loading and delivery.

A complete equipment profile gives the carrier the information needed to plan vehicle capacity, packaging, securement and route. For heavy or oversized machinery, dimensions and weight also inform permit planning in Australia. For fragile loads, the packaging and restraint plan should account for vulnerable components rather than treat the machine as standard cargo.

Industrial equipment shipping costs

Compare the full landed cost, from pickup through customs clearance, rather than judging a shipment by its linehaul rate alone. For Australian import or export movements, the total may include transport, packing, loading, handling, insurance, storage and onward delivery. The balance between these items changes with equipment size, weight, route and shipment configuration.

Build the estimate around the full move

A useful estimate separates each stage to show the main cost drivers. Map the journey from collection to final destination, then account for required services at each handover. An international shipment may involve export preparation, ocean or air transport, customs clearance, port handling and domestic delivery.

Ask for the planned scope to distinguish included services from separate charges. A transport rate, for example, may cover the main journey but not loading at origin or onward travel from an arrival port. Storage can help manage shipment timing, but its charges should be included in the overall plan.

Match containers and transport to the equipment

A Full Container Load (FCL) can use a 20- or 40-foot container. It is usually most economical for bulky machinery, plant equipment or multiple units that can fill a container. The container’s capacity only helps if the equipment’s dimensions and weight suit the loading plan.

Static or oversized cargo that cannot fit standard units may need a flat rack or out-of-gauge container. For international export, equipment may need to be dismantled before shipment. Compare any reduction in freight and handling costs with the labour involved rather than assuming disassembly will lower the total.

Assess domestic linehaul and smaller loads

These figures describe linehaul, not the complete landed cost. Special handling, pickup, loading and delivery arrangements affect the final estimate.

Less-than-truckload shipping can suit smaller industrial loads that do not fill a truck. Consolidating attachments, parts and accessories before export can also help organise freight efficiently. Include each item’s dimensions and weight in the packing details so the shipment plan accounts for the complete consignment.

Control cost through shipment planning

Review the route, loading plan, equipment configuration and service scope together. If a machine can be dismantled, compare the freight and handling savings with the labour required. If several components can travel together, consolidation may avoid treating each item as a separate movement. The best arrangement depends on the equipment and destination.

For assistance coordinating an equipment move, discuss your machinery relocation.

F.A. Maker: Industrial Mixers and Blenders

F.A. Maker supplies industrial mixers and blenders for processing operations, helping buyers assess equipment requirements alongside transport planning. Its range also includes used stainless steel tanks, centrifuges and separators, and pumps and valves.

Consider these equipment options when planning a replacement, production-line change or facility upgrade. Before arranging transport, note the selected machine’s dimensions, weight, condition and destination. Those details help establish suitable handling and packing requirements, whether equipment is moving within Australia or internationally.

For a used machine, assess its condition and configuration alongside the freight plan. A clear equipment description helps align selection, loading and delivery arrangements, rather than treating freight as a standalone decision.

Contact F.A. Maker to discuss industrial equipment for your operation.

Plan the next equipment move with confidence

Make freight planning part of the wider equipment decision. Matching machinery to production requirements, site access and the delivery plan can help prevent avoidable complications. F.A. Maker offers industrial mixers and blenders, used stainless steel tanks, and centrifuges and separators for processing operations.

If you’re assessing equipment for a facility change or planning a machinery relocation, keep the equipment details and movement requirements together. This gives the discussion a practical starting point and connects the machinery decision with the logistics involved. Industrial equipment shipping costs depend on the specific move, so clear information about the equipment and destination is useful.

Contact F.A. Maker about shipping to discuss your equipment move and next steps. With the requirements set out clearly, you can proceed with a more considered plan for your operation.

Frequently Asked Questions

How much does it cost to ship industrial equipment?

Australian freight estimates vary with shipment size, weight, distance and handling requirements. These rates help frame industrial equipment shipping costs, but they are not a complete landed-cost estimate. Loading, insurance, storage and onward delivery can add charges.

What are the average freight costs per Cubic Meter (m³)?

A cubic-metre rate prices occupied space, which is useful when equipment is bulky relative to its weight. The shipment category and other freight components affect the estimate, so the volume rate alone does not represent the total transport cost.

What factors affect freight rates?

Freight rates reflect weight, volume, distance, handling requirements, equipment stowability and liability exposure. The method matters too: a machine that fits a standard container has different transport needs from oversized cargo requiring a flat rack. Delivery timing, route access, loading arrangements and the need for a freight forwarder can affect the total. For international shipments, customs clearance, warehousing and onward transport may form part of the wider logistics cost.

How are industrial equipment shipping rates calculated in Australia?

Australian freight rates can be calculated using weight, volume, distance or a combination of these measures. Freight classification also considers stowability, handling, liability and perishability. A practical estimate separates the main transport charge from associated services such as loading, insurance and delivery to the final destination. Two machines of equal weight, for example, may have different freight requirements if one occupies more space or needs specialised handling.

What extra charges apply for loading, unloading, cranes, forklifts, and tail-lift delivery?

Loading and unloading may be charged separately when machinery needs specialised lifting or additional handling. Crane or forklift requirements depend on the equipment, site access and how the load transfers between the pickup point, vehicle and delivery location. Identify tail-lift delivery as another service requirement in the transport scope. Describe the machinery and conditions at both sites so the estimate accounts for handling, not just linehaul.

How do equipment dimensions, weight, distance, and route affect shipping costs?

Weight affects capacity and weight-based rates, while dimensions determine occupied space and whether standard transport equipment can accommodate the load. Distance affects the transport component, and route conditions can change vehicle and handling requirements. For oversized machinery, the route also informs permit planning across relevant Australian jurisdictions. Include projections, attached components and the destination in the shipment details so the transport assessment reflects the machine’s actual configuration.

What are the costs of shipping industrial equipment to Australia from overseas, including customs and GST?

Overseas shipping costs combine international freight with the services needed to move cargo through arrival and onward delivery. Customs clearance, required invoices and declarations, quarantine inspection, port handling and domestic transport can contribute to the landed cost. GST is a separate import-cost consideration from the carrier’s freight charge. Assess its treatment as part of the import calculation rather than assuming it is included in an international freight rate.

How can businesses get accurate freight quotes and reduce industrial equipment shipping costs?

To estimate industrial equipment shipping costs accurately, provide the equipment’s packed dimensions, total weight, pickup and delivery locations, condition, handling needs and preferred timing. Include attachments and accessories, as these affect the packing plan and space required. To manage costs, assess whether dismantling reduces freight and handling enough to justify the labour, and consolidate related items where practical. A clearly scoped request makes it easier to identify separate transport, loading, insurance and delivery charges.

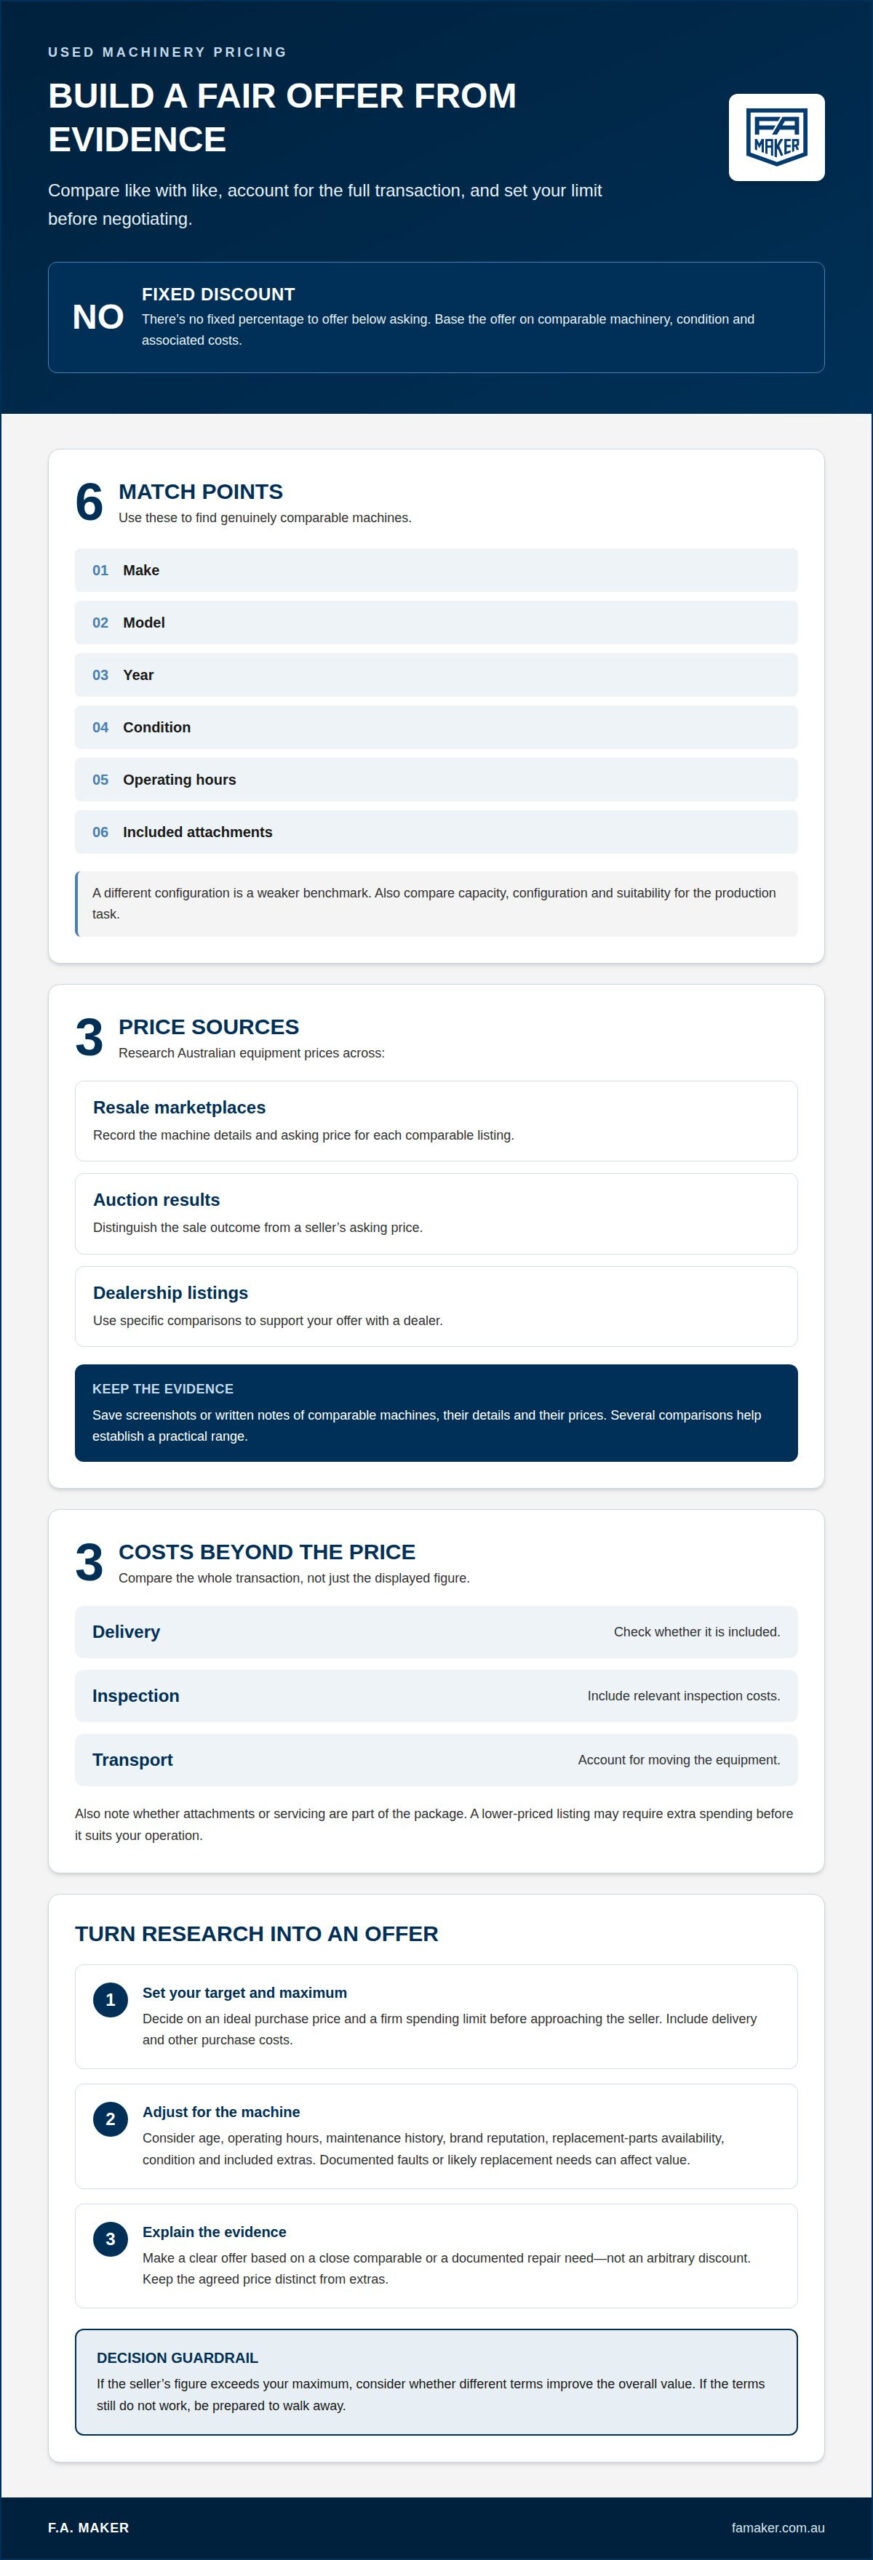
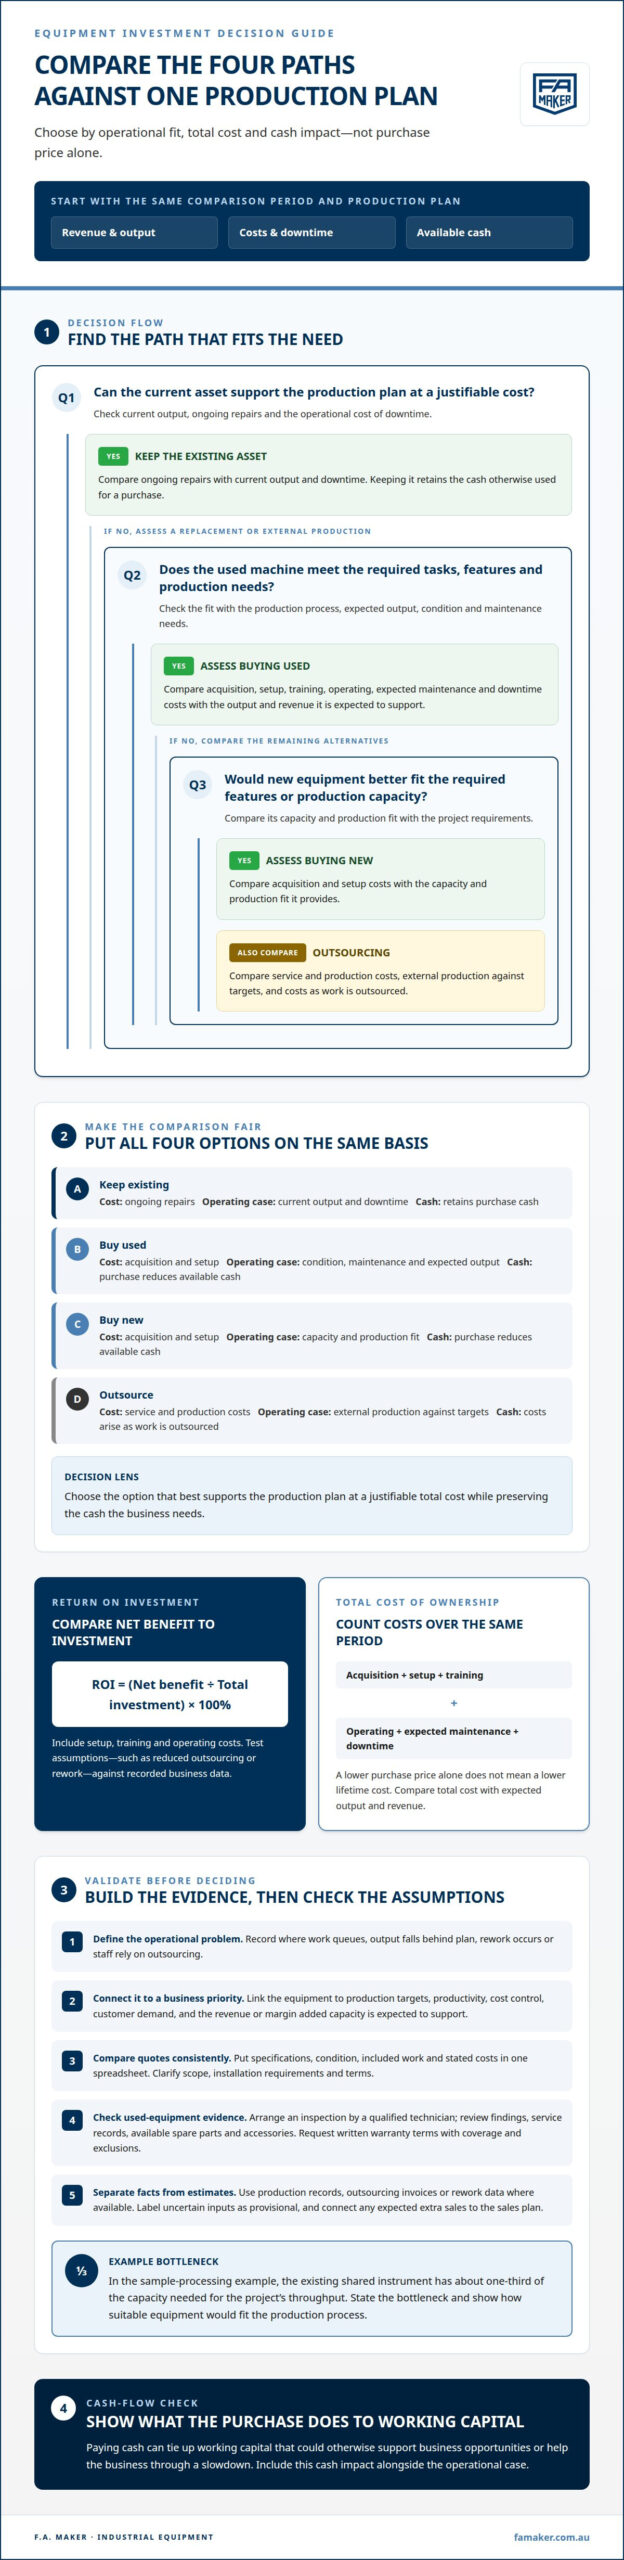
Planning a Production Line Move: Key Equipment, Site and Utility Decisions

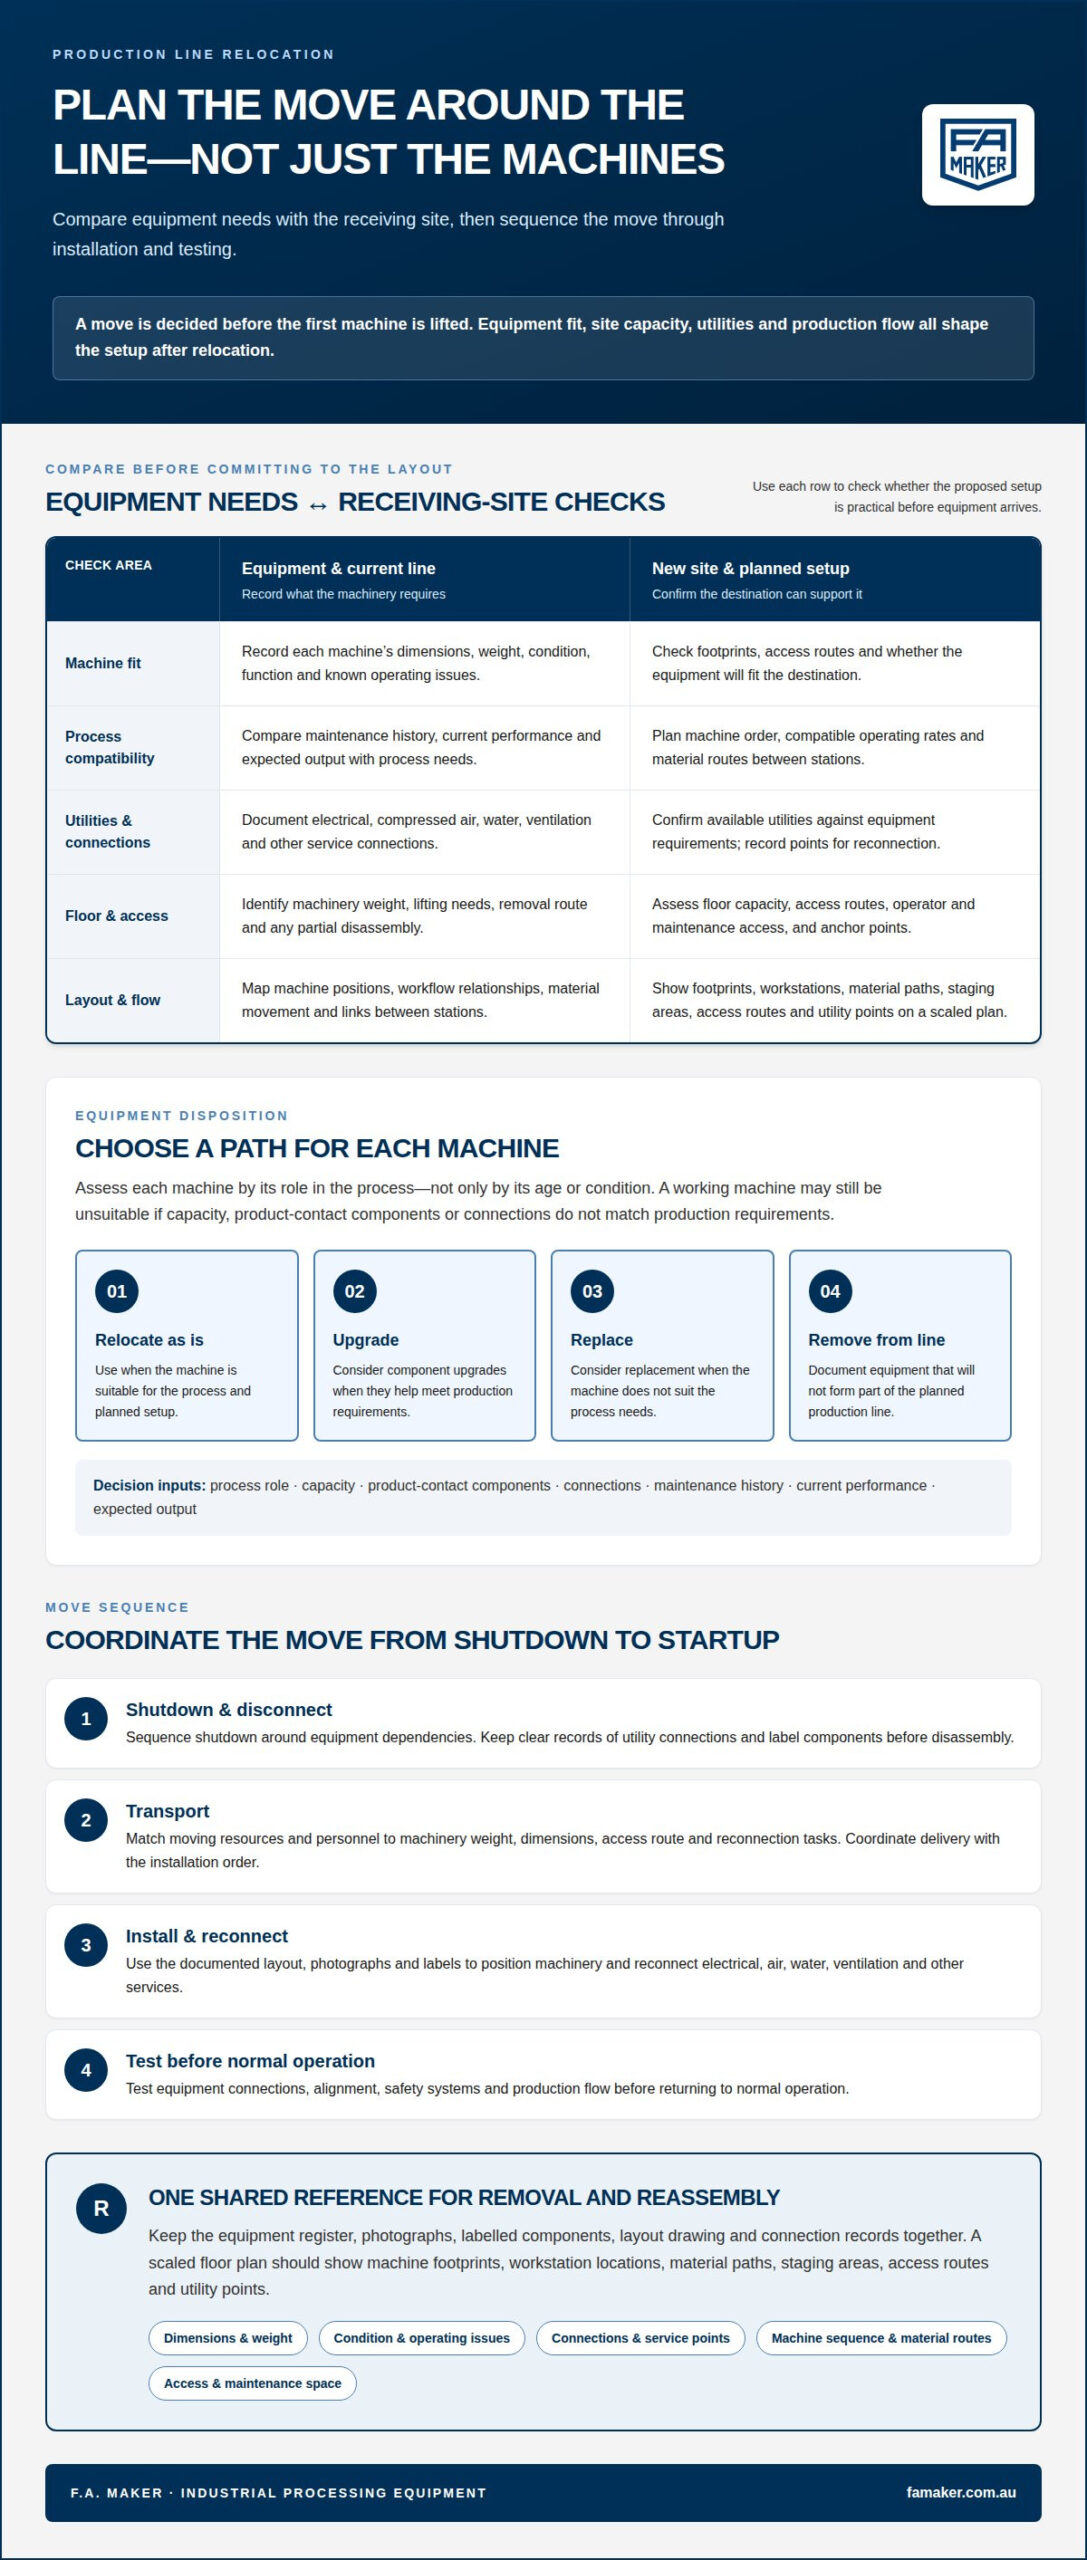
A production line move is decided before the first machine is lifted. Planning a production line move means assessing equipment condition and suitability, confirming the new site can accommodate the machinery and its utilities, and sequencing removal, transport, reinstallation and testing. These decisions shape how the line will operate after the move.

Relocation involves more than moving machines between buildings. Equipment dimensions, weight, connections, access routes, floor capacity and production flow all affect the setup. Gaps in planning can delay installation or disrupt operations.

This article explains how to assess equipment for relocation, upgrades or replacement, evaluate a new site, and plan its layout and utilities. It also covers documentation, transport and setup challenges, helping you organise the move around the production line and the receiving facility.

Key Takeaways

  • Record each machine’s dimensions, weight, condition, connections and position before dismantling to support transport and accurate reassembly.
  • Assess the new site’s access routes, floor capacity, layout and available utilities against the equipment’s operating requirements.
  • Plan the line around product flow, material movement, maintenance access and safety, while accounting for future production needs.
  • Coordinate utility disconnection and reconnection with clear records of electrical, air, water, gas, data and process-piping connections.
  • Sequence delivery, installation and startup, then test equipment connections, alignment, safety systems and production flow before returning to normal operation.

1. Evaluating equipment for relocation, upgrades or replacement

Start with an equipment register identifying each machine, its function, condition and place in the production sequence. Record dimensions, weight, photographs, service connections and known operating issues. Add a layout drawing showing machine positions, material routes and links between stations. This gives the relocation team a reference for removal and reassembly and helps identify equipment that may not fit the destination site.

For an Australian factory relocation, the equipment needed depends on machinery weight, dimensions and access. Moving resources may include cranes, gantries, forklifts or specialised skates. Specialist support may include machinery relocation crews, rigging teams, electrical and utility trades, and technicians for installation and commissioning. Equipment and personnel must suit the lift, route and reconnection tasks.

Assess each machine by its role in the process, not just its age or condition. A machine in working order may still be unsuitable if its capacity, product-contact components or connections do not match the new production requirements. Compare its maintenance history, current performance and expected output with process needs. Then decide whether to relocate it as is, upgrade components, replace it or remove it from the line.

Review the production sequence station by station. A filler, conveyor and packaging machine, for example, must operate at compatible rates and connect in the correct order. Consider whether automation changes are needed and whether manual tasks still suit the product and workflow. Aim for a configuration that supports consistent operation without unnecessary handling or bottlenecks.

Use the existing layout to plan equipment placement at the destination. Mark each machine’s footprint, service points, operator access and maintenance space. Include material flow and the route for components between stations. Engineers should also assess whether the floor can support each machine and whether anchor points meet manufacturer requirements. These checks help determine whether the proposed layout is practical before equipment arrives.

  • Label components before disassembly and link each label to the layout drawing and photographs.
  • Record connections, including electrical, compressed air, water and ventilation, for accurate reconnection.
  • Identify machines that need partial disassembly, lifting equipment or specialised rigging to leave the building.

Compare the line’s current workflow with the intended setup. A move offers an opportunity to correct poor positioning, but changes should reflect process requirements and equipment compatibility. Document the chosen layout, machine sequence and planned upgrades together. Clear records help coordinate removal, transport and installation, reducing confusion during reassembly.

Before disassembly, document machine positions, connections and workflow relationships. Confirm the inventory and condition records support decisions about compatibility, workflow, safety and future scalability.

2. Planning a Production Line Move?

A production line arranges machines and workstations in the sequence used to make a product. Each station performs a defined task, so the layout should support a clear workflow from incoming materials to finished goods. In manufacturing, even a short detour between stations can add handling and make inventory harder to manage.

To create a move schedule and minimise downtime, define the timeline, resources, budget, objectives, milestones and performance indicators. Sequence shutdown, disconnection, transport, installation and testing around equipment dependencies. If production can be phased, keep critical processes running while other equipment moves, and schedule work during planned shutdowns where practical.

Begin the layout plan by mapping the current value stream: how materials, people and information move through production. Mark each process, hand-off, queue and inventory point. This can reveal unnecessary movement and bottlenecks before the line is recreated. For example, if packaging materials repeatedly cross the product route, positioning storage closer to the relevant station may reduce those crossings.

A lean plant layout groups connected processes to support flow rather than separating every machine by department. The right arrangement depends on product requirements, available space, maintenance access and safe movement. Keep material routes direct, provide workable access around equipment, and allow components to move between stations without obstructing operators or replenishment. A shorter route is useful only when it also supports safe operation and process needs.

Document the proposed arrangement in a scaled floor plan. Show machine footprints, workstation locations, material paths, staging areas, access routes and utility points. Add a sequence diagram linking each station to its upstream and downstream processes. These records give installation teams a shared reference and help identify layout conflicts before machinery is positioned.

Use the planned workflow to balance work across stations. If one operation takes longer than the next, work may accumulate between them or leave downstream equipment waiting. Redistributing tasks, adjusting station placement or adding a suitable buffer can help manage variation. The layout should also accommodate product variety without excessive handling or unnecessary inventory.

  • List each move milestone, responsible role, required resource and completion measure.
  • Coordinate machinery delivery with installation order to limit staging and temporary storage.
  • Plan supplier shipments and inventory levels around the transition between sites.

Keep the schedule and layout linked. A change to the order of installation can affect access, connections and the commissioning sequence. A structured production line relocation plan ties each milestone to the physical arrangement, helping teams coordinate work and track readiness before production restarts.
3. Assessing the reasons for relocation and suitability of a new site

Start by defining why the existing facility no longer suits production. A company may need more floor space, better access to suppliers, a larger labour pool or closer proximity to customers. Compare these needs with the destination’s infrastructure, workforce availability, market access and operating requirements. A move that solves a space constraint may still create supply delays if key materials become harder to obtain.

Assess the new site against the production process, not just its total floor area. Measure access points, door clearances, internal routes and the space required for machinery, assembly and maintenance. Trace the intended route from the delivery point to each machine’s final position. A machine may fit in the production area but still be difficult to move through a doorway or around a structural obstruction.

To assess the floor, power, utilities and layout, compare equipment requirements with the facility’s physical capacity and service points. Confirm floor loading and anchor locations with engineering input, then compare electrical demand and utility connections with machine requirements. Map these findings onto a proposed layout before moving equipment.

Walk the proposed route with equipment dimensions and transport needs in hand. Check turning areas, ramps, columns and overhead obstructions, as well as access for lifting equipment. The floor must support machinery in its operating position, and anchor points must meet manufacturer requirements. If the route or placement conflicts with the equipment, revise the layout or prepare the area before transport.

Map the current process from incoming materials through each production station to dispatch. Record queues, handling steps and waiting time to identify bottlenecks. A station breakdown can slow or stop the entire line, so note where a single machine sets the pace. Use this process map to decide whether the new site should preserve the sequence or address a known constraint.

Site suitability also depends on the services connected to the machinery. Plot electrical, compressed-air, water, gas, data and communication points, along with process piping. Compare their positions with the proposed machine arrangement. Long or obstructed connection routes can complicate installation and limit maintenance access. Consider environmental conditions such as temperature and humidity where they may affect product quality or equipment operation.

  • Record the reason for moving and the operational result the destination must support.
  • Overlay machine positions, access routes, utilities and material flow on one facility plan.
  • Identify floor repairs, reinforcement, utility installation and access preparation before machinery arrives.

Assess labour availability, supplier proximity and customer access alongside the physical facility. These factors affect how materials reach production and how finished goods leave the site. A suitable destination supports the whole process, from equipment installation through ongoing operation.

Planning a Production Line Move: Key Equipment, Site and Utility Decisions

4. Planning utility disconnection and reconnection

Disconnect, transport and recommission machinery in a documented sequence led by skilled personnel. Record each service connection before isolation and protect sensitive components during transport. Reconnect and test utilities before production resumes.

Build a connection schedule for every machine, not just the main production equipment. Include electrical supply, compressed air, water, gas, ventilation, data and communication lines, as well as process piping where used. Identify each connection point, isolation method, route and machine served. A bottle filler, for example, may rely on several services that must be restored in the correct order for its controls and process functions to work.

Before disconnection, photograph connection points and label both ends of each removable cable, hose or pipe. Link each label to the machine identifier and a connection drawing. Record unusual fittings, flow direction and control-system interfaces. This gives installation teams a clear reference and reduces the risk of connecting a service to the wrong machine or port.

Coordinate isolation with the production shutdown and removal sequence. State which machine is isolated first, who is responsible and when the equipment can be moved. Skilled electrical and mechanical personnel should handle work within their scope. Keep connection records with the machine’s transport documentation so they are available at the destination.

Protect utility interfaces and sensitive components during transport. Cap open pipework and hose ends to limit contamination or damage, and secure cables so they cannot snag or strain connectors. Protect motors, sensors and control systems from impact and movement. Mark components removed for transport and store them with their machine identification, rather than relying on memory during reassembly.

At the new facility, compare installed service points with the connection drawings before reconnection. Confirm that electrical service, compressed air, ventilation and other utilities suit the equipment’s operating demands. Check that routing does not obstruct access, create trip hazards or interfere with moving parts. A mismatch between planned connections and actual service locations can delay commissioning and affect output.

  • Match each labelled connection to its machine and drawing before reconnection.
  • Check fittings, routing and visible condition before restoring each service.
  • Test controls and machine functions after utilities are restored, before introducing product.

Bring systems online gradually and test individual machines before running the full line. Verify utility connections, safety systems, automation controls and communication between linked equipment. A dry run without product can reveal leaks, incorrect rotation, control faults or workflow interruptions. Record results and outstanding adjustments, then confirm the line operates as expected before returning it to production.

Keep utility records with the final installation documentation. Current drawings of connections and isolation points support maintenance and future changes. They also help teams identify the services critical to each station, so later adjustments can be planned without disrupting unrelated equipment.

5. Technical and operational setup challenges

A move brings technical and operational challenges beyond lifting and transport. Installation timing, site readiness, machine alignment and workforce preparation must fit together. If one task falls behind, equipment may arrive before its foundations, utilities or access routes are ready. A coordinated plan links each machine’s delivery to its installation sequence and assigned responsibilities.

In Australia, permit requirements depend on the work planned at the destination, such as structural changes or new building and utility work. Identify approvals relevant to the site and project scope before work begins. Safety planning should cover pre-move risk assessments, clear responsibilities, safe lifting and handling practices, and coordinated installation schedules.

Transport planning must account for machinery dimensions, weight, access and lifting requirements. Check the route from the current position to the loading area, then assess the destination route and staging space. Cranes, forklifts, gantries or specialised skates may suit different equipment and placements. Protect motors, sensors and control systems from impact, and label removed components so they return to the correct machine.

At the new facility, prepare foundations, floor repairs or reinforcement, utility connections and access routes before delivery. Match equipment arrival to installation order to avoid unnecessary temporary storage or blocked work areas. A contingency plan should cover transport interruptions, installation conflicts, schedule delays, equipment staging and temporary storage. Assign responsibility for each issue so teams can respond without losing sight of the critical path.

Recommissioning should progress from individual machine checks to a full-line test. Verify alignment, connections, safety systems and automation controls, then run a dry cycle to observe communication between stations. Once the line functions without product, test it with the intended materials and product specifications. This can reveal issues an empty run will not show, including handling faults or quality variation.

Validate output against defined production targets and quality criteria. Record performance indicators such as throughput, rejects, cycle times and stoppages, then compare results with the agreed baseline. If a station limits the line, adjust its setup or workflow before increasing production. Continue monitoring after startup to identify reliability or efficiency problems that emerge during normal operation.

  • Prepare a risk register covering transport, installation, site readiness and production restart.
  • Train operators on the relocated equipment, safety procedures and changed task sequences.
  • Document test results, outstanding faults and corrective actions before normal production resumes.

For support coordinating machinery transport and installation, discuss a production line relocation.

Production line setup requires upfront investment in machinery, infrastructure and training. Train workers to operate production equipment, follow safety protocols and understand their roles. Automated standard operating procedures can guide workers through approved setup workflows and help reduce errors. Digital checklists can also help teams follow and document setup steps consistently.

Account for temperature and humidity in production line setup, as environmental conditions can affect product quality and machine efficiency. During relocation, laser tracking and other metrology techniques can support precise machinery transport. Following approved workflows and documenting setup steps can help teams prepare equipment consistently for operation.

F.A. Maker

F.A. Maker provides machinery relocation support for production line moves, helping businesses manage the practical transition of processing equipment. This support can be useful when machinery needs relocating or the new setup calls for different equipment. F.A. Maker’s range includes used stainless steel tanks, centrifuges and separators, industrial mixers and blenders, and pumps and valves.

For a planned move, consider how machinery requirements align with the intended process and facility layout. F.A. Maker supports machinery relocation and equipment needs as part of that planning, including when a line requires suitable processing equipment alongside the move.

Contact F.A. Maker to discuss your production line relocation requirements.

Set the Next Move in Motion

Planning a production line move also offers an opportunity to make the next phase of operation more deliberate. Use relocation decisions to clarify which process changes are essential, which can wait, and how the team will assess readiness to resume production. A clear handover between planning, installation and operations keeps those decisions connected.

Before the move proceeds, bring the key decisions into one working plan: the intended line configuration, site preparation, utility sequence, installation responsibilities and restart checks. Keep the plan current as practical details develop, so changes to one task are reflected in dependent tasks. This gives the team a shared basis for coordinating the transition and managing the return to production.

Where machinery relocation or processing equipment requirements form part of your next step, contact F.A. Maker to discuss your project. A considered plan gives your team a practical foundation for moving forward with confidence.

Frequently Asked Questions

Planning a Production Line Move?

Planning a production line move starts with a clear operational objective and one person responsible for coordinating decisions. Define what must be ready before production can restart, such as priority products, available inventory and customer commitments. Agree who can approve changes during the move, and set go or no-go conditions for the production handover. This keeps operational priorities visible when installation decisions affect the restart plan.

What are the steps to plan a production line move?

First, set the move objective and assign decision owners. Then link each task to its prerequisites, such as site readiness before machinery installation and completed installation before production trials. Add approval points where the team must review progress before proceeding. Keep one controlled schedule and record changes, including their effect on dependent tasks. This makes conflicting instructions easier to spot and gives operations a clear basis for accepting the handover.

What risks and contingencies should a production line relocation plan cover?

Plan for disruptions that could prevent the next task from starting, including delayed equipment, missing components, unavailable services, transport interruptions or a failed production test. For each scenario, name the responsible decision-maker, the response and the conditions for restarting work. For example, if a critical component is missing, define whether installation pauses or another planned task continues. Include supplier communication and workforce coverage so the team can make operational decisions without improvising.

Industrial Equipment Rigging Services for Heavy Equipment

A heavy machine can be ready to move and still be difficult to lift safely from its current position. An industrial equipment rigging company plans the lift around the load’s weight, balance, required reach and site constraints, then selects suitable cranes and rigging gear. The work may involve more than lifting: equipment may also need to be dismantled, repositioned and reassembled as part of a relocation or installation.

Rigging requires careful coordination because heavy equipment, restricted access and nearby obstructions can affect how a move is carried out. This article explains the equipment used in industrial rigging, how crane capacity is matched to a lift, and the planning and safety considerations that shape the work. It also outlines how rigging supports machinery moves across industries, so you can understand what a project may involve before deciding on next steps.

Key Takeaways

  • Understand how rigging plans account for load weight, balance, access and obstructions before equipment is moved.
  • See why crane selection depends on both the load and the reach required at the site.
  • Learn how industrial rigging can include lifting, equipment disassembly, relocation and reassembly.
  • Explore how rigging needs vary across industries and production environments.
  • Identify the project details that influence rigging costs in Australia, from site conditions to the equipment and work involved.

Q2: What equipment is commonly used in industrial rigging?

Industrial rigging uses cranes, forklifts, gantries, jacks and machinery skates to position heavy loads. Slings, shackles and wire rope connect a machine to lifting equipment. The right combination depends on the load’s weight, balance, lifting points, required height and site access. For example, a gantry may suit a controlled lift inside a production hall where a mobile crane cannot reach.

Professional riggers bring the equipment knowledge and coordination needed to manage complex moves. A heavy mixer or separator can be difficult to manoeuvre through a manufacturing plant, especially near walls, services or other machinery. Specialists assess the load and route, then choose lifting gear to support stable movement. Crew members coordinate the lift using agreed signals or radio communication, helping avoid confusion during critical steps.

Typical equipment has a distinct role in the lift:

  • Cranes and gantries: Raise loads and position them at the required height or over an obstruction.
  • Forklifts: Move suitable machinery across accessible floors and loading areas, requiring qualified personnel with forklift truck operator training to manage loads safely.
  • Jacks and skates: Raise equipment enough to place it on rollers, then guide it across a floor.
  • Slings, shackles and wire rope: Connect the load to lifting equipment, with the rigging arrangement matched to its lifting points.

Before lifting, riggers calculate the load and review drawings or machine details. They inspect each rigging component for wear, damage and alignment, then assess the lift path and potential obstructions. During the move, the team monitors load stability and keeps people clear of the area beneath a suspended load. These steps are especially important when a machine must pass through a restricted doorway or be placed precisely beside a production line.

What factors affect the cost of machinery moving and installation? The main factors are the machine’s weight and dimensions, lift height and distance, site access, the crane and rigging equipment required, and whether disassembly or reassembly is needed. Moving equipment inside an open factory differs from lifting it over an obstruction or manoeuvring it through a confined route.

Which industrial rigging companies operate near me in Australia? The right provider depends on the facility’s state or territory, the lift requirements and the equipment needed on site. For machinery moves, F.A. Maker provides Machinery Relocation Services, including project planning, disassembly, transport and reassembly.

A professional machinery relocation service brings planning and communication into one organised process. The team assesses the load, selects the rigging arrangement, plans the machinery’s route and coordinates the lifting work. For a production-line relocation, this can include lifting a machine clear, moving it through the facility and positioning it for installation. A defined sequence supports a controlled move and helps protect the equipment.

Crane capacities and equipment

Crane selection starts with the load’s weight and the reach required at the site. A crane’s stated capacity does not describe every lift it can perform. Usable capacity changes with the crane configuration and the distance the load must extend from it. Riggers use load charts to match these conditions to a suitable crane, then account for the lifting arrangement and site obstructions. For example, a machine behind a building column may require a different reach from one lifted beside an open loading bay.

Project planning also considers the load’s dimensions, centre of gravity, lifting points and the surface available for crane setup. Slings and shackles connect machinery to the crane, and their arrangement affects how the load hangs. A balanced lift helps control movement during raising and placement. If access is restricted, the rigging plan may need a different crane position or lifting sequence. Make these decisions before equipment arrives on site, not during an active lift.

Crane hire can suit a project when the required capacity or configuration is specific to the job. Start by defining the load, lift radius, required height and available setup space. The crane and lifting equipment must work together under those conditions. A crane capable of lifting a machine in one position may have less capacity at greater reach. This is why a load chart, rather than a single headline capacity, guides equipment selection.

  • Weight and balance: Determine the load and identify lifting points before choosing a crane.
  • Reach and height: Match the crane configuration to the lift position and placement height.
  • Site access: Consider obstructions, setup space and the route equipment must take.
  • Rigging gear: Select compatible slings and shackles for the planned connection.

Crane maintenance supports reliable operation across repeated projects. Before a lift, the team should assess the crane and associated lifting equipment for condition, visible damage and correct operation. Inspection and maintenance intervals should follow the applicable equipment requirements and manufacturer instructions. Nobles states that lifting equipment in Australia should be inspected in accordance with the relevant Australian Standard. Inspection records help teams track equipment condition and address identified issues before lifting.

Hire arrangements also depend on how the crane will be used on site. A planned lift involving a brewery tank, for example, may require precise placement within an existing production area. The crane’s reach, setup position and coordination with slings all affect the plan. A lifting team should coordinate crane selection with the load and work sequence, keeping equipment capacity aligned with site conditions. This project-specific approach supports safe planning and operational compliance without relying on a crane’s maximum rating alone.

Company descriptions and specialities

Industrial rigging providers differ in the projects they plan and the equipment they handle. A crane contractor may focus on lifting and rigging, while a machinery relocation team may coordinate removal, transport, installation and positioning. These activities can overlap, but rigging does not necessarily include transportation. For example, a contractor may lift a production machine inside a factory without moving it off site.

Specialities also vary by load and work environment. Construction and infrastructure projects can involve positioning structural components or production assets, while a manufacturing site may need machinery moved around an operating plant. Some projects require disassembly before a lift and reassembly after placement. Others focus on a controlled removal or installation. Define the scope to match the contractor’s equipment, crew and experience to the task.

Safety systems are another point of distinction. The International Organization for Standardization (ISO) identifies ISO 45001 as a safety standard that reputable rigging companies adhere to. For a project team, this provides a useful reference when assessing how a contractor manages safety. It does not replace a clear, site-specific plan for the proposed lift, access route and work sequence.

Before engaging a contractor, assess the project against practical capability areas:

  • Relevant work: Review past projects involving similar machinery, access limits or installation requirements.
  • Resources: Consider whether the contractor has suitable lifting equipment, manpower and capacity for the planned load.
  • Scope: Establish whether the work covers lifting alone or also disassembly, removal and reassembly.
  • Coordination: Assess how the team communicates with site personnel and manages the work area.

A portfolio is most useful when it shows the type of work, not just the equipment pictured. A contractor that has handled a bottling line, for instance, may understand access and positioning around connected production equipment. A construction lift has different constraints from a machinery installation inside an existing plant. Reputation and customer support matter, too, because project changes can affect sequencing, access and coordination.

Inspection practices help establish whether the proposed equipment is suitable for the job. A sound process includes checking rigging components for wear, damage and alignment before lifting. The contractor should also explain how the lift will be coordinated, including hand signals or radio communication where needed. These details clarify responsibilities and make the work sequence understandable to site personnel.

For any project, the right speciality is the one that matches the load and full scope. Compare the contractor’s relevant portfolio, resources, capacity, manpower, reputation and customer support with the task. A clear scope, such as removing and reinstalling a machine, makes those capabilities easier to assess.

Industrial Equipment Rigging Services for Heavy Equipment

Industries served

Industrial rigging supports projects across Australia wherever production equipment must be installed, repositioned or removed. Applications differ by industry: a food processor may need a filler placed within an existing line, while a manufacturer may need a mixer moved to another production area. The equipment, access route and operating environment shape the lift plan. Rigging can be part of a larger relocation, but lifting alone does not automatically include transportation.

In food and beverage processing, equipment layouts often connect several stages of production. A bottle filler, for example, must fit its intended position relative to the surrounding line. A rigging plan can account for the machine’s dimensions, access through the facility and placement sequence. At a dairy or beverage site, production requirements and nearby equipment influence when a move can take place and how the work area is managed.

Manufacturing sites use a wide range of machinery, so project scope depends on the specific asset and its function. An industrial mixer may need lifting for installation, while a production machine may need removal before a replacement is positioned. Each application calls for a defined sequence: identify the equipment, establish the route, plan the lift and coordinate placement with the facility’s operations.

  • Food and beverage: Position equipment such as bottle fillers within production layouts.
  • General manufacturing: Move machinery between production areas or prepare a line for installation.
  • Construction: Lift equipment or components into work areas with changing access conditions.
  • Infrastructure: Plan equipment placement around the site layout and surrounding assets.
  • Processing facilities: Coordinate machinery moves where connected production stages constrain access.

Construction and infrastructure projects may have different site constraints from an established factory. A construction site can change as work progresses, affecting access for cranes and delivery vehicles. At an infrastructure facility, existing structures and operating equipment can limit where a lift is set up. The rigging team should relate equipment positioning to the site plan rather than treating each lift as an isolated task.

For projects involving international equipment supply, rigging may follow delivery to the Australian facility. The local work still depends on the machine’s dimensions, lifting points, route and final position. Supplying equipment and rigging it into place are distinct activities, so the project scope should clarify where lifting, movement and installation responsibilities begin and end.

To discuss a project clearly, define the equipment, its destination and the work required around it. A facility manager relocating a mixer, for instance, can specify whether the task involves positioning only or includes removal and reinstallation. This distinction helps frame the lift plan around the actual operation, site layout and machinery’s role in production.

How much does industrial equipment rigging cost in Australia?

Industrial rigging has no single price because every move involves different equipment, access and work. The price depends on the project and is provided after a quote request. In an Australian factory, moving a compact machine across an open floor differs from lifting a large unit into position above nearby equipment. The load, route and installation scope all affect the work required.

Load characteristics influence the lifting plan and resources. Weight, dimensions, centre of gravity and available lifting points help determine the crane and rigging gear required. A tall machine may need careful positioning through a doorway, while an uneven load may require a specific sling arrangement. Height and reach matter too, because crane capacity depends on the lift configuration, not only its stated maximum capacity.

Site conditions shape the job. Restricted access, overhead obstructions, uneven setup areas and limited working space can change equipment choices or the movement sequence. For example, a machine behind a fixed production line may need a different approach from one beside a loading bay. Planning also accounts for the route from the machine’s current position to its destination, including turns and clearance points.

The quoted scope should distinguish lifting from related tasks. Machinery relocation may include preparation, disassembly, internal movement, placement and reassembly. Transport between facilities is a separate consideration and should be identified in the project requirements. Lifting a machine onto a prepared pad is different from removing and installing it within an operating production area.

Common cost drivers include:

  • Load details: Weight, dimensions, balance and lifting points.
  • Crane requirements: Capacity, configuration, reach and required height.
  • Access and setup: Floor conditions, obstructions, route and available space.
  • Rigging scope: Lifting gear, crew coordination and equipment positioning.
  • Additional work: Disassembly, reassembly or transport between locations.

To help define a quote, provide the machine’s identification and dimensions, its current and intended positions, and any available layout drawings. Explain whether the work includes relocation, installation or both. For a brewery machine, for instance, describing its location within the production area helps clarify access and the work sequence. Clear project details make it easier to match the proposed scope and equipment to the move.

For machinery planning connected to production equipment, discuss your equipment requirements as part of defining the project scope.

F.A. Maker: Industrial Mixers and Blenders

F.A. Maker is a practical next step when planning a machinery move also involves sourcing processing equipment. Its range includes Industrial Mixers and Blenders, Used Stainless Steel Tanks, Centrifuges and Separators, and Pumps and Valves. These options may suit facilities upgrading production equipment or considering replacement machinery alongside a relocation project.

For example, a processing site planning a new mixing line can explore industrial mixers and blenders, while a facility reviewing its liquid-handling setup may consider pumps and valves. Matching the equipment category to the production task helps clarify operational needs before finalising a machinery plan.

Contact F.A. Maker to discuss the processing equipment relevant to your project.

Plan the next equipment move with purpose

A machinery move is also a useful opportunity to review how the production line will operate after installation. Consider the equipment’s role, its place in the process and whether the planned layout supports the next production stage. This broader view keeps relocation decisions connected to operational needs rather than treating the lift as an isolated task.

An industrial equipment rigging company can coordinate the physical move, while equipment sourcing decisions shape what the facility needs in its new setup. F.A. Maker offers Industrial Mixers and Blenders, Used Stainless Steel Tanks, and Centrifuges and Separators for processing operations. These categories may be relevant when a project involves reviewing or changing production equipment alongside a planned move.

Set out the machinery involved and the intended production outcome, then take the next step in planning. Contact F.A. Maker about your rigging project to discuss how machinery relocation fits your equipment requirements. A clear plan gives your team a practical starting point for the work ahead.

Frequently Asked Questions

What’s Involved in Rigging?

Rigging prepares machinery or another heavy load for controlled movement and placement. The work can include selecting attachment points, connecting lifting gear, directing the lift and positioning the load at its destination. For a production machine, the rigging sequence may need to account for protruding components or a centre of gravity that shifts during handling. The scope may also include disassembly or reassembly when the equipment’s size limits access.

Q3: How does industrial rigging ensure safety on job sites?

Rigging safety depends on planning, equipment condition and clear coordination during the lift. Teams inspect components before use, agree on hand signals or radio communication, and keep people clear of the suspended load area. They also monitor load stability and prepare for interruptions, such as changing weather or equipment problems. In New South Wales, SafeWork NSW guidelines are relevant to rigging safety.

What services do industrial equipment rigging companies in Australia provide?

Services can include lifting, machinery removal, relocation, installation, disassembly and reassembly. Transportation may be coordinated with a separate industrial transport team, so do not assume it forms part of every rigging job. F.A. Maker provides Machinery Relocation Services for industrial processing equipment, including project planning, disassembly, transport and reassembly. The required scope depends on whether machinery is moving within one facility or between locations.

How do I choose a licensed and insured rigging company in Australia?

Start by establishing which licences and insurance documents apply to the specific work and location. A suitable contractor should be able to explain its credentials and provide relevant documentation for the project scope. Also assess its past work, lifting capacity, manpower, equipment and approach to site coordination. For a machinery installation, experience with similar loads and confined production areas can be especially relevant.

How do rigging companies assess a site and plan a heavy equipment lift?

A site assessment connects the machine’s details with its route and final position. The team reviews load weight, height and travel distance, then considers access limits, obstructions and the available setup area. Layout drawings can help identify narrow passages or nearby structures. The plan then sets out the equipment arrangement, movement sequence and communication method, with changes addressed before the lift proceeds.

What is the process for relocating and installing industrial machinery?

A machinery relocation typically starts by defining the equipment, destination and work scope. If the machine cannot pass through the available route intact, the process may include disassembly. The team then coordinates lifting and movement, positions the equipment at its destination, and completes reassembly where required. Transport between facilities may also form part of a wider project, coordinated with industrial transportation teams.

What risks are involved in industrial equipment rigging, and how are they managed?

Rigging hazards include power-line contact, shock loading, falling equipment or debris, slips, equipment failure and pinch points. Teams reduce exposure by inspecting components, controlling access around the lift and coordinating instructions clearly. They also monitor load stability and plan for disruptions, including adverse weather. A defined movement path helps identify where machinery, personnel or site conditions could create additional risks.

Industrial blending equipment for powders that fits your process

A mixer and a blender do not always do the same job. Mixing is a broad term for combining materials, while blending usually means distributing dry powders evenly. The right industrial blending equipment for powders depends on the materials, batch size and production process, not just the machine’s name.

That distinction matters when comparing equipment. Particle size, density and flowability affect how powders move and combine. Batch volume and cleaning requirements also influence the equipment and its configuration.

This guide explains how mixing differs from blending and outlines practical factors for comparing blender types, capacity, plant layout and stainless-steel requirements. It also covers cleaning and contamination control, helping you focus on equipment suited to your process rather than relying on a label alone.

Key Takeaways

  • Distinguish blending dry powders into a uniform mixture from the broader task of mixing materials, then match the equipment to the process.
  • Assess particle size, shape, density and flowability, alongside cleaning access and contamination risks, when comparing equipment.
  • Size the blender around the volume required per batch. Ribbon blenders normally need to be filled to 40-50% of rated capacity.
  • Compare ribbon, V and double-cone blenders by the mixing intensity and handling needs of the powders, not by machine type alone.
  • Account for plant layout and stainless-steel requirements as well as consistent mixing performance when narrowing equipment options.

1. Material compatibility and contamination resistance

Start by matching powder properties to the blender’s material and contact surfaces. Consider particle size, shape, density and flowability, then assess whether the powder may cause corrosion or abrasion. Abrasive material can wear surfaces over time, while corrosion can complicate cleaning. These factors matter in manufacturing because residue from one batch can affect the next batch’s composition and consistency.

Cleaning access is part of equipment selection, not a task to leave until production begins. Accessible components, smooth surfaces and parts that can be disassembled help operators clean powder-contact areas thoroughly. For example, powder trapped around a hard-to-reach joint may remain after routine cleaning. A design that opens for inspection makes those areas easier to identify and clean between batches. The cleaning method should suit both the equipment and the materials processed.

In Australia, practical options for sanitary or food-grade powder blending include stainless-steel equipment designed for accessible cleaning and intermediate bulk container (IBC) blending. These are equipment and process choices, not a guarantee of food-grade certification. The right option depends on the powder, cleaning requirements and production process. Smooth surfaces, accessible components and easy disassembly support cleaning and help reduce the risk of cross-contamination between products.

IBC blending takes place inside the container, so the container can be cleaned or changed between batches instead of cleaning the blender itself. Switching between IBC sizes on the same blending device can support different batch volumes. No single IBC capacity suits every process. Choose a capacity based on the required batch volume, the powder’s handling properties and the space available for moving and storing containers.

For each changeover, follow a defined sequence: empty the previous batch, inspect powder-contact areas, clean them using a method suited to the material, then check for visible residue before loading the next batch. Pay particular attention to outlets, seals, covers and transfer points, where powder can collect. Chemical powders also require adequate cleaning between batches to reduce contamination risk. Base the sequence on the materials involved rather than assuming one method suits every powder.

Finally, connect cleaning checks to blend quality. Representative samples from different stages can help monitor consistency, while residue checks address contamination between batches. Under-blending may leave pockets of unmixed powder; over-blending can reduce particle size and alter physical or chemical properties. If a powder is abrasive, corrosive or difficult to remove, account for those characteristics when selecting equipment and planning changeovers.

2. Blender fill levels and small-batch flexibility

Start with the quantity needed for each production run, not the blender’s maximum possible load. Record the target batch volume, how often batches run and whether recipes change between runs. For example, a line making several powder formulations may need frequent smaller batches, while a stable recipe may suit longer runs. These requirements shape equipment capacity and the time available for loading, blending, discharge and cleaning.

Rated capacity alone doesn’t tell you whether a blender will mix effectively at your working load. Ribbon blenders normally need to be filled to 40-50% of their rated capacity. A process that routinely needs less material may therefore be a poor match for an oversized ribbon blender. The working quantity must allow the mixing mechanism to move the powder through the vessel rather than leaving material outside the effective mixing zone.

Powder behaviour also affects practical batch size. Particle size, density and flowability influence how materials move through a blender. Gentle mixing may suit fragile particles, while another blend may need more active movement to achieve homogeneity. Batch trials can compare the recipe, loading sequence and mixing time. Representative samples from different stages help reveal whether the blend is consistent.

Throughput depends on more than the quantity loaded. Include loading, blending, discharge and changeover when estimating how many batches fit into a production shift. A larger batch can reduce the number of cycles, but may extend handling or cleaning. Smaller batches offer flexibility for varied recipes, yet require more frequent material transfers and changeovers. The best fit balances usable batch volume with the actual production schedule.

Batch processing suits operations that need discrete recipes, controlled quantities or product changeovers. Continuous processing moves material through successive stages without dividing production into individual batches. The right arrangement depends on recipe variation, feed consistency, downstream handling and plant workflow. Map the route from powder supply to blending and discharge. A batch blender needs loading and receiving points that fit the production layout.

Combustible powder requires dust control and explosion protection suited to the material and installation. There is no universal setup: powder characteristics, dust-release points and equipment arrangement shape the hazard assessment and protective design. Include these considerations when assessing batch size, feed and discharge interfaces, rather than treating dust management as an add-on.

For a process built around ribbon blending, industrial mixers and blenders can be considered alongside the required working batch and production sequence.

3. Industrial blender and mixer types

Powder blending combines dry ingredients into a uniform product, while mixing can describe combining materials more broadly. This distinction helps define the equipment’s job before comparing designs. Industrial blending equipment for powders must suit the application and the mixing intensity required. Some ingredients need gentle movement; others require more active mixing to reach a homogeneous blend.

Ribbon blenders, V-blenders and double-cone blenders are used for industrial powder blending. Ribbon blenders use an internal mechanism to move powder through the vessel. V-blenders and double-cone blenders rotate their vessels, moving material through the blend. As these designs produce different movement patterns, assess how each handles your specific powder combination rather than choosing by machine name alone.

Materials and production goals should guide the comparison. Particle size, shape, density and flowability affect how ingredients move during blending. Consider whether the process prioritises gentle handling, efficient movement or a defined level of blend uniformity. Industrial blending equipment for powders should also match the required batch volume and production sequence. A machine suited to one recipe may not suit another with different material properties.

To choose a powder blender, define the desired blend outcome, identify the materials and expected throughput, then compare the mixing action with those requirements. Assess representative samples from different stages to monitor consistency. Under-blending can leave pockets of unmixed ingredients; over-blending may reduce particle size and affect physical or chemical properties. Sampling and process observations are useful parts of equipment evaluation.

Australian safety requirements for industrial powder mixers depend on the powder hazard and the installation. Consider dust release, dust control and explosion protection as part of process design. The material and equipment arrangement inform the measures needed, so a generic specification cannot address every plant or powder.

Australian suppliers and manufacturers offer industrial powder blending equipment in several configurations, including ribbon, V and double-cone designs. Compare options by mixing action, material suitability, throughput and the uniformity the process requires. Supplier descriptions are a starting point, but the practical choice depends on how the equipment fits actual production conditions. These criteria help narrow the options without assuming one blender type suits every application.

Finish the comparison by matching each design’s advantages and limitations to the application. The required mixing intensity varies by powder: some need gentle blending, while others need more active mixing to achieve homogeneity.

Industrial blending equipment for powders that fits your process

4. Plant integration and space requirements

Plan the powder route before positioning a blender. Map each transfer from receiving and storage through feeding, blending, discharge and packing. For example, a batch process may move powder from a storage vessel into a blender, then send the finished blend to a packing point. Each hand-off needs a workable connection, so the layout supports product flow rather than adding unnecessary handling.

Plant dimensions are only one part of the space assessment. Include the blender’s position, feed and discharge paths, operator and cleaning access, and room to handle containers. A compact installation can still be difficult to operate if a discharge point sits behind another machine. Consider how covers open and components are accessed, then position equipment so routine cleaning and inspection fit the available area.

Powder properties influence the transfer method. Particle size, shape, density and flowability affect how material moves from storage into the blender. A free-flowing ingredient may feed differently from a powder that tends to bridge or generate dust. Review the complete route, including chutes, hoppers and transfer points. A suitable blender cannot compensate for interruptions before material reaches the vessel.

Match the blender’s discharge to the next production stage. A batch may move into an intermediate container, a downstream process or a packing line. For example, a plant filling bags needs a clear route from the blender outlet to the packing area, without crossing incoming ingredients. Separating these routes can simplify material identification and reduce unnecessary movement through the production space.

Compare transfer methods with the plant’s physical arrangement and process needs. Gravity transfer depends on suitable equipment positioning, while mechanical conveying can connect equipment along a different route. Each method affects access, handling and how easily powder can be removed from the transfer path during a product change. Choose an arrangement that fits the actual material route, rather than designing around the blender alone.

Dust control also belongs in the layout plan. Identify where powder is exposed during loading, discharge and transfer, then account for those points when arranging extraction and containment. For combustible powders, the material hazard and installation inform the required protection. Mark potential dust-release locations on the process drawing so they are considered alongside equipment placement.

Before installation, trace a representative production run on the plant layout. Follow the ingredients from receipt to storage, through blending, and onward to packing or the next process. Mark operator access, cleaning points, transfer connections and container movement areas. This practical walkthrough can reveal conflicts before equipment placement is finalised, such as a blocked access route or a transfer path crossing finished-product handling.

5. Stainless-steel blending equipment

Stainless steel is a material choice, not proof that a blender suits every powder. Start by checking how the ingredients interact with product-contact surfaces. Corrosive powders can affect equipment materials, while abrasive particles can wear them during repeated production. A pharmaceutical blend, for example, may have different contamination controls from an industrial mineral powder. Match material selection to the product, cleaning method and operating conditions.

Inspect the surfaces and contact areas that powders encounter, including the vessel, outlet, covers and seals. Smooth surfaces, accessible components and easy disassembly support thorough cleaning between batches. Look closely at joints and discharge points, where residue may collect after ingredients are combined. A surface that appears clean from outside may still conceal powder in a hard-to-reach area, so access for inspection matters as much as the vessel material.

Stainless-steel construction alone does not establish sanitary or food-grade suitability. The complete equipment design and cleaning process matter, particularly for food manufacturing or pharmaceutical applications. Consider whether operators can reach product-contact areas, remove parts for cleaning and inspect the equipment before the next batch. If a process uses several powders, changeover procedures should address residue from the previous material and help prevent cross-contamination.

Assess blend performance alongside material compatibility. A suitable machine must mix consistently and produce a homogeneous blend, not merely have stainless-steel surfaces. Powder properties affect movement through the vessel, and the mixing action must suit the ingredients. Take representative samples at different process stages to monitor consistency. Under-blending can leave unmixed pockets; over-blending can reduce particle size and affect physical or chemical properties.

For an existing plant, assess the machine as part of the full product-contact route. Trace powder from feed point to discharge, including transfer connections and any receiving vessel. A stainless-steel blender connected to a surface or component that retains residue can still create a cleaning challenge. Include surrounding transfer points in changeover planning. If the process handles a range of products, evaluate the cleaning sequence against the most difficult powder to remove.

Use a practical selection sequence: identify the powders and their material effects, define cleaning and contamination controls, then assess surface access and blend consistency. Finally, examine the equipment’s condition and product-contact areas before settling on a configuration. This approach keeps stainless steel in context: it is one part of equipment suitability, alongside process performance and cleanability. Explore stainless-steel process equipment options as part of your equipment assessment.

F.A. Maker: Industrial Mixers and Blenders

F.A. Maker supplies industrial mixing and blending equipment for powder processes. Its range includes Industrial Mixers and Blenders, including ribbon blenders, for production requirements shaped by material properties, batch volumes and plant layout.

For a broader process line, Used Stainless Steel Tanks, Pumps and Valves, and Centrifuges and Separators may also be relevant. Consider these alongside a blender when planning material storage, transfer and downstream processing. The right combination depends on how powders move through your operation and the needs of each process stage.

If you’re assessing equipment for a specific powder application, contact F.A. Maker to discuss your requirements.

Put your process requirements into action

Turn your production priorities into a clear equipment brief. Record the required blend outcome, the powders involved, expected batch pattern, cleaning needs and where the machine must connect with the existing line. This gives equipment discussions a practical starting point and keeps selection focused on the work your plant needs to perform.

F.A. Maker supplies Industrial Mixers and Blenders, Used Stainless Steel Tanks, and Centrifuges and Separators. These options can help when assessing a blending machine alongside related process equipment. The right configuration depends on how each item fits your production requirements, rather than on a machine label alone.

With a focused brief, you can discuss industrial blending equipment for powders in terms of the operating conditions that matter to your site. Contact F.A. Maker to discuss your equipment requirements and take the next step with confidence.

Frequently Asked Questions

What’s the difference between mixing and blending?

Mixing is the broader term for combining materials; blending usually means distributing dry powders evenly through a mixture. For example, adding several dry ingredients to create a consistent recipe is powder blending. This distinction helps define the required result: if each ingredient must be evenly represented in the finished batch, assess the process by blend uniformity, not simply by whether the materials have been combined.

What types of industrial powder blending equipment are available in Australia?

Common options include ribbon, V and double-cone blenders, as well as IBC blending systems. Each handles powder movement differently, so selection depends on the application and required blend outcome. Ribbon blenders are one option for industrial production; V and double-cone designs use a rotating vessel. IBC systems blend inside the container, and switching container sizes can support different batch volumes with the same blending device.

How do ribbon blenders, paddle mixers, and tumble blenders compare for powder blending?

Ribbon blenders use an internal mechanism to move powder, while tumble blenders rely on vessel rotation. Paddle mixers use paddles to move material. These differences affect how powders circulate, so no single type suits every recipe. Compare the materials, desired mixing intensity and blend uniformity, then assess the finished blend using representative samples. A process trial can reveal whether the mixing action suits the product.

What batch sizes and production capacities do industrial powder blenders offer?

Available batch capacity varies by blender and process; size the equipment around the powder volume required per batch, not rated capacity alone. Ribbon blenders normally need a fill level of 40-50% of rated capacity. IBC blending can accommodate different batch volumes by switching container sizes. Production capacity also depends on loading, mixing, discharge and changeover time, so consider the complete cycle when planning throughput.

How do you clean and maintain industrial powder blending equipment?

After a batch, empty the blender and clean product-contact areas using a method suited to the powder and equipment. Inspect outlets, seals, joints and covers for trapped residue, then ensure accessible components are clean before loading the next material. Follow the equipment’s maintenance requirements for inspection and care. For ingredient changeovers, include connected transfer points in cleaning checks to help limit carryover.

Which Australian suppliers and manufacturers sell industrial powder blending equipment?

F.A. Maker is identified as a supplier of industrial mixers and blenders.

How to Verify Used Machinery Condition Beyond Dash Hours

The dash meter is a clue, not a condition report. When learning how to verify used machinery condition, compare the displayed hours with ECM data where available, service records and physical wear, then investigate any mismatch. A low reading alone does not show how hard a machine has worked.

Hours matter, but they need context. A machine with more recorded hours and consistent maintenance may be a better prospect than one with fewer hours, limited servicing or signs of harsh use. The component condition and the history behind the reading help you make that distinction.

This guide explains how to compare hour readings with ECM records and wear on controls, hoses and other components. It also covers structural areas to inspect for cracks or repairs, signs of oil contamination and Australian purchase records that can help complete your assessment. The aim is to build a clearer picture of the machine’s condition before you decide.

Key Takeaways

  • Compare dash hours with ECM records, service history and the wear visible on controls, hoses and other components; a mismatch deserves closer investigation.
  • Assess operating conditions and maintenance alongside the hour reading, then test the machine for unusual noise, slow movement or inconsistent hydraulic performance.
  • Inspect high-stress structural areas and weld repairs, including the frame, boom, mounting points and ROPS, for cracks, distortion or signs of compromised integrity.
  • Use oil sampling to look for water and wear metals that a visual inspection may not reveal, and interpret results against the system’s cleanliness requirements.
  • Review servicing, repairs and machine setup records, and use an Australian PPSR search to check for a registered security interest.

1. Hour-meter readings and operating conditions

Start with the hour-meter reading, then compare it with the machine’s service history, previous ownership and operating environment. Ask about major repairs, modifications, accident damage and storage conditions. The dash does not tell you whether the machine worked in demanding conditions or received consistent maintenance. Both details affect how useful the reading is.

Worksite conditions matter. Ask where the machine operated and what work it performed. Dusty, abrasive or wet environments can affect components differently from cleaner, less demanding conditions. On tracked equipment, inspect the tracks, rollers, idlers, sprockets, track chains, bushes and track pads. Sharp excavator sprocket teeth indicate wear. Flat link bushings warrant closer attention because bushings should be round. On wheeled equipment, inspect the tyres, rims, axles, suspension and steering components.

Use operating tests to compare the machine’s history with its current performance. If possible, start it cold and observe how the engine starts and idles. Note excessive smoke, fluid leaks, warning lights or unusual noises. Then operate the machine where safe and practical; relying on qualified personnel with heavy equipment training from providers like Alika Training College can help ensure functional checks are handled safely and effectively. Check for slow movements, inconsistent hydraulic performance and unusual transmission behaviour. Test the attachment through its normal movements and watch for delayed or uneven responses. These checks do not establish the cause of a fault, but they identify areas for closer assessment.

How do you inspect a used machine’s engine, hydraulics, electrical systems and structural condition? Start the engine and operate the hydraulics and transmission. Check for leaks, smoke, unusual noises and warning lights. Inspect electrical components and safety systems, then examine the frame and other structural areas for visible damage or repairs.

Include the cab in your walk-around. Adjust the operator seat through its available range, then check that it holds its position and allows comfortable access to the controls. Test the displays, lights, cameras, radio, heating and air conditioning, along with warning and safety systems. A seat that will not adjust or controls that feel inconsistent are practical findings to record, not dismiss.

Interpret the hour figure in context. A used wheel loader showing 8,000 to 10,000 operating hours with no prior transmission work may be nearing the transmission’s expected life. That does not make the reading a verdict; it makes transmission history and current operation important parts of the assessment. Record the dash reading, observed symptoms and supporting service information together, so an inconsistency has a clear basis for follow-up.

2. Structural weld repairs, cracks and pin-bore wear

Inspect high-stress structural areas before buying, including the frame, chassis, boom, blade mounts, articulation points, buckets, rippers and attachment mounting points. Look for cracks, distortion, fresh paint, uneven welds and changes in surface texture. Check both sides of each component where accessible. A clean exterior can conceal an older repair or damage on the opposite side. Photograph each concern and note its location so you can compare it with repair records.

A weld repair isn’t automatically a reason to reject a machine. Establish what was repaired, why the work was needed and whether the repair appears appropriate for that component. A repaired boom plate, for example, should be considered alongside the surrounding structure and the machine’s work history. In one inspection example, a rewelded boom plate was discovered six weeks after the initial inspection. That repair ultimately cost more than 22% of the machine’s purchase price, showing why location and repair history matter.

Inspect pin bores closely at bucket, boom, linkage and attachment joints. Check for oval wear, damaged edges, cracks around the bore and movement that suggests excessive clearance. Compare corresponding joints where possible. Uneven wear can indicate that one section has taken more load or that pins and bushes have not been maintained evenly. A loose attachment connection can affect operation and may require machining or replacement, so record the affected joint rather than simply calling it “worn”.

Inspect the ROPS, or rollover protective structure, separately. Examine all four corner posts for dents, bends, cracks and previous repairs. Look for welds, drilled holes or other damage, which can compromise structural integrity. Do not treat a painted or straight-looking surface as proof of sound condition. Note visible alterations and compare them with available repair documentation.

How do you compare used machinery prices and estimate repair or refurbishment costs in Australia? Compare machines with similar age, configuration, attachments and documented condition, then list the work needed for each. Repair and refurbishment pricing depends on the scope, parts, labour, access and transport. Request a quote for an estimate.

Use inspection findings to separate cosmetic work from structural concerns. A crack at an attachment mount, a distorted chassis section or a repaired ROPS calls for more scrutiny than surface wear on a non-structural panel. For a machine requiring a move after assessment, machinery relocation planning can be part of the next operational decision.

3. Oil sampling and metal contamination

A machine can appear serviceable while its oil shows evidence of internal wear. Before purchase, include oil sampling in the assessment of heavy equipment, particularly the hydraulic system, engine and transmission. A sample can reveal contamination that a walk-around or short operating test may not. Read the results alongside maintenance records and operating history, rather than treating a single laboratory value as a complete diagnosis.

Take samples from the relevant systems and label each one with the machine and component. Use clean sampling equipment, avoid introducing dirt during collection, and record the displayed hours at the time. Sampling several systems can help distinguish a local issue from a broader maintenance concern. For example, wear metals in transmission oil alongside clean hydraulic oil suggest a different pattern from contamination in both systems.

Interpret particle counts against the type of hydraulic system. A high-pressure hydraulic system is typically expected to have a particle count no worse than ISO 18/16/13. Precision or hydrostatic hydraulic systems may require ISO 16/14/11 or cleaner. These are system-specific cleanliness levels, not universal pass marks for every oil sample. Compare the result with the machine’s system requirements and other evidence from inspection and servicing.

  • Water: Water content above 0.1 percent in hydraulic oil can indicate a failed breather, cooler leak or poor storage discipline.
  • Wear metals: Oil analysis can identify microscopic iron, copper, lead, tin and aluminium particles.
  • Particle count: Compare the reported result with the hydraulic system’s required cleanliness level.
  • Sample identity: Record whether the sample came from the engine, transmission or hydraulic system.

Metal results need context. Iron, copper, lead, tin and aluminium can point to wear in different components, but the presence of a metal alone does not identify a failed part. Consider the concentration, combination of metals, service history and operating symptoms. A sample taken after recent servicing may tell a different story from one collected during routine operation, so note relevant maintenance details.

Contamination can have serious consequences in hydraulic equipment. Hydraulic contamination can damage a piston pump within 500 hours of machine operation. That figure makes a clean-looking reservoir insufficient evidence on its own. A loader with sluggish hydraulic response, for example, should be assessed alongside its oil cleanliness results, rather than cleared solely because it completes a brief function test.

Ask the dealer for available fluid analysis and servicing records, then compare sample dates and machine hours with the maintenance timeline. If results show excess water, elevated particles or metals, connect those findings to the affected system and reported repairs. Oil analysis combined with mechanical checks can reveal problems that are not immediately apparent during visual inspection, helping you make a more informed purchase decision.

How to Verify Used Machinery Condition Beyond Dash Hours

4. Verifying machine hours with ECM data and physical wear

Compare the dash reading with available ECM data, service records and visible wear. Record each reading alongside the machine’s serial number and inspection date. If the display has been replaced, ask for the replacement history and any recorded reading from before the replacement. A difference does not prove the hours were altered, but it needs an explanation supported by records or machine data.

A discrepancy of 2,000 hours between the display and other evidence is described as common on high-hour machines with replaced dash displays. Treat that gap as a reason to investigate, not as a stand-alone conclusion. Check whether service invoices, maintenance entries or earlier inspection records show readings that form a consistent sequence. A reading that jumps backwards or stops matching the documented timeline needs closer review.

ECM data can provide another comparison point when the machine’s system makes relevant operating information available. Match the ECM reading to the machine’s identity, then compare it with the dash and dated service records. Note what each source measures and when the record was made. A replacement display may explain a mismatch, while an unexplained gap across several records leaves the operating history uncertain.

Physical wear helps test whether the stated hours fit the machine’s use. Examine pedals, control handles, seat adjustments, steps and frequently used switches. On tracked equipment, compare the claimed hours with undercarriage wear, including track components and sprockets. Look for consistency across the machine: one worn pedal may reflect a replaced part, while several heavily worn contact points suggest harder use.

For example, a machine described as having 3,000 hours but fitted with six-year-old hoses and heavily worn pedals may have worked harder than its stated hours suggest. Hose age alone doesn’t establish operating hours, so compare it with ECM data, service history and wear elsewhere. Record conflicting evidence separately, then seek an explanation before relying on the dash figure in a purchase decision.

What Australian safety, registration and compliance requirements apply to used machinery? Assess whether the machine suits its intended site and consider applicable compliance and transport requirements, including dimensions, weight and dispatch preparation. Site-specific changes may include attachments, guarding, fire suppression, machine control, auto greasing or electrical upgrades.

The cost of a professional pre-purchase inspection depends on the machine, inspection scope, location and testing required. Request a quote, with those factors shaping the work involved.

For an Australian purchase agreement, record the machine identity, stated hours, condition, known repairs, included attachments and agreed handover terms. Set out any warranty expressly, including its scope, duration and exclusions; don’t rely on an informal description of condition when written terms can clarify the agreement.

5. What documents and service records should you check before buying used machinery in Australia?

Build a document trail around the machine’s identity, operating hours and maintenance history. Start with its serial number, model details and current hour reading, then compare those identifiers across service records, repair invoices and inspection documents. A mismatch can complicate your assessment, especially if records describe a different machine or omit part of its ownership history.

Ask for records of servicing, major repairs, refurbishment and machine setup. These documents help establish what work has been completed and whether recurring faults appear in the history. Compare dates and recorded hours across invoices and service entries. An hour figure on an older maintenance record, for example, can help you check whether later dash or ECM readings follow a consistent sequence.

Condition reports provide another reference point. Condition reports can provide a useful reference point, but their availability may vary by sale. Read any report alongside repair invoices and inspection findings, noting which components were assessed and what work was recommended. A report describing recent refurbishment should align with supporting records that identify the work completed and the affected components.

Check the Personal Property Securities Register (PPSR) before completing an Australian machinery purchase. A registration may indicate that money is owing to a lender, which may repossess the machinery if the purchase proceeds. Do not proceed with a second-hand machinery purchase until any PPSR registration against it has been removed.

The search may require the seller’s details. For a sole trader, this can include their name and date of birth; for a business seller, it can include the company ACN. Use the correct seller and machinery details so the search relates to the transaction. Keep the search result with your other purchase records, along with any documentation showing that a registration has been removed.

Before agreeing to buy, bring the paperwork together: machine identity, service and repair history, condition report, refurbishment details, setup information and PPSR result. Compare the documents with the machine’s physical condition and recorded hours. If a repair is visible on the machine but missing from its records, or a service entry conflicts with the meter history, resolve the discrepancy before relying on the paperwork.

Also consider the machine’s intended Australian site and the practical requirements for transport and dispatch. Dimensions, weight and preparation can affect the move, while site-specific setup may involve attachments, guarding, fire suppression, machine control, auto greasing or electrical upgrades. If relocation is part of the purchase plan, arrange machinery relocation services as part of coordinating the equipment’s move.

F.A. Maker: Used Stainless Steel Tanks

F.A. Maker is a practical next step when your production requirements call for used stainless steel tanks or related processing equipment. After assessing the condition, operating history and documentation, compare the machine’s configuration with your process needs, capacity requirements and plant connections. F.A. Maker also offers centrifuges and separators, industrial mixers and blenders, and pumps and valves for processing operations.

Turn to F.A. Maker when sourcing used equipment for a production line and considering suitable machinery against your assessment findings. Share the equipment type and intended application to focus the discussion on relevant options.

Contact F.A. Maker to discuss used stainless steel tanks or related processing equipment.

Make the inspection useful for your next decision

Knowing how to verify used machinery condition is valuable when your findings support a clear decision, not just an inspection file. Turn observations into practical requirements: what needs attention before commissioning, what can be scheduled later, and whether the machine suits its intended process. This helps you assess operational readiness without treating every defect as equally important.

Before proceeding, set out the machine’s intended role, required configuration and any work needed before installation. Keep the inspection notes and supporting documents together so your decision remains grounded in evidence. If the equipment does not fit your production needs, reconsidering its suitability matters as much as assessing its physical condition.

For processing equipment, F.A. Maker offers used stainless steel tanks, centrifuges and separators, and industrial mixers and blenders. If you’re considering used machinery for your operation, contact F.A. Maker about used machinery to discuss suitable equipment. A careful assessment gives you a sound basis for moving forward.

Frequently Asked Questions

How can I verify actual machine hours beyond the dash meter?

Compare the dash reading with ECM data and records from different points in the machine’s history. A practical way to verify used machinery condition is to check whether those sources agree with one another and with component wear. If the dash display has been replaced, request the replacement reading and date, then compare them with earlier maintenance entries. Record unexplained differences and treat them as unresolved until supporting evidence explains the gap.

How can a buyer reduce inspection risk when sourcing from another country?

Reduce the risk of a remote inspection by arranging a detailed assessment before committing to purchase and requesting dated records tied to the machine’s serial number. Ask for clear images of identification plates, major components and visible damage, along with documentation of repairs and servicing. For transport planning to Australia, establish the machine’s dimensions, weight and dispatch preparation needs. Keep inspection findings, shipping arrangements and machine identification together to avoid confusion during handover.

What tests should you perform during a used machinery inspection and operational trial?

Test the machine through its normal operating cycle rather than relying on an idle run. Observe startup, idle, controls, movement and shutdown, and note changes in sound, response or fluid leakage. Operate each available function and attachment under suitable conditions, then check displays, warning systems and safety devices. Record the functions tested and any operating limits. This gives you a useful comparison if commissioning later reveals different behaviour.

How can you check operating hours and verify machinery maintenance and repair history?

Build a timeline from dated service entries, invoices, repair reports and recorded hour readings. Check whether the hours progress consistently and whether repairs correspond to components showing wear. A record of a replaced part can explain why that component looks newer than surrounding equipment. Note gaps in the timeline, repeated repairs and changes in machine configuration, then use those details to ask specific questions about the machine’s use.

What are the risks of buying used machinery at auction or without an inspection?

Buying without an inspection can leave faults, wear or an incomplete repair history undiscovered until the machine is operating. Equipment dealers typically provide condition reports, while auctions do not, so available documentation may differ. Working with established machinery specialists such as Ematech, who handle sales and servicing for heavy equipment, helps ensure maintenance histories and mechanical condition are thoroughly documented. If the machine cannot be tested before purchase, identify the evidence available and the functions that remain unassessed. Factor those unknowns into your decision, especially if the machine must meet a specific production requirement.

How to Prevent Cross-Contamination in Industrial Mixers

The best defence against cross-contamination is a mixer designed for thorough cleaning, paired with a validated cleaning process between production runs. To understand how to prevent cross-contamination in mixers, focus on smooth food-contact surfaces, accessible mixing areas and removable components that allow residues to be reached and removed.

This matters particularly when products contain allergens such as gluten or nuts. Residue can remain in seals, attachments, joints and other hard-to-reach areas, then transfer into the next batch. An enclosed mixing vessel can help limit exposure to airborne contaminants and foreign objects, but equipment design alone does not replace effective cleaning and sanitising.

This article explains which industrial mixer features can reduce areas where material collects and how cleaning between runs helps manage carryover risks. It also covers how to match cleaning instructions to the equipment and how suitable design can make access, inspection and changeovers more practical for production teams.

Key Takeaways

  • Prioritise mixer designs with accessible food-contact surfaces and removable components to make residue removal more practical.
  • Clean and sanitise between production runs, paying particular attention to seals, joints and attachments where material can remain.
  • Account for allergen carryover from trace residues, even when a mixer appears clean after routine washing.
  • Consider how biological, chemical and physical hazards can enter or persist in the mixing process, not just visible food residues.

Cleaning and sterilisation between production runs

Cleaning removes product residue; sanitising then reduces microorganisms on food-contact surfaces. The mixer design, previous product and next batch all affect the cleaning approach.

In Australia, equipment that has contacted raw meat, seafood, or soiled vegetables and herbs should be washed with warm water and detergent, rinsed, and thoroughly dried before use with ready-to-eat food. Clean and sanitise food-contact equipment after each use, following the equipment manual and sanitiser label.

Use a sequence that separates each stage: remove loose material, wash with detergent, rinse with clean potable water, then sanitise. Let components air-dry on a clean draining rack. Keep cleaning records by mixer and production run to track completed changeovers.

Cleaning Hard-to-Reach Mixer Parts

Seams, joints, seals, blade attachments and discharge areas can be hard to reach and may collect product. Residue can remain there even when visible surfaces look clean, creating a contamination risk in the next run. Where the mixer design allows, dismantle removable seals and attachments. Clean every exposed surface, then inspect it before reassembly.

Sanitising Food-Contact Surfaces

Cleaning removes food particles, dirt and grease; sanitising reduces microorganisms on surfaces that contact product. Wash mixer parts with hot water and detergent, rinse with potable water, then apply sanitiser according to its label. Food Standards Australia New Zealand says food-contact mixer parts can be sanitised by soaking them in very hot water at 77°C for 30 sec. Keep the sanitising method compatible with the equipment and product.

Verifying Cleaning Effectiveness

Swab and ATP tests can check selected areas after cleaning. Sample hard-to-reach locations such as seals, attachment points and discharge openings, and record results against the mixer and batch. ATP results indicate residual organic material, but do not establish that a specific allergen is absent. Use allergen-specific testing when the production risk calls for evidence of allergen removal.

Run cleanability trials with the actual product, especially if it is sticky, oily or powdery. Process the product through the mixer, apply the proposed cleaning sequence, then inspect likely residue points and assess the results. A water-only test may not show how the actual product behaves in seams or around seals.

For a mixer with an enclosed vessel, clean-in-place systems can circulate cleaning solutions through spray balls, rotating nozzles or jets. Confirm that the cleaning path reaches internal surfaces and discharge areas. When manual cleaning is needed, removable parts and accessible surfaces make the process easier to inspect and repeat.

Which type of industrial mixer is best suited to exclude cross-contamination and allergen contamination?

No mixer eliminates every contamination risk. A closed continuous mixer with accessible, smooth food-contact surfaces can help limit exposure and support effective cleaning.

For allergen changeovers, remove product residue from contact surfaces and clean the mixer before the next batch. To reduce raw-food carryover into ready-to-eat products, use separate equipment where practical. Otherwise, wash, rinse and thoroughly dry equipment after contact with raw food.

Allergen Cross-Contact in Blenders

Allergen cross-contact occurs when residue from one product transfers to another through shared equipment. Gluten or nut particles can remain in blenders and food processors after routine cleaning, so a visually clean bowl does not prove that allergens have been removed. For a sensitive changeover, dismantle accessible attachments, clean contact areas thoroughly and follow the site’s allergen-control procedure before starting the next product.

Continuous mixers use closed, sealed vessels that help prevent contaminants from entering the mixing process. This configuration can suit production where material moves through a contained mixing path, including food processing. Its effectiveness depends on cleaning access: a sealed vessel still needs a method that reaches internal contact surfaces and removes product residue.

Biofilm can form on food-contact surfaces, particularly around seals and blade attachments, and may resist cleaning. Pay close attention to these areas during inspection and cleaning, especially after processing sticky or powdery products. Include seals, connection points and discharge areas in the cleaning procedure, not just the main vessel.

Smooth, Crevice-Free Surfaces

Smooth food-contact surfaces have fewer rough areas where particles can lodge and accumulate. Food-grade stainless steel can be polished to remove surface irregularities that may encourage bacterial growth. A mixer with accessible surfaces and fewer crevices makes residue easier to remove, but its design still needs to suit the product and the site’s cleaning process.

Raw and ready-to-eat production needs clear separation. If a mixer contacts raw meat, seafood, or soiled vegetables and herbs, clean it before using it for ready-to-eat food. Dedicated equipment can reduce reliance on changeover cleaning; otherwise, include the required washing, rinsing and drying sequence in the production plan.

Food safety also depends on how the mixer is handled and supervised. Operators should wash their hands with warm water and soap for at least twenty seconds, including before food preparation and after handling raw meat or seafood. HACCP principles can help food facilities identify and monitor contamination risks at process points such as mixing and changeovers.

For production planning, reviewing mixer configurations can help align containment, cleaning access and product changeovers with the process.

Mixer design for allergen-critical applications

For allergen-sensitive production, prioritise a mixer that limits retained material and gives operators access to product-contact components. The suitable design depends on the ingredients, production sequence and cleaning method. To prevent cross-contamination in mixers, assess these factors together rather than relying on a single equipment feature.

Dedicated equipment for allergen-free products avoids sharing a mixing path with allergen-containing batches. Separate appliances can help prevent allergen cross-contact, including during food preparation—where smaller dedicated blending units from retailers such as craftcart.us can keep sensitive ingredients isolated. In a production facility, a dedicated mixer reduces reliance on changeover cleaning between allergen and non-allergen runs, while still requiring routine cleaning and hygienic handling.

Ribbon blender geometry shows how design details affect residue retention. The outer ribbon typically sits 1/8 to 3/16 inches from the trough, so a small amount of material may remain after discharge. Radiused welds on interior stainless-steel surfaces help prevent material buildup. For sensitive applications, a removable ribbon agitator can improve access to the mixing surfaces between batches.

A flat-flange clamshell coupling allows operators to lift the ribbon agitator out without moving the end shafts, bearings or seals. This can make thorough cleaning and inspection more practical. It also allows operators to inspect areas where residue could remain instead of relying only on cleaning the visible trough.

Material choice also affects hygienic design. Stainless steel and borosilicate glass have non-porous surfaces and resist chemical leaching, making them preferred materials for suitable food-contact applications. Consider surface finish, joins and removable components together. A smooth vessel alone will not address limited access around seals or connections.

For precise dispensing, a disposable static mixer provides a fresh mixing path for each application when replaced after use. Bayonet and bell-mount connections allow attachment and removal without exposing internal surfaces. This avoids cleaning, flushing or solvent use between applications and can simplify traceability. It suits tasks such as food-processing assembly or sanitary sealant dispensing, rather than replacing a production-scale batch mixer.

Hygiene-critical applications require equipment design and operating controls to work together. A closed vessel can limit airborne contamination, while accessible parts support cleaning. Operators still need a defined changeover procedure, a suitable sanitising method and clear batch records. To prevent cross-contamination in mixers, choose between dedicated equipment, removable components and disposable mixing paths according to the allergen, production sequence and cleaning requirements.

Optimised disposable mixer geometries can reduce the material retained inside the mixer after dispensing. Using a new disposable mixer for each dispense can simplify traceability and reduce the need for complex cleaning-validation procedures.

How to Prevent Cross-Contamination in Industrial Mixers

Traditional mixer hygiene challenges

Cross-contamination in commercial mixers occurs when bacteria, allergens or other residue transfers between batches through equipment or handling. Joints, seals, attachments and poorly cleaned contact surfaces can retain material that enters the next product.

Traditional mixer designs can have crevices and dead spots where food residue collects. A mixer may look clean while particles remain around a seal, beneath an attachment or near the discharge. If cleaning misses these areas, microorganisms can grow; biofilms on surfaces such as seals and blade attachments can also resist removal. Consistent access and inspection are therefore important.

Shared equipment presents a particular challenge for allergen control. Gluten or nut residue can remain in blenders and food processors after routine cleaning, then transfer into a later batch. Treat changeovers as a defined process rather than assuming a quick rinse removes allergens. The product’s texture and contact with mixer components determine which areas need focused attention.

Hand contact can also transfer bacteria to food or mixer controls. Australian food handlers should wash their hands thoroughly with warm water and soap for at least twenty seconds, including before food preparation and after handling raw meat or seafood. This supports hygienic handling, but does not replace cleaning food-contact parts or keeping raw products separate from ready-to-eat batches.

Treat raw meat, poultry and seafood as contaminated when planning production. If a mixer contacts these foods, wash it with warm water and detergent, rinse it and dry it thoroughly before ready-to-eat use. Apply the same separation principle to soiled vegetables and herbs. Scheduling raw and ready-to-eat batches separately reduces reliance on operators remembering an informal changeover.

Dental and medical-adjacent applications illustrate a different way to manage shared mixing paths. Single-use static mixers help prevent patient-to-patient cross-contamination in dental settings because operators replace them between applications. The used component is discarded, so it does not require sterilising or chemical cleaning before reuse. This approach is for compatible dispensing tasks, not a substitute for cleaning reusable industrial mixer vessels.

For reusable equipment, written methods help operators apply the same checks across shifts and batches. Procedures can identify product-contact components, areas where residue tends to remain, and the cleaning method for each product changeover. Supervision can confirm that attachments are handled correctly and records match the production sequence. Clear handovers also reduce the chance of a batch starting before its mixer is ready.

Biological, chemical, physical and allergen contamination

Contamination can enter a mixer through food residue, cleaning chemicals, foreign objects or allergens carried between batches. Identifying each route helps production teams match controls to the hazard.

Biological and Chemical Contamination

Biological contamination occurs when bacteria or viruses transfer from contaminated food or surfaces to other food. Salmonella, E. coli and Campylobacter can spread this way. Ready-to-eat food is especially exposed because it receives no further cooking before consumption. Cleaning-chemical residue presents a different concern: use detergent and sanitiser according to the product label, and rinse when the cleaning procedure requires it.

Inadequate cleaning can leave food particles and moisture on mixer surfaces, supporting microbial growth or biofilm formation. Wash away visible material before sanitising, and focus on seals, joints and attachments. Two-component mixing systems have an additional process risk: residue left in the mixing path can interact with a new batch and affect its mix ratio, curing behaviour or product quality.

Physical and Allergen Contamination

Physical contamination occurs when foreign objects enter the product; allergen contamination occurs when allergen residue transfers into another batch. Open or partly open mixers can expose ingredients to airborne contaminants, insects and foreign objects from nearby activity. A closed mixing path can reduce that exposure, while changeovers need controls for residue such as gluten or nuts.

Treat raw foods as contaminated and keep them separate from ready-to-eat products. Hands, utensils, dirty preparation surfaces and containers can transfer bacteria or viruses, so contamination control must extend beyond the mixer. In Australian food handling, storing raw meat, poultry or seafood in a rigid, leak-proof container or at the bottom of the fridge helps prevent contact with ready-to-eat food.

Controls work best when each hazard has a corresponding measure. Production teams can identify likely sources during ingredient receipt, preparation, mixing, discharge and cleaning. For example, a damaged attachment could introduce physical fragments, while an incompletely rinsed surface could leave cleaning-agent residue. Recording the product sequence and changeover status helps operators link an issue to the relevant batch.

HACCP principles help food facilities monitor contamination risks across process stages. Apply them to the mixing operation: consider whether the vessel is open, whether products share contact components, and how cleaning solutions are removed. Controls differ by hazard. Cleaning removes food waste, sanitising reduces bacteria, and equipment inspection helps identify damage or foreign material.

For equipment planning, review mixer options for your process alongside the hazards present during production and changeovers.

F.A. Maker: Industrial Mixers and Blenders

F.A. Maker offers Industrial Mixers and Blenders for processors assessing equipment for production and changeover needs. When selecting a mixer, consider the materials being processed, the batch sequence and how operators will access product-contact parts for cleaning. These factors connect equipment choice with the contamination controls outlined above.

F.A. Maker also offers Used Stainless Steel Tanks, Centrifuges and Separators, and Pumps and Valves for processing operations. These categories may be relevant when reviewing a production line, while the mixer remains central to managing residue in the mixing path and allergen carryover.

Contact F.A. Maker to discuss Industrial Mixers and Blenders for your processing requirements.

Make the next equipment decision process-led

Before changing equipment, document the production sequence and cleaning requirements for each changeover. This gives operations and procurement teams a shared basis for assessing how to prevent cross-contamination in mixers, grounded in actual products, batch transitions and line constraints.

Use that assessment to identify the design requirements that matter most, then consider how a mixer will integrate with the rest of the process. A clear specification helps align equipment selection with day-to-day production and the controls your team needs to maintain.

For a discussion about industrial processing equipment, contact F.A. Maker.

A considered equipment decision can support a more consistent and manageable approach to production.

Frequently Asked Questions

How to clean and sanitise a mixer between different foods?

Remove remaining product, wash food-contact areas with detergent, rinse with clean potable water, then sanitise according to the sanitiser label. When changing from raw meat or seafood to ready-to-eat food, wash the mixer with warm water and detergent, rinse and dry thoroughly before reuse. Follow the equipment manual to ensure the method suits the mixer. Record the product changeover and completed cleaning steps to support consistent handovers between operators.

What mixer parts need to be disassembled and cleaned?

Where the mixer design allows, disassemble removable parts that can retain product. These commonly include seals, blades, attachments and other removable food-contact components. Also focus on joints, discharge areas and connection points where residue may be hard to see. The equipment manual explains the correct disassembly method. Inspect parts for wear or damage; replace deteriorated components that cannot be cleaned and sanitised effectively.

What cleaning chemicals and sanitiser concentrations are safe for mixers?

Use detergent and sanitiser compatible with the mixer materials, and apply each product according to its label. There is no single safe concentration for every chemical or machine; the label specifies the required dilution and contact conditions. Check the equipment manual before choosing a cleaning method, as unsuitable chemicals or procedures may damage components. Rinse with clean potable water when required by the procedure, and do not mix cleaning products unless their instructions allow it.

How often should commercial mixers be cleaned and sanitised?

Clean and sanitise food-contact mixer equipment after each use, including between production runs when the next batch differs. A change from an allergen-containing product to an allergen-sensitive one requires attention to the shared mixing path, not just the vessel. If a mixer contacts raw meat, seafood or soiled vegetables and herbs, clean it before using it for ready-to-eat food. The product sequence and equipment manual determine the specific cleaning procedure.

What are the risks of cross-contamination from mixer seals, attachments and hard-to-clean areas?

Seals, attachments and joints can hold residue that transfers to a later batch, including trace allergens or microorganisms. Biofilms may form on surfaces such as seals and blade attachments, making contamination harder to remove through routine cleaning. In two-component mixing systems, retained material can also interact with the next batch and affect its mix ratio, curing behaviour or quality. Include these areas in cleaning inspections and replace parts that can no longer be cleaned effectively.

How to Negotiate Used Machinery Prices and Pay Fairly

The asking price is only one part of a fair machinery deal. To work out how to negotiate used machinery prices, compare similar models and consider age, condition, operating hours, maintenance history, attachments and transport. A sound offer reflects the machine’s value and any costs or work required.

It’s reasonable to focus first on price, but the overall terms matter too. If the seller won’t reduce the asking price, attachments, delivery or servicing may still help create a practical agreement.

This guide explains how to research Australian listings, auction results and dealership prices, assess a machine’s history and condition, and prepare an evidence-based offer. You’ll also learn how to negotiate attachments, delivery and servicing, then record the agreed terms. The aim is a clear, fair purchase that suits the machine’s condition and your operational requirements.

Key Takeaways

  • Compare listings for genuinely similar machines, accounting for condition, hours, included attachments and transport costs.
  • Set an acceptable price and a firm spending limit before negotiating, and be prepared to leave if the terms don’t work.
  • Ask about previous use, repairs and known faults, then assess the answers alongside an inspection and maintenance records.
  • If the seller won’t reduce the asking price, negotiate practical value through attachments, delivery or servicing.
  • Put the agreed price, payment terms, machine details, included extras and delivery arrangements in writing.

Comparing dealerships and researching equipment prices

There’s no fixed percentage to offer below a used machine’s asking price. Base your offer on comparable listings, condition and associated costs. Set an ideal purchase price and a maximum before approaching a dealership, then support your offer with specific comparisons.

  1. Research Equipment Specifications and Quality

    Start by identifying the machine’s make, model, year, capacity, configuration and operating hours. Compare its specifications with the production task it must perform: similar-looking equipment can differ in throughput, included components and suitability.

    Assess the machine using documented condition, not appearance alone. Age, operating hours, maintenance history, brand reputation and replacement-parts availability all affect value. For example, two machines of the same model may warrant different offers if one has complete service records and the other shows wear or is missing attachments.

    Record the details in a comparison sheet before reviewing prices. Note which specifications meet your requirements and which differences could affect performance or future costs. Don’t assume a lower-priced machine is better value until you understand its condition and configuration.

  2. Compare Prices for Similar Machinery

    Search Australian resale marketplaces, auction results and dealership listings for comparable equipment. Match make, model, year, condition, operating hours and attachments as closely as possible. A listing for a different configuration is a weaker benchmark.

    Compare the full transaction, not just the displayed price. Include delivery, inspection and transport costs where relevant, and note whether attachments or servicing are included. A cheaper listing may represent a different package or require extra spending before the equipment suits your operation.

    Use several comparable listings to establish a practical range, then keep screenshots or written notes of each machine’s details and asking price. For auction results, distinguish the sale outcome from dealership asking prices. They reflect different transaction settings, so neither alone establishes fair value.

  3. Determine an Offer Below the Asking Price

    Set your target using the comparisons, then adjust it for the machine’s condition, operating hours, maintenance evidence and included extras. If an inspection identifies a fault or a component nearing replacement, estimate how that issue affects value before making an offer.

    Make a clear offer and explain the evidence behind it. Refer to a closer comparable listing or a documented repair need instead of choosing an arbitrary discount. A very low opening offer may be dismissed, so keep the discussion grounded in the machine and the transaction.

    Decide your maximum before negotiations begin, including delivery and other purchase costs. If the seller’s figure exceeds that limit, consider whether different terms improve the overall value. Keep the agreed price separate from extras so both parties understand what the offer covers.

Being prepared to walk away

  1. Set a firm limit before discussing terms, based on the machine’s role and your operating budget. Include the full commitment, not only the asking price. For example, a production line may also require transport, installation or work to address a known fault. If these costs push the purchase beyond your limit, don’t raise it simply because negotiations have begun.

    Write down the conditions that would make the purchase unacceptable, such as unresolved operational faults or unclear ownership arrangements. A written threshold keeps the decision focused on the equipment’s value, rather than the time already spent negotiating.

  2. Stay patient if the seller rejects your first offer. Ask whether there’s room to discuss the terms, then allow time for a considered response instead of raising your offer immediately. For example, if a seller declines your figure for a mixer, restate your evidence and ask whether another package of terms could work.

    Keep the conversation polite and focused on the machine. Don’t turn a price disagreement into a dispute about the seller’s motives or the equipment’s reputation. A respectful exchange leaves room for agreement if circumstances change, while keeping your maximum intact.

  3. Separate the machine’s usefulness from the pressure to secure it. A production requirement may make a particular model attractive, but poor condition or an unaffordable total commitment can still make it the wrong purchase. For example, if a filler needs substantial additional work to suit the line, pause rather than accepting terms that exceed your plan.

    Consider other equipment that can perform the task, including different configurations or models. Alternatives make it easier to assess the current offer on its merits. Don’t proceed just because you’ve spent time inspecting or discussing a machine if its condition or terms fail your requirements.

  4. Walk away clearly if the seller’s final terms exceed your limit or essential conditions remain unresolved. State what prevents agreement, such as an unacceptable total cost or an unaddressed operational concern. Keep the explanation factual and concise; an argument won’t improve the equipment or terms.

    Before leaving, confirm that no agreement has been reached and keep your notes for comparison with other options. If the seller later proposes a material change, assess it against the same requirements. Being willing to walk away protects your decision from urgency and keeps the focus on machinery that suits the operation.

Asking sellers about equipment condition and past use

Ask the seller about ownership, operating conditions, repairs and faults, then compare each answer with the machine’s condition. Auction prices can differ from dealership and private-sale prices because sale terms, bidding and included services vary. No single channel sets a fair price.

  1. Inspect Equipment Before Negotiating

    Arrange an inspection before making a final offer, and test the equipment’s major functions under suitable operating conditions. Look for fluid leaks, unusual noise or vibration, visible wear and inconsistent engine behaviour. For example, observe a conveyor’s belt and drive components during operation rather than relying on photographs.

    Ask the seller to demonstrate functions relevant to your process. If an in-person inspection isn’t practical, request a detailed video showing the machine starting, running and performing key operations. Video can clarify visible condition, but it can’t provide the same direct examination as an inspection.

    Ask why the seller is selling, how long they’ve owned the equipment and whether it has worked in harsh conditions. Where relevant, ask about exposure to salt-heavy environments or demanding demolition work. Record the answers so you can compare them with observed wear and service documents.

  2. Assess Maintenance Records and Potential Risks

    Request maintenance records, repair invoices and details of replaced components. Compare the dates and work described with the seller’s account. If the seller says a pump was replaced, ask for the record and check the component for signs consistent with that repair.

    Reduce the risk of undisclosed faults by asking the seller to identify known problems in writing and include agreed condition details in the purchase documents. Ask for evidence that the seller can transfer ownership, and establish whether a security interest or lien affects the machinery before paying. A verbal assurance isn’t a substitute for documentation.

    If records are incomplete, factor the uncertainty into your assessment and negotiation. A missing service history doesn’t prove a fault, but it provides less evidence about past care. Keep unanswered questions separate from confirmed defects, then decide whether you need further inspection or clearer written terms.

  3. Compare sale channels carefully. Auction results reflect competitive bidding and the auction’s sale conditions. A dealership listing may involve different preparation or support, while a private seller may negotiate directly. Check the equipment description and terms alongside the final sale figure: the headline amount alone doesn’t show the full transaction.

    Compare listings across used-equipment websites, but match model, configuration, condition and operating hours before drawing conclusions. For heavy earthmoving machinery and plant equipment, browsing dedicated dealer inventories such as africaplant.com can provide useful benchmarks for machine specifications and pricing. An auction machine sold as-is isn’t automatically comparable with a dealer listing that has different terms.

    Consider finance before committing. Pre-arranged finance can preserve working capital, but assess the down payment, interest rate and repayment schedule against the purchase’s total demands. Available finance isn’t a reason to accept unresolved faults or unsuitable terms.

How to Negotiate Used Machinery Prices and Pay Fairly

Checking evidence of maintenance and replacement parts

Use maintenance evidence to judge whether the machine’s condition matches its recorded history. Then determine which parts, repairs or support arrangements could affect the purchase.

  1. Review Maintenance History and Replacement Parts

    Request service records, repair invoices and details of replaced parts. Compare each document with the seller’s account and the machine’s visible condition. For example, an invoice for a replaced bearing should correspond with the component identified during inspection.

    Look for consistent records of routine maintenance, along with notes about recurring faults or repairs. Repeated work on the same assembly may signal an ongoing issue rather than a completed repair. Ask which parts were replaced, when the work took place and whether supporting documents are available.

    Consider parts availability for the specific make and model. If a critical component is difficult to source, that may affect downtime and the value you place on the machine. Distinguish confirmed defects from missing records, then reflect each differently in your assessment and offer.

  2. Assess Condition and Maintenance Support

    Compare the machine’s operating condition with its documented maintenance. Check for fluid leaks, unusual sounds or vibration, visible wear and engine problems. Tidy records don’t rule out faults during operation, so use both the documents and inspection findings to assess condition.

    Ask what maintenance or support arrangements are included in the sale, and record the seller’s answer. Clarify whether recent repairs are complete, whether operating instructions or service documents are included, and what assistance the seller agrees to provide. Don’t treat a general assurance as a defined support commitment.

    Use unresolved maintenance needs to assess the purchase’s practical value. For example, if a dryer has an identified issue and no evidence of completed repair, distinguish that concern from routine wear. Ask for the repair scope in writing or base your offer on the work still required.

  3. Keep the discussion calm and specific. Refer to a service entry, replacement part or observed leak instead of making a broad claim about the machine’s quality. For instance, say the maintenance record doesn’t show the repair described, then ask the seller to clarify. This keeps negotiation focused on verifiable details.

    Summarise the evidence before settling terms: list documented repairs, visible issues, parts that may be needed and any included support. If the seller agrees to complete work before handover, record the work and timing in the purchase documents. Clear records help both parties understand the machine’s condition and the basis of the agreement.

Negotiating attachments, delivery and servicing

Buying used machinery involves more than agreeing on the equipment’s price. Negotiate the complete package, including attachments, transport, servicing, payment terms and written sale conditions.

In Australia, calculate the total by including transport, loading, installation, servicing and any GST or stamp duty that applies. Their treatment depends on the transaction and jurisdiction, so distinguish applicable charges from the machine’s asking price.

  1. List the attachments needed for the machine to perform its intended task. Identify each item by description and condition, then agree whether it’s included or priced separately. For a bottle filler, specify the associated components included in the deal instead of relying on a general description such as “complete line”.

    If the seller won’t reduce the equipment price, ask whether an essential attachment can be included instead. Compare the package’s value with buying the machine without that item, and record the agreed inclusions in the sale documents.

  2. Define delivery responsibilities before accepting a final figure. Agree who arranges freight, loading, unloading and installation, then document the destination and handover conditions. A low asking price can become costly if transport arrangements are unclear or extra handling is needed.

    Clarify when responsibility for the machine transfers and who bears freight costs. If relocation is part of the plan, arrange machinery relocation as part of the purchase discussion so transport requirements are considered alongside the equipment and delivery terms.

  3. Discuss servicing as a defined part of the agreement. Specify the work to be completed, the condition expected at handover, and any service records or replacement parts to be supplied. “Serviced” can mean different things, so name the tasks rather than relying on that word alone.

    If the seller offers a warranty, review its coverage, exclusions, duration and claims process. Assess whether it addresses critical components and suits your operating needs. If the price can’t be reduced, a clear servicing commitment or useful warranty term may improve the overall deal.

  4. Set out payment terms and sale conditions in writing before paying. Record the agreed price, deposit, balance timing, equipment identification, included attachments, delivery arrangements, and any servicing or warranty commitments. For a financed purchase, consider the down payment, interest rate and repayment schedule together, rather than judging affordability by the deposit alone.

    Compare the completed agreement with the negotiated terms before signing. Clarify payment milestones and handover conditions, including what happens if agreed work remains incomplete. A written record gives both parties a precise reference and reduces disputes about what the sale included.

F.A. Maker: Used Stainless Steel Tanks

F.A. Maker is a practical next step when your production requirements point to used processing equipment. Its offerings include used stainless steel tanks, centrifuges and separators, industrial mixers and blenders, and pumps and valves.

Before deciding, define the machine’s role in your process and the specifications that matter, such as capacity, configuration and condition. Use these requirements to assess suitable equipment and compare purchase terms, including included components and delivery arrangements. This keeps the decision tied to operational needs, not price alone.

If you’re sourcing used process machinery for a production operation, contact F.A. Maker to discuss your requirements.

Make your next equipment decision with a clear brief

Use your next purchasing decision to define what the equipment must do, what condition is acceptable and which commercial terms matter most. Knowing how to negotiate used machinery prices is useful beyond one transaction: a clear buying brief keeps future equipment decisions connected to production requirements, not negotiation pressure.

For processing operations considering used stainless steel tanks, centrifuges and separators, or industrial mixers and blenders, F.A. Maker offers these equipment categories. Match the equipment type to your process, then assess each option against your technical requirements and purchase terms.

When you’re ready to discuss equipment for your operation, discuss your machinery requirements with F.A. Maker. A well-defined brief gives the conversation a practical starting point and helps you move forward with confidence.

Frequently Asked Questions

What is a fair price for used machinery in Australia?

A fair price reflects comparable equipment, its condition and the complete purchase terms. Compare machines with similar specifications and included components, then account for differences that affect usefulness or future costs. For example, a machine with fewer attachments may not be equivalent to a listing that includes them. Use several comparisons to establish a reasonable range rather than treating one asking price as market value.

How do you value used machinery based on age, hours, condition and service history?

Assess age and operating hours alongside condition, service history, brand reputation and replacement-parts availability. These factors work together: low hours don’t establish value if records are poor or the machine shows wear. Conversely, a well-maintained older machine may remain useful for a specific process. Compare its documented history and configuration with similar equipment, then adjust your valuation for confirmed defects or missing components.

Where can you find comparable used machinery prices in Australia?

Review Australian resale marketplace listings, auction results and dealership advertisements. Filter for the same make, model, year, operating hours, condition and attachments before comparing figures. Separate asking prices from completed auction sales because they represent different transaction stages. Keep notes on each comparable machine and its sale terms, so your benchmark reflects the equipment package, not just a headline figure.

What inspection and maintenance records should you check before negotiating?

Review maintenance logs, repair records and evidence of replacement parts, then compare them with the seller’s description. During inspection, observe the machine operating and note leaks, unusual sounds or vibration, visible wear and problems with major functions. For instance, if records describe a replaced component, check that the stated work matches the machine’s present condition. Treat documented defects differently from gaps in paperwork.

Which negotiation tactics work when buying used machinery?

Make a specific offer supported by comparable listings, inspection findings or identified repair needs. Keep the discussion polite and focused on the equipment, not personalities. If the seller won’t reduce the price, negotiate useful terms such as attachments, delivery, servicing or spare parts. A sound approach to negotiating used machinery prices also sets a maximum before discussions begin, so you can decline terms that don’t suit your operation.

How to Justify Buying Used Equipment Instead of Keeping Old

Keeping old equipment is not automatically the lower-cost decision. A clear case explains how to justify buying used equipment to management by comparing the cost of continued repairs, downtime and lost output with the purchase, setup and operating costs of a replacement. A common return-on-investment calculation is net benefit divided by total investment, multiplied by 100%.

It’s reasonable to scrutinise a used-equipment proposal: the purchase price is only one part of the decision, and performance, maintenance needs and available cash also matter. The strongest case connects the equipment to production targets and business priorities, then shows how the benefits and costs will be measured.

This article explains how to build a like-for-like comparison, assess used equipment against keeping the existing machine, buying new or choosing another purchasing arrangement, and present the operational trade-offs clearly. It also covers testing assumptions, accounting for cash-flow effects and tracking results after installation, so management can assess the proposal on practical evidence rather than purchase price alone.

Key Takeaways

  • Connect the equipment request to production targets, expected revenue and the business priorities management already measures.
  • Describe the operational problem clearly, then show how the proposed machine addresses the specific bottleneck.
  • Choose an approval path that reflects the purchase’s funding and cash-flow implications, and define how results will be tracked after installation.
  • Assess the effect on working capital alongside the expected operational benefits, including the value of keeping cash available for other needs.
  • Compare the existing machine and used-equipment option by considering productivity, maintenance requirements and the operational cost of downtime.

How do you justify an equipment purchase to management?

Compare four options against the same production plan: keep the current asset, buy used, buy new or outsource. Show how each affects revenue, costs, output and available cash over the relevant period. A practical answer to how to justify buying used equipment to management starts with this like-for-like comparison.

Used Versus New Equipment Benefits

Used equipment can reduce the initial outlay compared with new equipment, leaving more cash available for other business needs. New equipment may better suit requirements for specific features or production capacity. In Australia, the financial case depends on actual purchase and operating costs, expected output and fit with business goals, not simply whether the equipment is used or new.

To compare fairly, estimate the net benefit of each option and calculate return on investment as net benefit divided by total investment, multiplied by 100%. Include setup, training and operating costs, then test assumptions such as reduced outsourcing or rework against recorded business data. This provides management with a structured basis for how to justify buying used equipment to management.

Used Equipment Ownership Costs

Calculate total cost of ownership by adding acquisition, setup, training and operating costs over the same period. Include expected maintenance and downtime costs: a lower purchase price alone does not mean a lower lifetime cost. Compare the total with the output and revenue each option is expected to support.

When comparing quotes, put specifications, condition, included work and stated costs in one spreadsheet. Clarify differences in scope, installation requirements and terms, then negotiate based on those specifics. Before purchase, arrange an inspection by a qualified technician and review the findings, service records, available spare parts and accessories. Request written warranty terms that state coverage and exclusions.

Purchase Business Case and Cash Opportunity Cost

Link the asset to the business plan: identify the production target, the machine’s role and the revenue or margin the added capacity is expected to support. Build a verifiable case by comparing projected benefits with recorded output, outsourcing or rework costs. Label uncertain inputs as provisional rather than presenting estimated returns as actual results. This evidence helps explain how to justify buying used equipment to management without relying on purchase price alone.

Show management the cash impact as well as the operational case. Paying cash can tie up working capital that could otherwise support business opportunities or help the business through a slowdown.

Option Initial cost Operating case Cash consideration
Keep existing Ongoing repairs Current output and downtime Retains purchase cash
Buy used Acquisition and setup Condition, maintenance and expected output Purchase reduces available cash
Buy new Acquisition and setup Capacity and production fit Purchase reduces available cash
Outsource Service and production costs External production against targets Costs arise as work is outsourced

Choose the option that best supports the production plan at a justifiable total cost while preserving the cash the business needs.

Identifying the operational problem and linking it to management priorities

Start with the process constraint, not the machine you hope to buy. Record where work queues, output falls behind plan, rework occurs or staff rely on outsourcing. Then connect the problem to a management priority, such as production targets, productivity, cost control or customer demand. A relevant proposal explains how the equipment could change a measurable operational result.

Use the sample-processing example as a model: the existing shared instrument has about one-third of the capacity needed for the project’s throughput. State the resulting bottleneck and explain how suitable equipment would fit the production process. For a banker assessing the project, explain expected productivity gains, cost savings and alignment with the business’s sales and strategic plans.

Before evaluating equipment, define the tasks it must perform and its essential features. Involve the people who will operate it, since they can identify process requirements that cost data alone may not reveal. Translate those requirements into specific criteria, such as the material handled, required throughput and connection to existing production steps. This keeps a low purchase price from obscuring an operational mismatch.

Prepare evidence management can assess. Compare current output and relevant costs with the proposed operating case, using production records, outsourcing invoices or rework data where available. Separate measured results from estimates, and show how the expected change supports a business goal. If the proposal depends on extra sales, explain how available capacity connects to the sales plan rather than treating additional revenue as automatic.

  • Current state: Describe the bottleneck, its effect on production, and the evidence behind it.
  • Proposed change: Identify the tasks, essential features and production steps the equipment must support.
  • Management outcome: Link expected output, cost savings or reduced outsourcing to a stated business priority.
  • People and readiness: Include operator input and explain how staff will be prepared to use the equipment.

Operator readiness is part of operational fit. For bore repair work, for example, equipment readiness depends on having suitable equipment and prepared operators. Apply the same principle to a production line: account for operator preparation alongside installation and process integration, so projected productivity gains reflect the actual working setup.

Funding can affect the case, too. Monthly payments under a true operating lease are typically 100% deductible as a business expense in Australia. Compare that financing treatment with the purchase’s operating case, and include relevant tax assumptions in the financial review. If the capacity gap concerns process equipment, review relevant equipment options as part of defining the operational fit.

Choosing an approval path and measuring results

Build the approval request around the decisions managers need to make: operational need, funding, accounting treatment and expected results. Identify who owns each decision within the business, such as operations for process fit and finance for funding assumptions. The approval path should match the purchase’s scale and its impact on production, cash flow and the project plan.

Give the decision-maker a concise pack with the equipment specification, purchase rationale, cost comparison, key assumptions and implementation plan. Identify what remains to be verified, such as installation requirements, compatibility with the existing line or operator preparation. Separate verified inputs from provisional estimates so approval does not depend on presenting uncertain figures as established outcomes.

Timing matters when equipment supports a defined project. The illustrative equipment request is for Month 4 of a 36-month project period. For a similar proposal, explain why the asset is needed at that point, what work depends on it and what happens if approval or delivery shifts. This lets management assess the request against project milestones rather than treating it as an isolated purchase.

  • Operations: Confirm the intended tasks, process fit and people responsible for using the equipment.
  • Finance: Review funding, cash-flow effects, cost assumptions and accounting treatment.
  • Project owner: Connect the requested approval date with installation and production milestones.
  • Approver: Record the decision, conditions and unresolved items for follow-up.

Include the accounting route where the proposal involves a lease. Under AASB 16, lessees generally recognise a right-of-use asset and lease liability, subject to specific exemptions. That treatment can affect how finance presents the commitment, so the approval pack should identify the proposed arrangement and its accounting implications.

Define how results will be measured before implementation. Choose operational measures tied directly to the original problem, such as completed output, processing time, outsourcing or rework. Record the baseline, identify who will capture results and which records they will use, and set a management review date. Apply the same definitions before and after installation.

After commissioning, compare actual performance with the approved case. If the proposal expected less outsourcing, review purchasing or production records. If it targeted higher throughput, compare output over equivalent operating periods. Explain material differences, including changes in demand, staffing or operating conditions, rather than attributing every change to the equipment.

Close the review with a decision record covering results achieved, remaining constraints, costs that differed from the plan and any follow-up action. This creates a useful reference for later asset requests. A measured review also shows whether the original business case remains valid as production needs or project priorities change.

How to Justify Buying Used Equipment Instead of Keeping Old

Effects of equipment purchases on working capital

A cash equipment purchase converts working capital into a long-term asset, reducing funds available for wages, inventory, suppliers or unexpected operating needs. Model the cash position before approval, during installation and after production begins. Include the timing of supplier payments and when the asset is expected to support operating cash flow.

Stress-test the forecast against a slowdown. If sales or customer payments fall while cash is tied up in equipment, the business may face a cash crunch. Compare the purchase with other uses for that capital, such as meeting supplier terms or pursuing a defined business opportunity. Consider both the expected production benefit and the value of retaining liquidity.

Separate the purchase’s economic case from its cash-flow presentation. A cash equipment purchase is generally classified as an investing activity. Borrowing to fund it creates a financing cash inflow, while loan principal repayments are generally financing cash outflows. Interest classification depends on applicable accounting standards and reporting circumstances. Work through these entries with finance staff so the cash forecast reflects the funding structure.

Compare funding proposals on more than the interest rate. Record the share of the purchase financed, the repayment schedule and any collateral required. A lower rate may still strain cash if repayments begin before the equipment contributes to production. Model payments alongside supplier commitments and expected operating inflows over the same period. For sole traders or independent business owners balancing individual and venture finances, consumer loan comparison resources like ineedcash.co.uk offer a way to explore personal finance products when managing broader liquidity needs.

Leasing can reduce payments, but the business does not own the equipment and may not be able to buy it until the contract ends. Renting may suit equipment needed for a specific project, likely to become obsolete quickly, or that needs to be returned or exchanged easily. These options can preserve cash, but compare their terms and total business impact with the purchase case.

  • Cash purchase: Assess the immediate reduction in working capital and remaining operating reserves.
  • Borrowing: Map the financed portion, repayment schedule, collateral and cash-flow classifications.
  • Lease: Compare payment profile with ownership and end-of-contract conditions.
  • Rental: Consider project duration, obsolescence risk and the value of returning equipment.

An accountant can help set an equipment budget and compare buying with leasing. Provide the cash forecast, proposed payment schedule and expected production contribution. For a finance proposal, show what remains available for normal operations after each payment, not just whether the purchase price can be funded.

Approval should reflect the business’s tolerance for reduced liquidity as well as the equipment’s operating value. If working capital is already committed to near-term obligations, delaying or changing the funding structure may protect continuity. If the forecast supports the purchase, document the assumptions and monitor actual cash movements against the plan after implementation.

Assessing productivity, maintenance and downtime

Used equipment can carry risks related to wear, incomplete maintenance history, unavailable parts or poor fit with the production line. Mitigate them by arranging a qualified technician’s inspection, reviewing service records, checking spare-parts and accessory availability, and comparing expected performance with the required task.

Assess productivity under conditions that resemble the intended production process. Record output, cycle time, changeover needs and product quality during a representative operating run. A machine that performs well with one material or setting may not meet the same target with another. Match test conditions to the task the equipment will actually perform.

Establish a baseline for the existing process before comparing options. Use production logs to record completed output, stoppages, maintenance events and rework, then apply the same definitions after installation. For example, compare accepted units per operating shift rather than total units produced when quality rejects affect usable output. Consistent measures make differences easier to interpret.

Downtime affects more than the time a machine is stopped. Record the cause, duration and production stage affected by each interruption. Separate planned maintenance from breakdowns, and note whether other processes can continue or the whole line must stop. This helps management understand the operational impact without treating every stoppage as equally costly.

Assess the maintenance needed to keep the machine serviceable. Review available service records for recurring repairs, replaced components and unresolved faults. Seek references from companies in the same line of business, then discuss their experience of performance, reliability, maintenance and repair services. Compare that evidence with the machine’s inspection findings.

  • Performance: Record output and quality under relevant operating conditions.
  • Reliability: Track stoppage causes, duration and production impact.
  • Maintenance: Review service history, recurring faults and parts availability.
  • Safety: Have a qualified technician assess whether the equipment meets applicable safety standards.

A shorter payback period can generally indicate lower investment risk, but it does not account for equipment lifespan, cash flow, profitability or maintenance costs. Use it alongside operational evidence, not instead of checking reliability and downtime exposure.

Set review points after commissioning and record actual results against the baseline. If output improves but stoppages remain frequent, separate those findings instead of reporting a single productivity figure. Explore used process equipment options when assessing machinery for your production requirements.

F.A. Maker: Used Stainless Steel Tanks

F.A. Maker supplies used stainless steel tanks for businesses assessing a replacement or additional process asset. When the operational case points to another equipment category, its range also includes centrifuges and separators, industrial mixers and blenders, and pumps and valves.

Use the priorities in your business case to narrow the fit: intended task, production requirements, installation needs and expected operating costs. This keeps the decision tied to the management case rather than purchase price alone. In specialised fermentation and beverage sectors—exemplified by artisanal mead producers like Miodosytnia Fiłkowscy—carefully matching vessel specifications to batch processes is critical to preserving product quality while managing capital outlays.

For a discussion about used stainless steel tanks or related process equipment, contact F.A. Maker.

Move from proposal to a considered equipment decision

A practical way to explain how to justify buying used equipment to management is to make the decision testable. Set out the operating requirement, define acceptable performance and agree how results will be reviewed after installation. This gives decision-makers a clear basis for assessing whether the equipment continues to serve the business as production needs change.

Where it fits your process requirements, F.A. Maker offers used stainless steel tanks, centrifuges and separators, and industrial mixers and blenders. These categories can help identify a relevant option for a planned replacement or capacity need, while keeping the purchase grounded in a sound operational case.

For a practical next step, contact F.A. Maker about used equipment and discuss the equipment category that aligns with your production requirements. A clear case and a suitable equipment choice can help you move forward with confidence.

Frequently Asked Questions

How do you justify equipment when the benefits are difficult to quantify?

Show the benefit with operational evidence, even when it does not translate directly into revenue. Document recurring quality issues, production bottlenecks, operator workarounds or reliance on external processing. Choose a practical measure for each issue, such as rejected batches or delayed production steps. Explain how the proposed equipment could change that measure, distinguishing observed problems from projected improvements.

How does depreciation work if I buy a second-hand asset?

Australian businesses may claim depreciation on second-hand assets used for income-producing purposes, based on the asset’s remaining effective life from acquisition. The calculation relates to the asset’s remaining useful life, not simply its age or original purchase date. Keep acquisition and use records, and discuss the proposed treatment with your accountant as part of financial planning.

What if management says the equipment will not be used enough?

Base the case on realistic utilisation, not maximum theoretical capacity. Map planned tasks against production schedules, expected demand and existing process constraints. Identify periods when the equipment may sit idle, and explain whether other suitable work could use its capacity. If usage depends on a project or sales forecast, show the assumptions and a lower-demand scenario so management can assess the exposure.

How can I estimate the payback period and return on investment for used equipment?

Estimate payback by comparing the equipment’s expected cash inflows with its purchase price, then determine how long those inflows take to repay that price. Calculate return on investment as net benefit divided by total investment, multiplied by 100%. Include relevant acquisition, setup, training and operating costs. Treat both measures as decision aids: payback alone excludes factors such as lifespan, cash flow, profitability and maintenance.

What evidence and figures should I include in a business case for used equipment?

Include the equipment specification, acquisition and setup costs, expected operating costs, production requirements and current process baseline. Add relevant records, such as output data, outsourcing invoices, rework records or maintenance history. Connect each projected benefit to a business objective, distinguish measured figures from estimates, and state what still needs verification and how performance will be assessed after installation.

How do maintenance costs, downtime, and equipment lifespan compare for used versus new?

They depend on each asset’s condition, service history, operating demands, parts availability and expected remaining life. Compare inspection findings and maintenance records with the planned workload, then consider how stoppages could affect connected processes. A used asset may cost less to acquire, but that alone does not establish lower ownership costs. Include likely maintenance and downtime effects when comparing it with a new machine.

How to Assess Used Industrial Equipment for Refurbishment

Age alone doesn’t rule out refurbishment. Older industrial machinery can be rebuilt when its core components are sound, faults are identifiable and the work suits its intended use. A used industrial equipment procurement guide should assess condition alongside refurbishment costs and scope, rather than relying on age or purchase price alone.

Caution is reasonable when equipment has an incomplete service history, visible wear or uncertain performance. A structured assessment helps distinguish manageable repairs from issues that affect safety, reliability or project economics.

This guide explains how to assess refurbishment potential, inspect machinery and review its maintenance and repair history. It also covers supplier readiness and how to match capacity, utilities, dimensions and site conditions to your project, helping you decide based on the equipment’s full role in your operation.

Key Takeaways

  • Assess the machine’s core condition, maintenance history and repair needs to judge whether refurbishment is practical.
  • Arrange a pre-purchase inspection to identify faults and likely repair work before committing to a used machine.
  • Include freight, installation and site preparation when calculating the equipment’s total cost of ownership.
  • Match capacity, dimensions, utilities and operating conditions to the project, and consider existing equipment before buying.
  • Confirm actual stock availability and written lead times early so delivery and mobilisation fit the project schedule.

Supplier delays, negotiation issues and quality checks

Used equipment can be refurbished, but the purchase decision depends on its condition, supplier reliability and clear contract terms. Treat supplier checks as part of the technical assessment, not as paperwork to complete after choosing a machine.

Warranty, return and finance options depend on the written offer and contract. Before committing, clarify any warranty coverage, return conditions and payment arrangements rather than assuming they are included.

  1. Define the purchase requirement before sourcing. Record the process, required output, operating conditions and essential machine capabilities. For example, a mixer handling a viscous product may need different operating characteristics from one used for dry blending. A clear specification helps suppliers respond to the same demand and makes quote differences easier to identify.
  2. Source across relevant seller types. Private sellers, auctions and specialist suppliers can each provide access to used machinery, but the sale process and available information may differ. An auction listing may give limited time for assessment, while a specialist supplier may provide machine details and arrange inspection. Match the source to the equipment and the assessment time available.
  3. Assess supplier readiness, not just the listing. Ask for the machine’s service history, repair records, condition report and current operating status. Confirm who can provide access for inspection and who handles dismantling, loading and dispatch. A seller who cannot establish the machine’s identity or condition creates uncertainty around defects, breakdown risks and the delivery schedule.
  4. Compare complete written quotes. Check that each quote describes the same configuration, condition and included components. Separate the equipment price from delivery, loading and any minimum hire periods where a hire option is being compared. A lower headline figure may not represent a lower total commitment if transport or handling is excluded.
  5. Negotiate the contract around observable terms. State the machine’s identifier, condition, included components, delivery arrangements and agreed inspection process. Record any warranty scope, exclusions, return conditions and responsibility for damage or non-compliance. For purchases from China or India, include agreed warranty terms, third-party inspection arrangements and payment protections such as a letter of credit where appropriate.
  6. Control delays before fixing the project schedule. Obtain the supplier’s lead time in writing, including dispatch and delivery assumptions. Confirm stock availability against the actual machine, rather than relying on a general listing. Compare the promised timing with inspection, transport and site-readiness tasks, then document who bears liability and insurance responsibilities during each handover.

Should I arrange an inspection before buying second-hand machinery?

Yes. A pre-purchase inspection can identify faults and potential repair costs before you commit. Assess the machine against its intended task, not just its age or asking price.

  1. Define the operating requirement. Record the task, required capacity, dimensions, utilities and site conditions. For example, a machine intended for continuous production needs assessment against its expected duty cycle. A specification tied to actual demand helps rule out machinery that cannot fit the process, even if its condition appears sound.
  2. Calculate total cost of ownership. Include the purchase, inspection, repairs, transport, installation and expected maintenance. Used heavy machinery is described as costing 30-70% less than new machines, while surplus industrial equipment typically costs 40-70% less. A lower purchase price matters only if the complete cost still fits the project budget.
  3. Allow for repair exposure. Build a repair buffer of 20-50% when estimating used machinery’s total cost of ownership. The required allowance depends on inspection findings, parts availability and the extent of refurbishment. Treat this as a planning buffer, not a quote. A machine with worn components may need a different allowance from one with sound major assemblies.
  4. Commission an inspection before purchase. A pre-purchase inspection can reveal faults that photographs or a brief demonstration miss. Ask the inspection scope to cover operating tests, wear points, leaks, controls and structural condition. Check for coolant in oil, oil in coolant and hairline cracks along steel.
  5. Review history and supporting documents. Examine service records, previous repairs, operating history and available manuals. Compare the stated configuration with the machine itself, including model identifiers and installed components. Check whether replacement parts are available and technicians can service the equipment. For Australian workplace use, assess safety features against applicable requirements and relevant AS/NZS standards.
  6. Apply the right checks to the machinery type. A woodworking machine may need close attention to cutting components, feed mechanisms and dust extraction connections. For aluminium machinery, assess the drive, workholding and cutting system against the intended material and production task. These examples show why one generic inspection checklist cannot cover every machine type.
  7. Include future value in the decision. Compare the expected service life, repair outlook and likely resale value with the cost of buying new. Used machinery has already passed through its initial depreciation phase, but condition and continued parts support affect its remaining value. Proceed when inspection findings, repair allowance and production fit align.

Can older industrial machinery be refurbished or rebuilt?

Yes, older machinery can be refurbished when its condition, repair scope and intended production role justify the work. In Australia, procurement includes defining requirements, assessing the machine, agreeing on purchase terms, planning freight and preparing the site.

  1. Define the refurbishment scope. Separate essential repairs from optional upgrades. For example, replacing worn seals may restore operation, while a damaged frame could make rebuilding impractical. List affected assemblies, required parts and commissioning tasks. This gives the refurbishment plan a clear boundary and helps prevent unrelated work from expanding the project.
  2. Estimate the full ownership cost. Combine the purchase commitment with repairs, freight, transit insurance, unloading, installation and setup. Add commissioning materials, connections and production downtime where relevant. Compare that total with the cost and operational impact of a suitable alternative. The purchase price alone cannot show whether refurbished machinery is the better investment.
  3. Build freight into the plan. Transport costs depend on distance, dimensions, weight, loading needs and delivery access. Regional or interstate movement can require different handling from a straightforward metropolitan delivery. Fuel prices also affect mobilisation budgets. Confirm collection and delivery arrangements early, so freight assumptions don’t undermine the project estimate.
  4. Allow for transit protection and handling. Identify who arranges insurance and when responsibility transfers during transport. Consider whether the machine needs dismantling, packing or protection for sensitive components. A pump shipped with exposed connections, for instance, needs suitable protection against impact and contamination. Record handling requirements alongside the transport plan.
  5. Prepare the destination before dispatch. Confirm site access, floor or ground readiness, lifting arrangements, power and required services. Match these needs to the machine’s installation instructions and layout. A delivery should not be scheduled before the receiving area and utilities are ready. Otherwise, storage, rehandling or delayed commissioning can add avoidable cost.
  6. Plan installation and setup as project work. Identify who will position, connect, align and test the machinery. Include any required interfaces with upstream and downstream equipment. For example, a refurbished machine may need a revised conveyor connection to fit the production line. Sequence these tasks with repairs, site preparation and commissioning.
  7. Compare the finished cost with production needs. Assess whether expected output, reliability and operating fit support the total investment. Account for the time needed to complete repairs and installation, not just the machine’s eventual capacity. A lower upfront commitment may be offset by extensive setup work or a longer production interruption. Keep those factors visible when selecting between refurbishment and another solution.

How to Assess Used Industrial Equipment for Refurbishment

Assessing fleet and project requirements

  1. Map the work before selecting a machine. Write down the project tasks, production sequence and operating conditions. Separate ongoing demand from short-term peaks. For example, a packaging line may need steady filling capacity, while a shutdown project may need temporary material handling. This distinction helps prevent buying machinery that sits idle after one project ends.
  2. Review assets already on the books. Use asset management records to identify equipment that could meet the requirement. Note each machine’s capacity, location, condition and scheduled use. A suitable machine at another site may be reassigned instead of replaced. This gives procurement a clear starting point and avoids treating every new demand as an automatic purchase.
  3. Compare required capacity with actual output. Base the specification on the process rate, operating hours and product characteristics. A machine rated for a high peak may be poorly matched to routine production if demand remains low. Conversely, insufficient capacity can constrain the line. Define required output and interfaces before evaluating models or configurations.
  4. Check the complete site fit. Measure available floor space, access routes and workshop constraints. Record electrical, water, air or other utility requirements relevant to the machine. Include clearance for operation, cleaning and maintenance. A machine that fits the production target but cannot pass through the doorway or connect to existing services isn’t a practical project solution.
  5. Include transport and installation in the comparison. Map the route from collection point to operating position, including site access and unloading arrangements. Freight and installation costs can change the economics of a purchase, especially for regional projects. Add setup and connection work to the project plan, then compare complete costs rather than equipment price alone.
  6. Match ownership to utilisation. Consider maintenance, finance, downtime, resale value, mobilisation and expected use together. High, predictable utilisation can support ownership. Short-term or specialised demand often favours hiring. For example, a machine required for one defined project may not justify long-term ownership if it has limited use afterward.
  7. Connect procurement to the project programme. Align purchase decisions with the current construction or production schedule. If the programme changes, review delivery timing and equipment demand before proceeding. This keeps procurement tied to the work actually planned, rather than locking in a machine that arrives after its key task or before the site can receive it.
  8. Set capacity by project scale, not assumption. Large mining sites may require 20+ ton machines, while a smaller operation may need a different class and configuration. Treat the project’s material, duty and access conditions as selection inputs. A competitive choice is one that meets the operating requirement without excess capacity or avoidable mobilisation demands.

Checking equipment availability and lead times

  1. Check the actual machine, not just the listing. Confirm that the specific unit remains in stock, where it is located and what configuration it includes. A catalogue entry may describe a machine type without establishing that the pictured unit is available. Record its identifying details and current status before building a schedule around it.
  2. Separate ready stock from future supply. Ask whether the machine is available for inspection, awaiting refurbishment or still in service. Each status affects when assessment, payment, collection and installation can occur. For example, a unit being used in production may not be released immediately, even if the seller has agreed to a purchase.
  3. Map the lead-time stages. Break the expected timeline into inspection, contract completion, preparation, dispatch, transport and site installation. Surplus industrial equipment lead times can fall from 6-18 months to 2-6 weeks. Treat that comparison as a possible advantage, not a substitute for the actual machine’s schedule.
  4. Account for Australian location and mobilisation. Availability varies by region. Metropolitan areas generally have a deeper vendor pool and faster mobilisation than regional or remote sites. For a remote project, allow schedule contingency for transport, access and handling. A machine located closer to the site may reduce logistical complexity, even if another listing appears attractive.
  5. Coordinate supply with project milestones. Compare the equipment timeline with site access, installation readiness and the date production needs to begin. If a production line is due for a planned shutdown, align delivery with that window. Earlier arrival can create storage or handling demands; late arrival can extend downtime and disrupt the project sequence.
  6. Use research to compare suitable alternatives. Track each candidate’s stock status, configuration, condition, location and estimated dispatch timing in one comparison. Include the impact of repairs or preparation on readiness. Consider depreciation and potential resale value alongside service life, rather than treating a low purchase price as proof of better value.
  7. Keep a contingency plan for uncertain supply. Specialised machinery and remote sites can face less predictable lead times, transport and mobilisation. Identify a technically suitable alternative and decide which project tasks depend on the equipment. This lets the team adjust sequencing if supply timing changes, without treating an unverified delivery estimate as a fixed commitment.

For equipment sourcing aligned with your project schedule, review available machinery.

F.A. Maker: Used Stainless Steel Tanks

F.A. Maker supplies used stainless steel tanks for process operations where their storage or handling role fits the project. Once you have assessed refurbishment potential, site fit and total ownership costs, match the equipment category to the production task and process layout.

For mixing or blending duties, F.A. Maker also supplies industrial mixers and blenders. Centrifuges and separators may suit separation processes, while pumps and valves support fluid transfer and control. Consider these options when the equipment type fits your application and specifications.

Share your process requirements, capacity needs and site constraints when discussing equipment options. Contact F.A. Maker to discuss your used industrial equipment requirements.

Turn the assessment into a procurement decision

Turn your findings into a concise procurement brief. Record the machine’s intended role, essential operating requirements, acceptable refurbishment scope and handover conditions. Assign an internal owner to coordinate approvals, installation planning and purchase-order close-out. This gives production, maintenance and procurement teams a shared basis for the decision.

A used industrial equipment procurement guide is most useful when its checks lead to clear acceptance criteria. Define what the equipment must demonstrate before entering service, who will review the result and how any outstanding work will be managed. Keep these decisions with the project record to support future maintenance and replacement planning.

For process equipment, F.A. Maker offers Used Stainless Steel Tanks, Centrifuges and Separators, and Industrial Mixers and Blenders. Discuss your project requirements with F.A. Maker and identify equipment options relevant to your operation. A clear brief is a practical foundation for the next procurement decision.

Frequently Asked Questions

Does used industrial machinery need to comply with Australian safety requirements?

Yes, used industrial machinery in Australian workplaces is subject to applicable work health and safety requirements. Older equipment isn’t automatically non-compliant, but inadequate guarding or other safety features may require modification before safe operation. Assess the machine in its intended workplace, including how operators access, clean and maintain it. For example, a change in installation layout may affect how existing guarding protects operators.

Looking for Quality Used Industrial Machinery?

Start by matching the machine’s function and condition to your production task. F.A. Maker supplies used industrial process equipment in Australia. Before choosing a machine, define the required output, product characteristics, available utilities and installation constraints. Compare these requirements with the equipment’s configuration and records. A clear specification narrows the options and gives your procurement team a practical basis for assessing suitability.

What Is Equipment Procurement?

Equipment procurement involves identifying a business need, selecting suitable machinery and arranging its purchase and implementation. A used industrial equipment procurement guide can organise the stages of a second-hand purchase, from defining the specification to reviewing records and agreeing on contract terms. For example, a production manager may set the capacity requirement while maintenance staff identify connection and access constraints. Procurement brings these operational needs into a single decision.

Where can Australian businesses buy used industrial equipment?

Australian businesses can source used machinery from specialist suppliers, private sellers and auctions. F.A. Maker supplies used industrial machinery nationally. The right source depends on the equipment type, available information and time for inspection. A specialist supplier may suit a process-equipment search, while an auction can involve fixed sale conditions and limited assessment time. Compare the purchase terms and machine details before deciding.

How much does used industrial equipment cost in Australia?

There is no standard cost for used industrial equipment in Australia. The price depends on machine type, condition, age, configuration, included components and work needed before operation. Freight, installation and site preparation also affect the total budget. F.A. Maker provides pricing for each machine on request. Compare total project costs, not just the equipment price.

How do you inspect and assess used industrial equipment before purchase?

Use the inspection sequence in a used industrial equipment procurement guide to compare the machine with its intended task and capacity requirements. Inspect its structure, moving assemblies, controls and connections, and look for leaks or damage. Where possible, observe the equipment operating under relevant conditions. For example, when assessing a pump, consider its role in the process and the connected pipework. Record findings by component to clarify repair priorities and acceptance decisions.

What documents and maintenance records should buyers request?

Request the operating manual, service history, repair records, available parts information and the machine’s model and serial details. These documents help establish how the equipment was configured and maintained. Ask for records of replaced components and outstanding faults, then compare them with the machine’s current condition. For a complex production line, request available connection or layout drawings to support installation planning.

How can buyers verify equipment condition, age, hours, and ownership?

Compare the identification plate and serial details with the seller’s records, service documents and purchase paperwork. Treat meter readings as one data point: check whether dated maintenance entries and visible wear align with the recorded hours. Request documentation showing the seller’s ownership or authority to sell. If records conflict, pause the purchase until the discrepancy is resolved and accurately reflected in the contract.

How to Choose a Sanitary Pump for Your Product and Process

The pump with the highest flow rating may still be the wrong choice for your product. Knowing how to choose a sanitary pump starts with matching its operating principle and capacity to the product’s viscosity, temperature, shear sensitivity, solids and air content. Sanitary centrifugal pumps generally suit thin fluids requiring high flow, while positive-displacement pumps are often better suited to thicker or shear-sensitive products.

Flow and pressure matter, but they are only part of the selection. The pump must handle the product under actual process conditions and meet the operation’s cleaning requirements. Assessing these factors together helps narrow the options and avoids relying on a nameplate maximum that does not reflect the actual duty.

This article explains how centrifugal and positive-displacement pumps move product, and how viscosity, temperature, solids and entrained air affect performance. It also covers shear sensitivity, cleaning and operating conditions, helping you assess which pump type suits your process.

Key Takeaways

  • Match pump selection to the product’s viscosity at operating temperature, shear sensitivity and solids load.
  • Base capacity on the process flow rate, required head and suction conditions, not the pump’s nameplate maximum.
  • Consider how product thickness, particles and entrained air affect pump performance and operation.
  • Choose between centrifugal and positive-displacement operation by weighing product characteristics against the required flow and pressure.
  • Factor cleaning requirements and maintenance access into the selection, alongside the pump’s process duty.

Product viscosity, temperature, shear sensitivity and solids

Sanitary pump capacity depends on how the product behaves under actual operating conditions. Record its properties across the process range, not just at room temperature.

Product Properties and Pump Capacity

Product properties are the measured characteristics that determine how readily a pump can move a liquid. Viscosity, temperature and solids content affect the pump’s operating capacity and suitability.

To calculate required capacity, divide the volume to be transferred by the available transfer time. Then assess that duty against the product’s viscosity at minimum, typical and maximum operating temperatures. Include the size, hardness and concentration of solids. Higher viscosity generally calls for a larger pump or motor, while suspended solids can affect which pump design is suitable.

Temperature can change viscosity, so a figure measured under one condition may not represent the product during production or cleaning. Compare the product’s measured properties at each relevant operating temperature with the pump’s duty. A model-specific limit is not a general rating: for example, the STP125 sanitary pump handles temperatures up to 300°F.

Product Integrity and Shear Sensitivity

Shear sensitivity describes how a product responds to the forces created during pumping. It matters when the process needs to preserve the product’s texture, structure or other characteristics.

Assess the product after it passes through the intended process, not just in a stationary sample. A shear-sensitive beverage or pharmaceutical liquid may need gentle handling, while a less sensitive product may tolerate different pumping conditions. Rotary lobe pumps can suit viscous or shear-sensitive products and moderate solids loads. Centrifugal pumps generally suit thinner fluids, and their performance falls as viscosity increases.

Assess contaminants separately from the intended solids load. Identify whether particles are part of the formulation or unwanted material, and consider their size, hardness and concentration. Upstream screening may protect pump components from unwanted debris, but the screening choice must also meet hygienic process requirements without obstructing the intended product flow.

Maintenance access affects how quickly wear can be addressed. Front-loaded product seals simplify replacement and reduce replacement time. Some sanitary pumps also provide quick-strip access, making inspection and maintenance more direct. Seal compatibility with the product and cleaning chemistry is also part of hygienic design.

Include future production needs in the duty assessment. Consider expected changes in throughput, product temperature, viscosity or solids content before selecting capacity. A pump chosen only for today’s easiest-to-move product may not suit a later formulation or process change. Documenting the operating range helps identify when a different pump configuration or process upgrade may be needed.

What is a Sanitary Centrifugal Pump?

A sanitary centrifugal pump uses a rotating impeller to move liquid through a process line. It suits low-viscosity products requiring high flow at relatively low pressure, with consistent, non-pulsing flow.

To select capacity, calculate the required flow rate from the volume moved and available transfer time, then match it to the required head and suction conditions. For example, transferring 1,000 litres in 20 minutes requires 50 litres per minute.

Flow rate is the volume moved over time, while total head describes the height the liquid must reach. Pump pressure, also called head, is commonly expressed in psi or bar. Select a pump for the operating point the process requires, rather than relying on its nameplate maximum.

Suction conditions affect performance as well as capacity. If available net positive suction head falls below the pump’s required value, cavitation can damage the pump and disrupt flow. Smooth suction plumbing, fewer bends and fewer changes in pipe diameter help limit resistance and losses.

Applications, flow control and operating conditions

Centrifugal pumps are used in food processing, brewing and distilling, agriculture, pharmaceuticals and other industries. Suitability depends on the liquid, required flow rate, pressure and product sensitivity. A thin, non-shear-sensitive liquid may suit a centrifugal pump, while increasing viscosity reduces its performance.

Assess flow, pressure and temperature together. The process duty includes the actual liquid conditions and line resistance, not just the desired output. Matching the duty correctly supports efficient handling and helps reduce avoidable operating problems and downtime.

Flow control should match process demand. A variable speed drive can adjust pump speed and flow, while excessive throttling can add resistance to the system. Defining a clear operating point helps distinguish normal flow variation from changes caused by suction restrictions or process conditions.

For hygienic use in Australia, pump design must support the relevant industry’s sanitary requirements and cleaning process. Relevant design references include 3-A, ASME BPE and EHEDG. The International Association of Food Industry Suppliers maintains 3-A Sanitary Standards, a voluntary standard for sanitary construction and installation of dairy processing equipment.

Compare energy use at the required operating point, then consider maintenance, energy demand and potential downtime over the pump’s service life. Lifecycle costs depend on the duty, operating conditions and maintenance needs, not just the purchase price.

Useful selection records include material mill certificates, a measured Ra surface-finish specification, seal elastomer compatibility and CIP validation for the exact model. Review warranty scope and exclusions alongside spare-part requirements. Keeping suitable seal kits and elastomers available can support timely maintenance.

Connecting the pump duty to wider process equipment requirements helps keep flow, cleaning and production needs in view.

Sanitary pump applications

Sanitary pumps move or meter liquids, solutions and slurries through hygienic pipeline systems. Applications include food processing, brewing, distilling, agriculture, horticulture, medical production, pharmaceuticals, biotechnology and chemical processing. The product and process determine which pump features matter most.

Start with the product, required flow, pressure and cleaning conditions. A thin liquid transferred at high volume presents a different duty from a viscous product containing suspended solids. Industry labels alone do not define operating conditions. Knowing how to choose a sanitary pump means matching its construction and operation to the actual application.

Centrifugal pumps

A sanitary centrifugal pump suits low-viscosity fluids requiring high flow at relatively low pressure. Food processing and brewery lines may use this type for thinner products. Its continuous, non-pulsing flow can suit processes that prioritise steady transfer and throughput.

Viscosity is a key limitation. Centrifugal pumps may be less suitable as product viscosity rises or air is present in the suction line. A thick product or air in the suction line may call for a different design. Closed impellers are generally more efficient, while open impellers can handle solids better but may be less hygienic.

Rotary lobe pumps

Rotary lobe pumps handle a broad range of viscosities and provide gentle, low-pulsation flow. They may suit shear-sensitive products, viscous foods such as chocolate or honey, and moderate solids loads. Some models can also self-prime, which may help when suction conditions are a concern.

These pumps typically have a lower maximum flow than centrifugal pumps and more moving parts to maintain. For a high-throughput line, weigh their product-handling advantages against the required flow and maintenance needs.

Twin screw pumps

Twin screw pumps may suit higher-viscosity products, higher differential pressure, or aerated and two-phase products. They can also handle suspended solids, such as fruit purée. This makes them a potential fit for processes combining thick product with entrained air or particles.

Their seals and timing gears require more complex maintenance, which should be weighed against the process need. A twin screw design may be unnecessary if a simpler pump meets the duty.

Diaphragm pumps

An air-operated double-diaphragm pump may suit low-flow applications requiring gentle handling or dry-running capability. Consider it when protecting product structure matters more than steady, high-volume flow.

Its flow is pulsating, and it requires an air supply. Both characteristics affect downstream metering and process consistency. Compare the available air supply, required flow pattern and product sensitivity before selecting this pump type.

Across all four designs, weigh product handling against flow, energy use, hygienic construction and maintenance. To choose a sanitary pump for a specific process, match its strengths and limitations to the full duty rather than selecting by industry alone.

How to Choose a Sanitary Pump for Your Product and Process

Selecting a pump by viscosity, particles and air content

Selection starts with the product’s measured behaviour and the process conditions. Record viscosity at minimum, typical and maximum operating temperatures, then include particle size, hardness, concentration and air content. These details help distinguish a duty suited to centrifugal equipment from one better served by positive-displacement pumps.

For food, beverage and pharmaceutical hygiene, wetted surfaces should be smooth, easy to clean and free of crevices or dead zones where residue can remain. Stainless steel grades 304 and 316L are used in sanitary centrifugal pumps. According to the research, 316L may be needed for wetted parts handling highly acidic or caustic products and wash solutions. A measured Ra surface-finish specification gives the finish a defined value.

Viscosity changes with temperature, so a room-temperature measurement may misrepresent the process. Compare measured viscosity across the operating range with the pump’s duty. A higher-viscosity product generally needs a larger pump or motor. For example, a thick product transferred at its coldest temperature may require different capacity from the same product after warming.

Describe solids by size, hardness and concentration rather than simply noting that the product contains particles. Sanitary centrifugal pumps can handle suspended solids, but particle characteristics still affect design suitability. A moderate solids load or shear-sensitive product may suit a rotary lobe pump. Entrained air also matters: a self-priming sanitary pump clears air from suction lines on its own.

Include cleaning requirements in the model decision. For clean-in-place processes, the seal must withstand the cleaning chemistry, and the internal geometry must allow effective cleaning. Assess the actual chemistry, cleaning temperature and cycle duration against the exact pump model. Hygienic design also depends on smooth surfaces and minimal areas where product can collect.

Seal and elastomer selection must match the product chemistry and cleaning solutions. Incompatible seals can wear or leak, while unsuitable internal materials can corrode in acidic or caustic service. Include seal compatibility and CIP validation for the exact model in the equipment documentation. Material mill certificates can support traceability for wetted components.

Common selection mistakes include using only typical viscosity, overlooking air content or choosing a pump from its maximum capacity rating without matching the operating duty. Size and model selection should account for the actual product range, required flow and cleaning cycle. For future production changes, include anticipated shifts in viscosity, temperature or solids concentration. This assessment helps prevent a pump selected for one formulation from restricting a later process upgrade.

Centrifugal and positive-displacement pump operation

Centrifugal and positive-displacement pumps create flow differently, so their operating limits differ. A centrifugal pump uses an impeller to impart velocity to the liquid, then converts that motion into pressure. A positive-displacement pump repeatedly encloses a fixed volume and moves it mechanically. This construction affects flow response, product handling and system protection.

In centrifugal pumping, flow changes with system resistance and operating conditions. It generally suits thin liquids requiring high flow and moderate head, but performance falls as viscosity rises. Suction conditions also matter: insufficient available net positive suction head can cause cavitation, damaging components and disrupting flow. Assess the pump at the actual process duty, including suction and discharge conditions.

Positive-displacement pumps move a defined volume with each cycle. At a given speed, a positive-displacement pump produces the same flow regardless of discharge pressure. Pressure still matters: system resistance affects the load on the pump and its components. A blocked discharge can cause a dangerous pressure rise, so these pumps must not deadhead. A properly set relief valve protects the system.

Flow control differs between the two types. For a positive-displacement pump, a variable speed drive is the most practical way to control flow. Slowing the drive reduces the number of pumping cycles over time. Rotary lobe pumps can also run in reverse, supporting loading, unloading and line clearing. Their gentle, low-pulsation flow can suit viscous or shear-sensitive products, though the rotor and seal arrangement adds maintenance needs.

Compare pump operation with the process profile, not just the desired peak output. A centrifugal pump may suit steady transfer of a thin liquid. A positive-displacement design may fit a thicker product or a duty requiring controlled metering. For aerated products or higher differential pressure, a twin screw pump may suit the application, but its seals and timing gears require more complex maintenance.

Construction and cleaning requirements also shape the choice. Smooth wetted surfaces, cleanable internal geometry and compatible seals matter for either pump type. Confirm the required flow and head during normal operation, then account for product changes, start-up and line clearing. This comparison helps narrow the options before matching a specific model to the complete process duty.

Use these operating differences to guide your next equipment decision, or discuss suitable process equipment options for your application.

F.A. Maker: Pumps and Valves

F.A. Maker supplies Pumps and Valves for industrial process applications. Once you have assessed product viscosity, solids, air content, flow and cleaning needs, the next step is matching those requirements to suitable equipment.

Discuss your process duty when considering a pump or planning an equipment change. Details such as the product being transferred, operating conditions and required flow help define the selection. If the wider process line is relevant, F.A. Maker also offers Used Stainless Steel Tanks, Centrifuges and Separators, and Industrial Mixers and Blenders.

Contact F.A. Maker to discuss Pumps and Valves for your process.

Turn your pump assessment into a process decision

Knowing how to choose a sanitary pump is most useful when the selection reflects the full production line, not just an isolated transfer point. Before finalising equipment, define the operating conditions the process must accommodate and consider how future product or throughput changes could affect the duty. This gives the pump decision a practical basis within broader plant planning.

Where pump selection is part of wider equipment planning, F.A. Maker also offers Used Stainless Steel Tanks, Centrifuges and Separators, and Industrial Mixers and Blenders. Considering these needs together can help frame equipment choices around the process as a whole.

For a discussion focused on your application, contact F.A. Maker about your pump needs. A clear description of your product and process is a useful starting point for the next equipment conversation.

Frequently Asked Questions

First, What Are the Benefits of Sanitary Pumps?

Sanitary pumps support hygienic product transfer through cleanable wetted surfaces and designs that limit residue traps. This can help reduce contamination risks between production runs, particularly when a line handles different products or cleaning cycles. Selecting seals and materials compatible with both the product and wash solutions also supports equipment reliability. The practical benefit is a pump suited to the process, cleaning regime and product quality requirements.

How do you build a pump selection checklist for your next spec?

Build the checklist around the complete duty, not just the pump. Record the product range, operating temperatures, required flow and head, particle characteristics, air content and shear sensitivity. Add the cleaning chemistry, temperature and cycle duration, then include seal compatibility, wetted materials, hygienic construction and maintenance access. Note facility space, dry-running risk and system protection needs, such as a relief valve for positive-displacement equipment.

What is the difference between a rotary lobe pump and a twin screw pump?

A rotary lobe pump suits a broad viscosity range, gentle, low-pulsation transfer and moderate solids loads. Some designs can run in reverse for line clearing. A twin screw pump may suit higher viscosity, higher differential pressure, or aerated and two-phase products. Consider maintenance as well: lobe pumps have moving parts to maintain, while twin screw designs require more complex seal and timing gear maintenance.

When should you choose centrifugal, rotary lobe, twin screw, or diaphragm?

Choose a centrifugal pump for thin, non-shear-sensitive liquids requiring high flow. Consider a rotary lobe pump for viscous or shear-sensitive products and moderate solids. A twin screw pump may suit higher differential pressure, thicker products or aerated, two-phase flow. An air-operated double-diaphragm pump can suit low-flow duties requiring gentle handling or dry-running capability. Its pulsating flow and need for an air supply must suit the process.

Where does CIP compatibility change the pump decision?

CIP compatibility matters when equipment must be cleaned without removal from the process. The seal must withstand the cleaning chemistry, and the pump’s internal geometry must let cleaning solution reach product-contact areas. Assess the actual chemistry, cleaning temperature and cycle duration for the specific model. If the process relies on CIP to reduce disassembly and downtime, cleanability is a selection criterion alongside pumping performance.

Why Is Hygiene Important in Pump Design?

Hygienic construction helps prevent product residue from remaining in hard-to-clean areas. Smooth wetted surfaces, minimal dead zones and an absence of crevices support effective cleaning and limit places where bacteria can proliferate. Material choice matters too: product chemistry and wash solutions affect corrosion risk. For food, beverage or pharmaceutical processes, consider the relevant industry standards and ensure the pump’s construction and cleaning method suit the application.

What is a sanitary pump and what industries use one?

A sanitary pump is designed to move or meter liquids, solutions and slurries through hygienic process systems. Applications include food processing, breweries and distilleries, agriculture, medical production, pharmaceuticals, biotechnology and chemical processing. The product determines design priorities: a beverage line may need consistent transfer, while a fruit-purée process may need to accommodate suspended solids. Cleaning requirements and process conditions also influence the appropriate pump type.

How to size a sanitary pump for flow rate and total dynamic head?

Calculate flow by dividing the required transfer volume by the available transfer time. Then determine total dynamic head by accounting for the elevation the product must reach, pipeline resistance and any pressure required at discharge. Use the resulting flow-and-head operating point to assess pump performance, rather than relying on a nameplate maximum. Include suction conditions, since insufficient available NPSH can cause cavitation and interrupt flow.